
Introduction
The Solar Racer is a fun motorized circuitry project powered by the sun! Assemble the wood chassis, add circuitry and watch it go in direct sunlight! No tools required.
Tools
Parts
-
-
BEFORE YOU BEGIN The Solar Racer chassis is assembled by pushing tabs into slots and this requires force. The wood panels are prone to breaking under that force if unsupported from behind. When instructions show a panel laid flat against a table, this is to support evenly from behind. Do NOT attempt to seat the plates any other way!
-
To begin, empty the contents of the kit and double check parts. You should have: 4x rubber wheels, 2x precut wood plates (with a total of 7 body panels within), 2x metal axles, 1x motor, 1x small orange motor spindle wheel, 1x large white axle wheel, 1x rubber band, 1x solar panel, 1x small file, and several pieces of double-sided tape.
-
Carefully remove the individual wooden body panels from the two plates and use the file to smooth any significant ragged edges. If all body panels release from the plates cleanly, ignore this step.
-
The wooden parts that form the chassis of this Solar Racer project should be decorated! The best way to do this is with either markers or paint. If you are using markers, it is easiest to do that now.
-
If you intend to decorate your Solar Racer with paint, it is best to do it LAST. Paint will add thickness to the panels and potentially make tabs more difficult to insert in slots. This can cause one to use more force than needed when seating them; leading to broken parts.
-
-
-
Separate the following parts for use: the large rounded corner base, the motor and the rounded triangular piece with 2 holes in it.
-
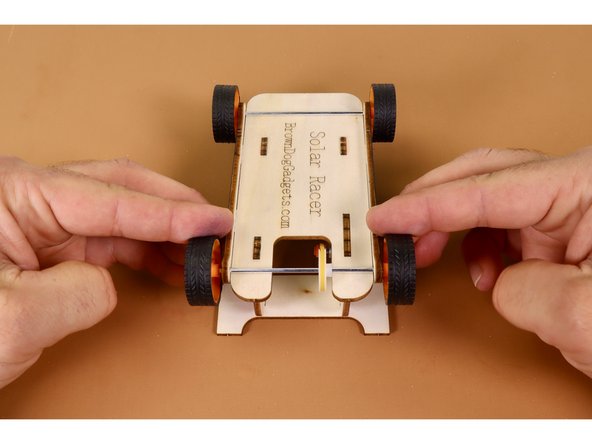
Lay the Solar Racer base plate flat against a table with the engraved side down and the u-shaped notch facing toward you.
-
From above, press the two tabs of the triangular body panel into the two slots on the left-hand side of the base plate. Notice that the tabs on THIS triangular body panel AREN'T the same size. Use these sizes of the corresponding slots on the base to guide orientation of this panel. It should be perpendicular to the base.
-
Carefully seat the motor into the larger hole. The motor should be inserted spindle/axle first FROM the outside/left edge and pushed TOWARD the u-shaped notch on the base plate. Afterward, thread the wires, one-at-a-time through the small hole toward the middle of the base plate.
-
-
-
With the developing chassis still laying flat against the table find the remaining triangular body panel and press it into place; seating the two identical tabs into the two corresponding slots along the right edge of the base plate.
-
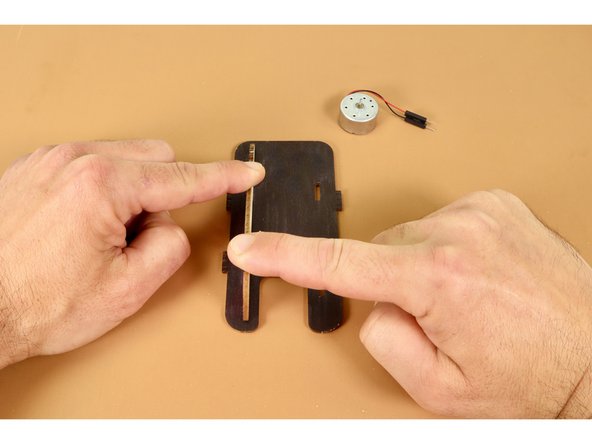
Now, grab one of the two matching long body panels that feature small holes at opposite ends and lay it flat against the table with the rounded drop-down ends facing you.
-
Pick up the partially-assembled chassis and orient it so that you are looking at the engraved underside while seated. Now press the two downward-facing tabs on the chassis into the two slots of the long rounded end panel. Repeat this EXACT process to seat the remaining matching body panel on the opposite side of the chassis.
-
-
-
Set partially-assembled chassis aside and gather 3 wheels and two metal axle rods. Seat each axle rod into the center hole of two of the three wheels.
-
Take one of the two axle rod/wheel combos and thread it through the two drop-down holes located at the flat end of the chassis. Seat the third wheel onto the end of that same axle. This is the front end of the Solar Racer.
-
-
-
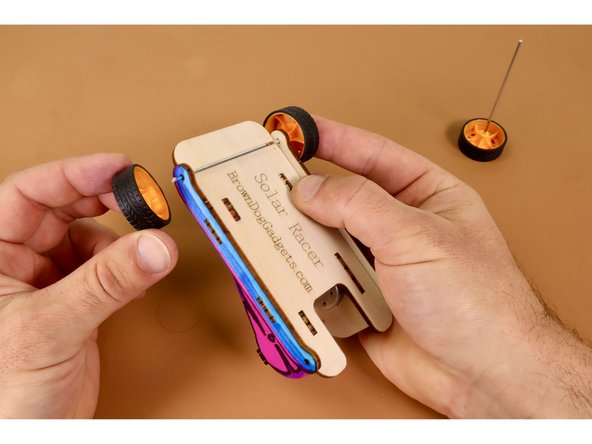
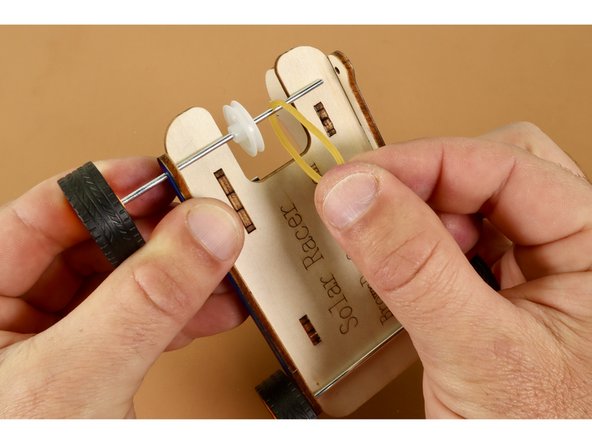
Find and set aside the large plastic axle wheel, rubber band, and final wheel. Thread the remaining wheel axle/wheel combo through the FIRST drop-down hole of the remaining pair. Before threading this axle rod through the final drop-down hole, thread it through both the plastic wheel AND rubber band.
-
With white axle wheel and rubber band in place, continue threading the end of the axle rod through the final hole and press the remaining wheel onto it afterward.
-
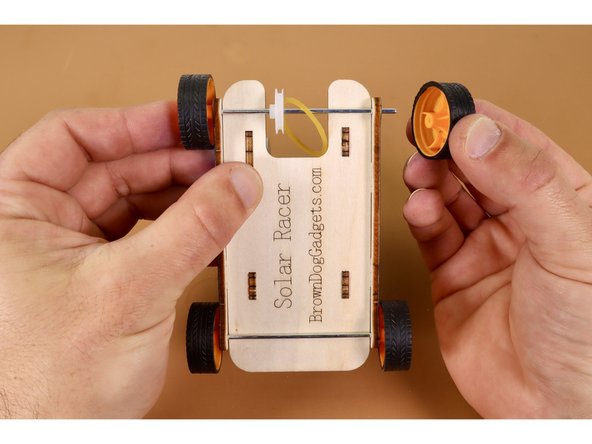
When assembled correctly, the entire assembly on this notched end of the chassis should look like the photo.
-
-
-
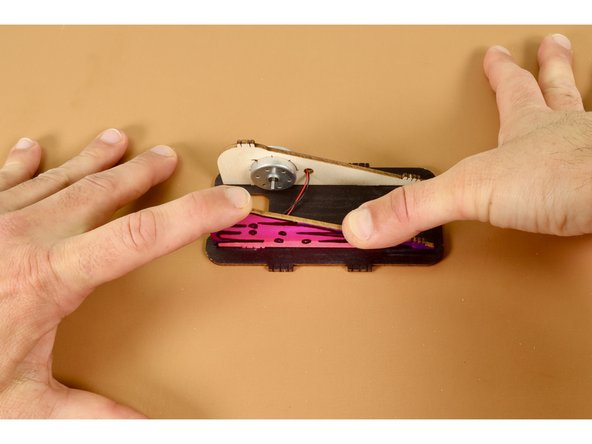
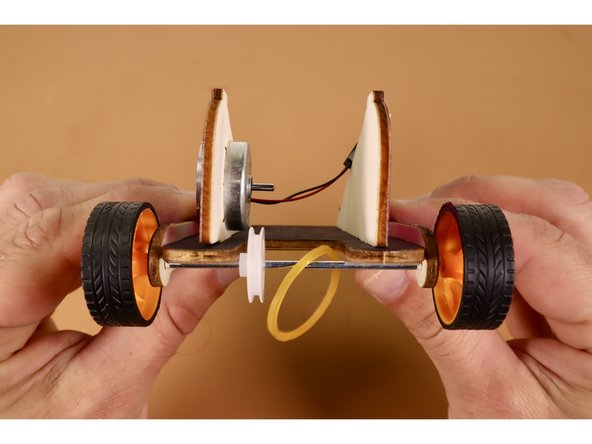
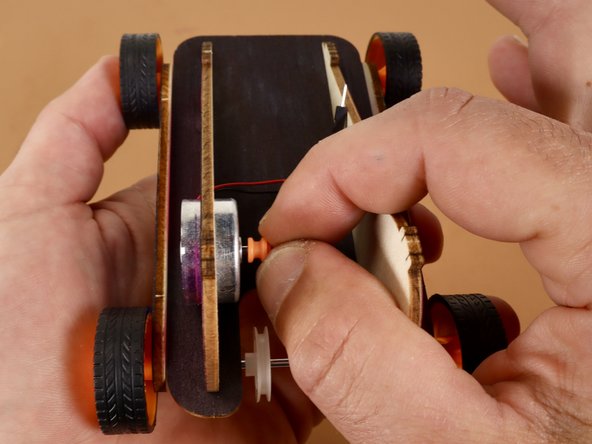
Now find the orange motor axle wheel and press it onto the spindle/axle of the already mounted motor.
-
At this point, you will need to stretch and seat the rubber band on the grooves of both the orange motor axle/spindle wheel and the white axle wheel. If your white plastic wheel isn't lined up with the orange wheel, simply slide it into alignment.
-
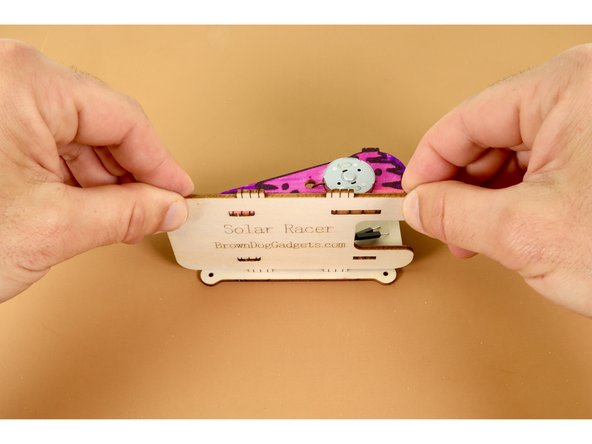
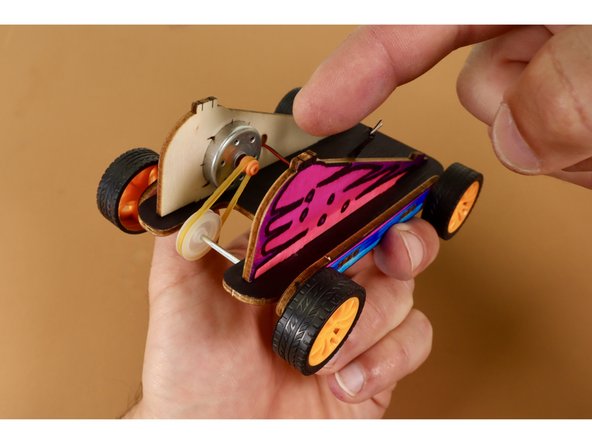
Find the larger of the two remaining body panels and lay it flat on the table with the open part of the "U" oriented toward you. Holding the chassis with the engraved side up and the notched end of the chassis toward you, press the two downward-facing tabs nearest the motor into the two slots of the u-shaped rear spoiler.
-
-
-
Press the remaining body panel into place atop the remaining set of tabs oriented as shown. This is the front spoiler.
-
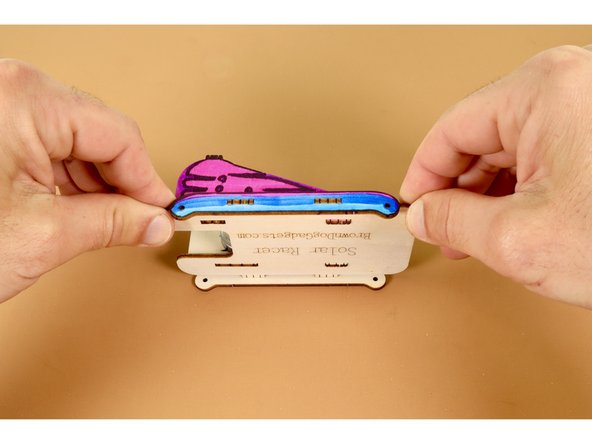
To attach the solar panel to the completed Solar Racer chassis, you will first need to peel and stick two pieces of the included double-sided foam tape where shown in photo two.
-
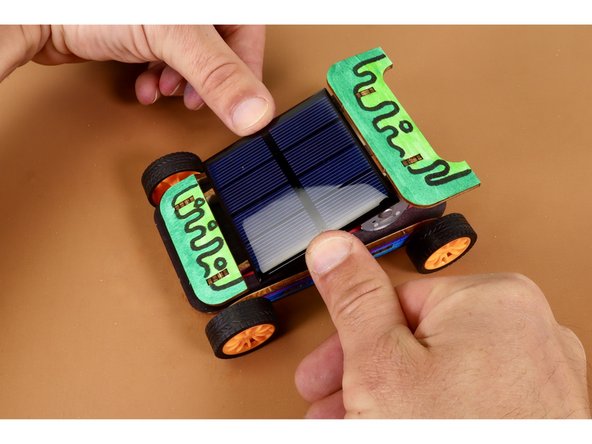
With foam tape peeled and stuck in place, connect the red motor wire to the red solar panel wire and the black motor wire to the black solar panel wire. With wires connected, press solar panel into place as shown with dark purple, glossy side facing UP.
-
-
-
If you are using tempra/acrylic paints to decorate you Solar Racer, paint the wooden parts of your completed racer now, taking care to keep all non-wooden parts free of paint.
-
To get your Solar Racer moving, simply take outside, set on the ground and expose to direct sunlight!
-


With your Solar Racer assembly complete, take this fun project outside in direct sunlight to power up the circuit and see it go!
With your Solar Racer assembly complete, take this fun project outside in direct sunlight to power up the circuit and see it go!