Introduction
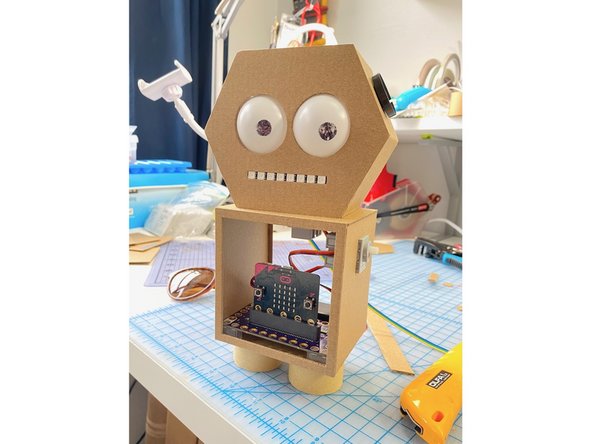
All she wants from you is a high five to keep her love for you alive. A high-fiving robot made with Crazy Circuits and micro:bit.
Video Overview
-
-
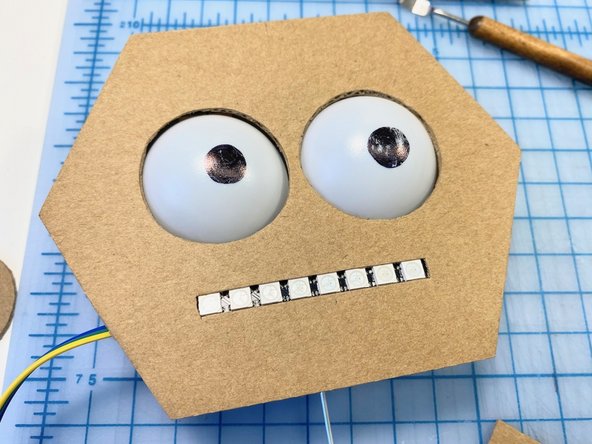
We took two ping pong balls and drew pupils onto them with a Sharpie marker.
-
We created a box out of cardboard slightly larger than the ping pong balls and used super glue to attach the cardboard pieces.
-
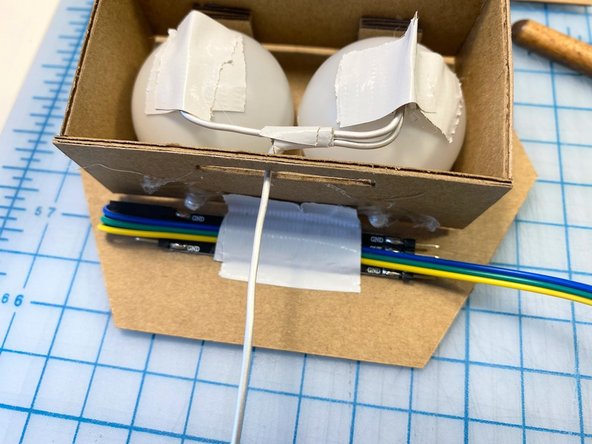
We used sewing pins to poke thru the cardboard and into the ping pong balls to create a hinge for them to spin on.
-
We taped a piece of armature wire to the back of the two balls to create a pivot point. This will allow us to move one wire and have both of the eyes move in the same direction.
-
-
-
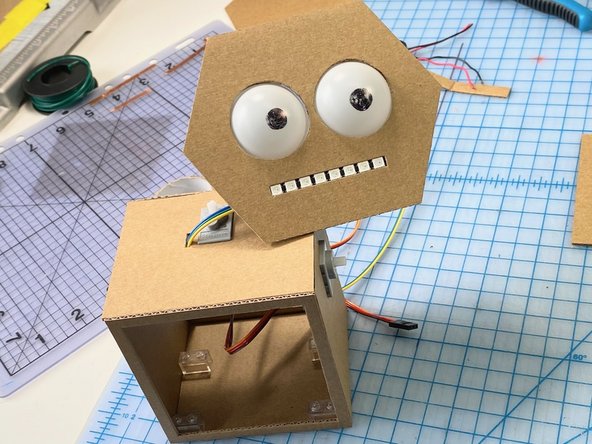
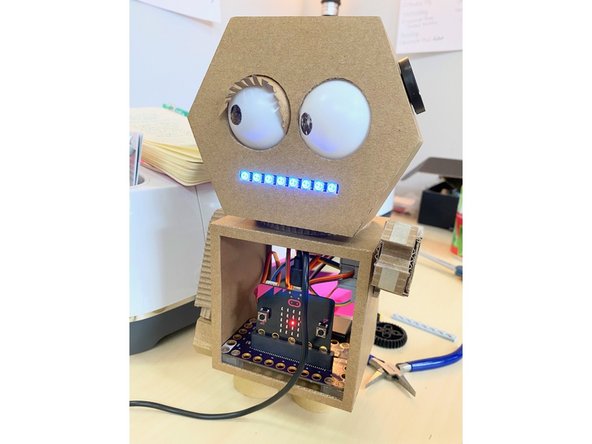
We cut a shape for the head, and two holes for the eyes to stick through.
-
We measured the LED strip and cut out a mouth to fit.
-
Then, we glued the eye box to the back of the head.
-
-
-
We added the LED strip to the mouth with a piece of duct tape.
-
-
-
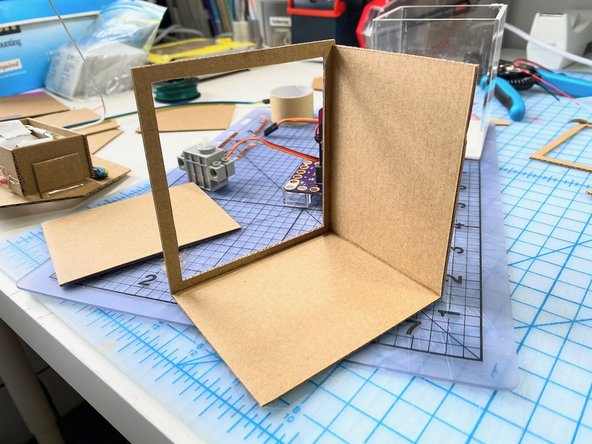
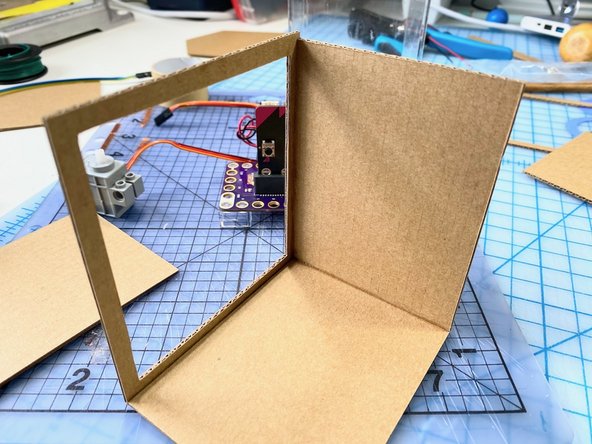
We cut out a frame of cardboard for the front of the body box, then created the side walls.
-
-
-
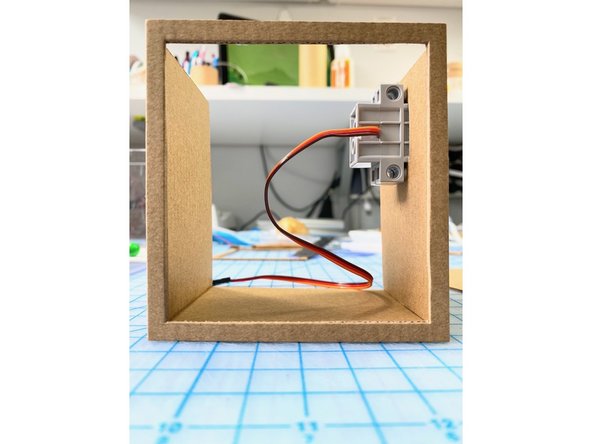
On the right side, we cut out a place for the servo to attach to the moving arm.
-
-
-
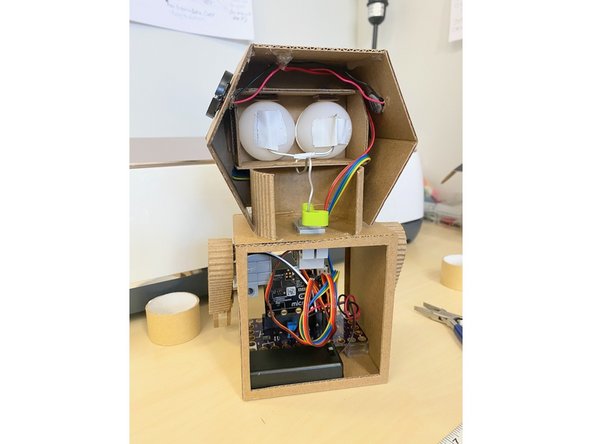
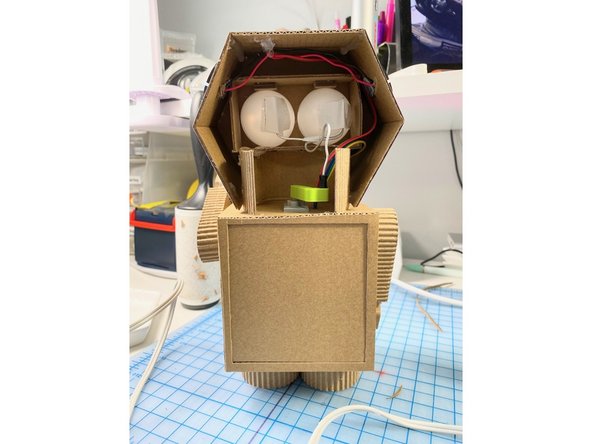
Because the Bit Board fits perfectly on LEGO, we used superglue to attach four LEGO pieces to the cardboard base so that we could add and remove the Bit Board as we built it.
-
-
-
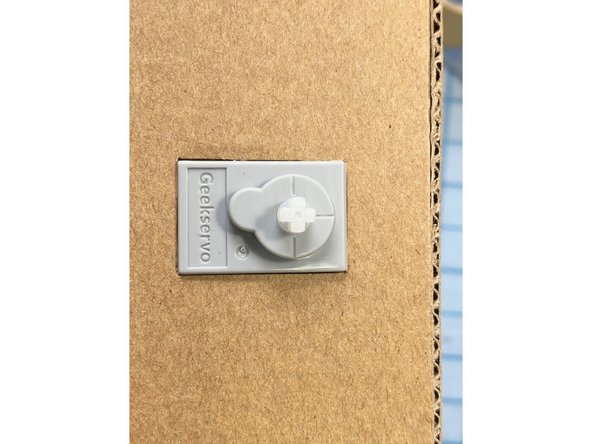
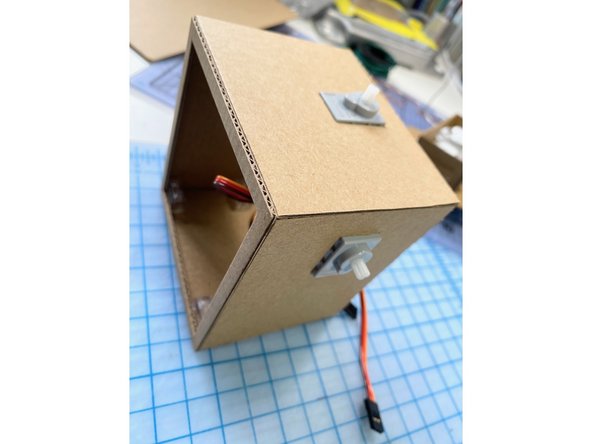
To create the moving eyes, we added another servo to the top of the robot's body.
-
We also made a hole in the top, next to the servo, to allow the wires from the speakers and the LED mouth to enter the robot's body.
-
-
-
We cut two pieces of cardboard to be the sides of the head, allowing them to fold instead of cutting separate pieces. We thought this made the design look cleaner.
-
When we cut the pieces to size, we also angled the cutting knife so that the top piece would sit flush with the edge of the side pieces. We think it came out really nice.
-
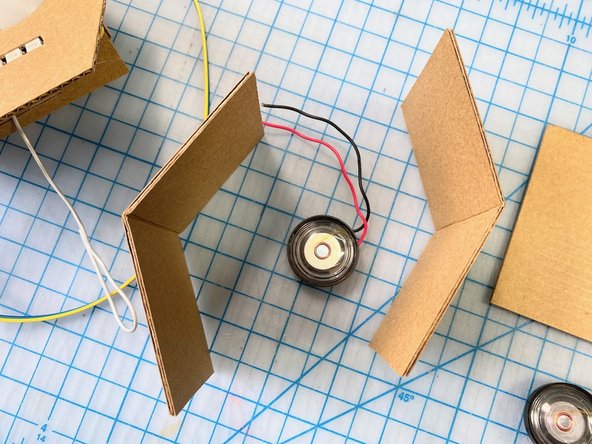
We used superglue to set all the pieces in place, then added the 8 Ohm speakers to each side of the head to give the appearance of "ears."
-
-
-
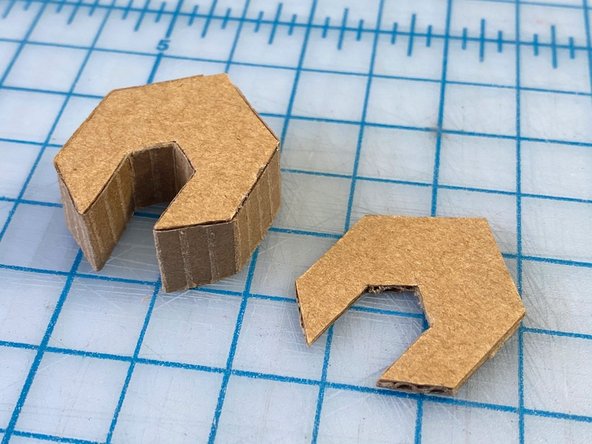
We sketched a wrench shape because we thought it was the most iconic and aesthetically pleasing robot hand. We cut the shapes out twice, one for each hand, and outlined them with the paper that we pulled off of one side of the cardboard (This made it easier to fold and manipulate around the small corners).
-
-
-
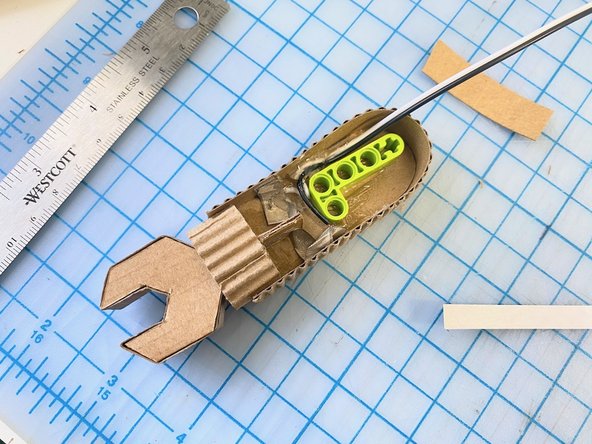
We pulled the paper off of one side of the cardboard to create the arms with exposed corrugation. We like how the corrugation is a nod to metal corrugation - so it looks "techie."
-
We added Maker Tape around each side of one of the hands to act as a touch-switch when you give her a high-five.
-
We added corrugated cuffs - we thought they made it look like a sweater, and also like the robot may be able to twist and turn her hand (even though she can't).
-
-
-
We transitioned the Maker Tape to wires to make it easier to feed the connection back inside the robot body to the Bit Board. To do this, we stripped the wire and folded the Maker Tape around the bare wire.
-
We used hot glue to separate the two wires to be sure that they wouldn't touch.
-
Then, we glued a LEGO in place to attach to the servo.
-
-
-
We poked a hole near where the arm attaches and fed the wires through.
-
We attached the arm to the servo.
-
We glued the other arm in the same place on the other side of the robot.
-
We added a neck using another piece of corrugated cardboard.
-
-
-
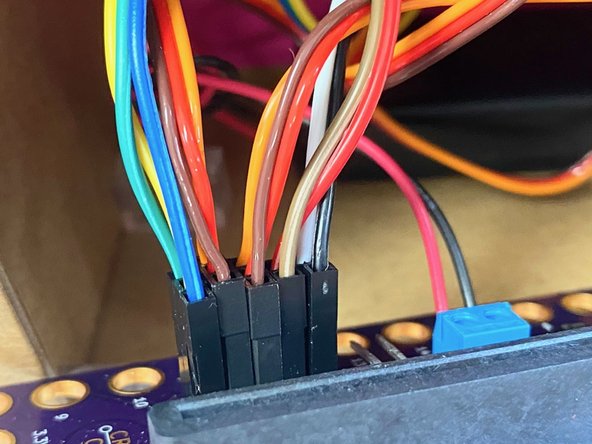
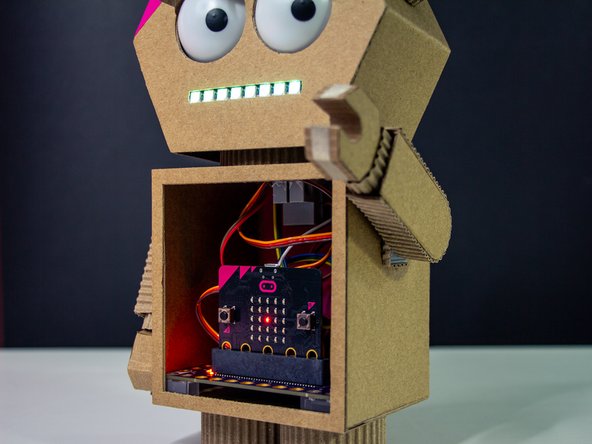
We placed the Bit Board into the robot's body and connected all the wires.
-
We put the end of the armature wire into the LEGO beam so that the servo would turn both of the eyes.
-
-
-
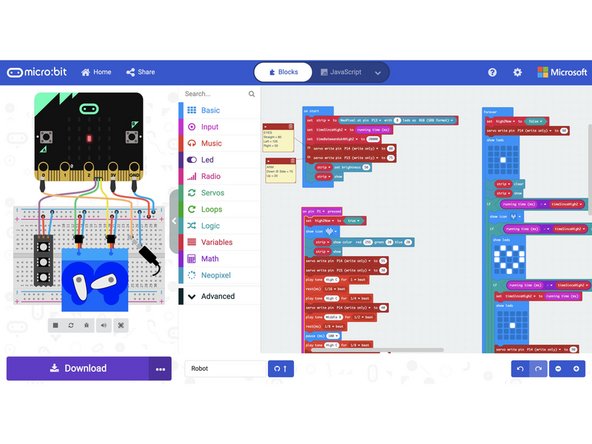
We used makecode.microbit.org to program our board. It uses a simple drag and drop block interface.
-
We loaded the following code for our Robot program: https://makecode.microbit.org/_AAVa8HbVb...
-
Here's what she does:
-
After a certain amount of time, she gets lonely and wants a high-five, so she calls out, looks at you, and raises her hand. During this time, she has no love in her heart because she is heartbroken that she didn't get a high-five yet.
-
She waits with her hand raised until she gets the high-five she asked for. (Don't leave her hanging!)
-
When she gets her high-five, she gets excited and sings a little song ending on a high note to let you know she's happy. Her heart starts beating again.
-
Then at some point, she'll need to ask for another high five...
-
-
-
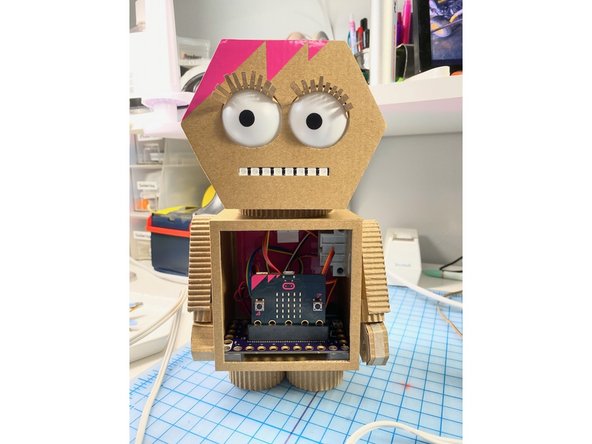
We used vinyl to give her pink hair that matched the pink spikes on the micro:bit.
-
We used the same pink vinyl to cover the interior of her robot body's rear panel.
-
-
-
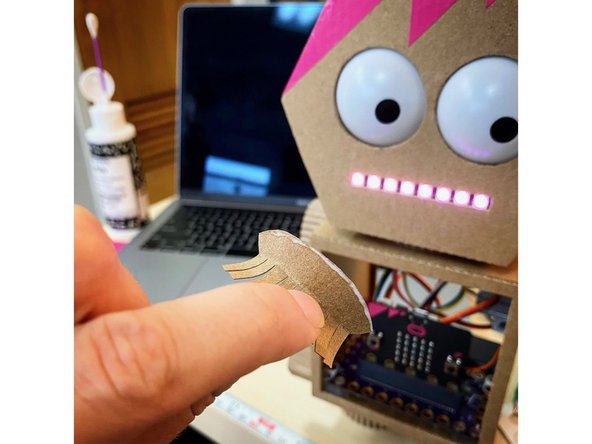
We made her some eyelashes out of the paper that was torn off of the cardboard. We glued them on using white glue, but the process felt a lot like gluing on real false eyelashes!
-
-
-
We made sure all the wires were glued out of the way so that the servo could work.
-
We used an alcohol swab to remove the Sharpie marker from the pupils and replaced them with black vinyl circles that we cut on our Cricut Maker for accuracy.
-
We added a small strip of corrugated cardboard around the speakers/ears.
-
We added corrugated cardboard feet for her to stand on.
-
-
-
Our cute little friend is all set! And now she's ready to give you a high-five!
-
When she asks for a high-five, just tap her hand, and make sure you touch both of her fingers. She'll be very happy!
-