
Introduction
Make a touch piano that plays 11 notes and works with a browser-based keyboard.
Video Overview
Featured Document
-
-
We’re going to build a touch piano. You’ll be able to trigger a sound by just touching a conductive surface. For this guide we’re going to use Squishy Circuits conductive dough.
-
We’ll use a browser-based application to play our sounds, so we’ll need a computer with internet access and Mozilla Firefox or Google Chrome installed. (Sorry, Safari doesn’t seem to work right now!)
-
The Crazy Circuits Invention Board can be programmed as a keyboard, and it will then send key commands to the piano application, just like if you were to use a keyboard. (Only much more awesome!)
-
Note that since our “piano” send keyboard commands to the computer if you use it when you do not have your web browser loaded up and ready to go with the piano web page, strange things can happen. (Like, phantom typing!)
-
-
-
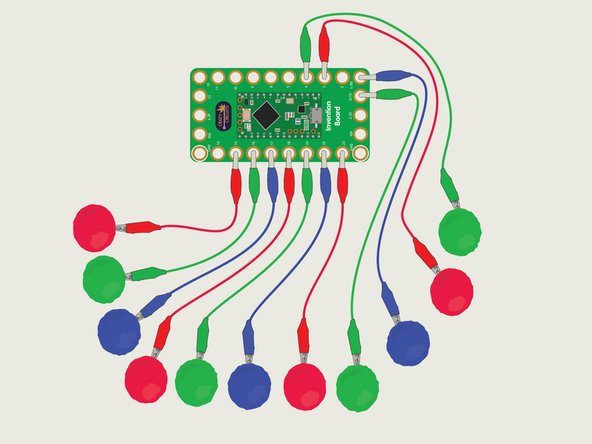
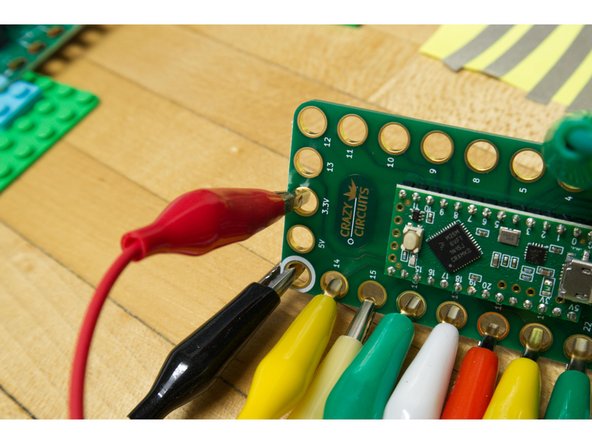
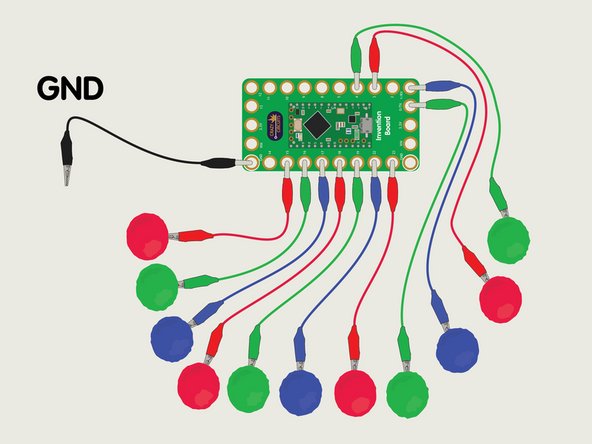
Our circuit is pretty simple! We’re going to connect 11 alligator clips to the Invention Board.
-
Note the correct orientation of the alligator clips. They need to be 90 degrees in relation to the board, not flat down.
-
You don’t have to connect 11 alligator clips (you can do less) but 11 is the maximum you can use.
-
-
-
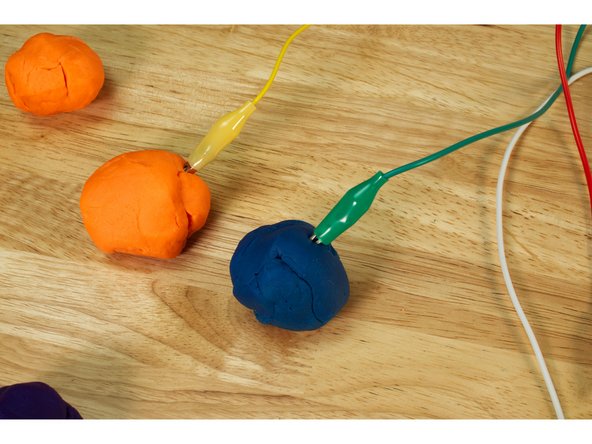
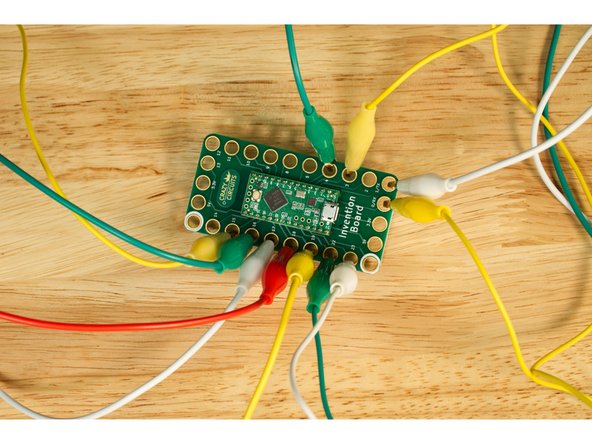
You should have 11 alligator clips connected to the Invention Board, so it’s time to add some dough.
-
We don’t need to add dough, you can just touch the end of the alligator clips, but dough definitely makes a larger target to hit and a bit more fun.
-
You don't need to "clip" the dough, just press the metal part into the dough so it's in there securely.
-
-
-
If you've never programmed the Invention Board before, start with this guide: Invention Board Setup and Use
-
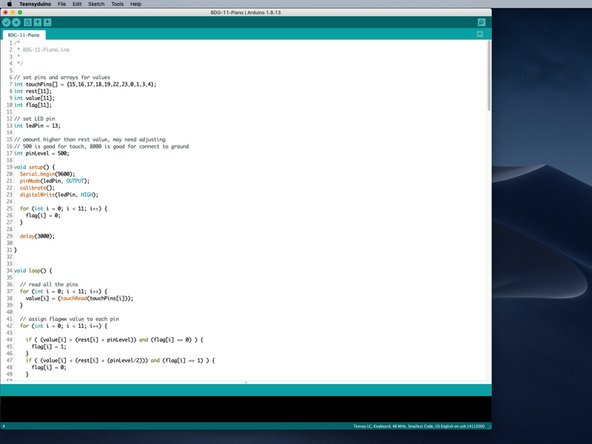
We've got a GitHub repository called BDG-11 Piano with the Arduino code you'll need.
-
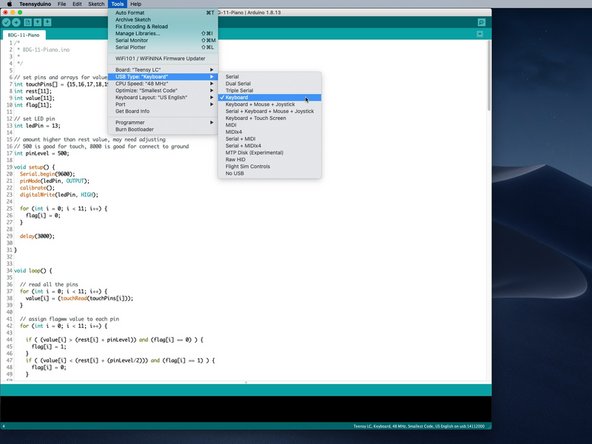
Under the Tools menu for USB Type make sure you choose Keyboard.
-
The Invention Board will send the following characters to the computer: left arrow, up arrow, right arrow, down arrow, space, W, A, S, D, F, and G.
-
When you plug the programmed Invention Board into your computer it might start typing right away! Be aware of this as it might type where you don't want it to!
-
-
-
After you've uploaded the code to the Invention Board it will do a calibration. It will do this calibration every time you power the board by plugging it into your computer.
-
The calibration will check each pin for a "rest" state to determine a value.
-
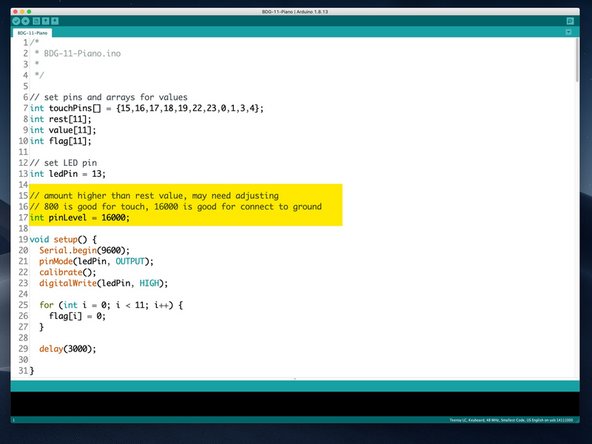
The board will then use that value as a baseline reading, and our pinLevel will determine how high above that reading will trigger a touch.
-
It is important to not touch anything connected to the board while it calibrates! Don't touch the alligator clips, the dough, etc.
-
When calibrating the small LED on the Invention Board will shine at half brightness. When you see it fully lit calibration is done. It should take just a few seconds.
-
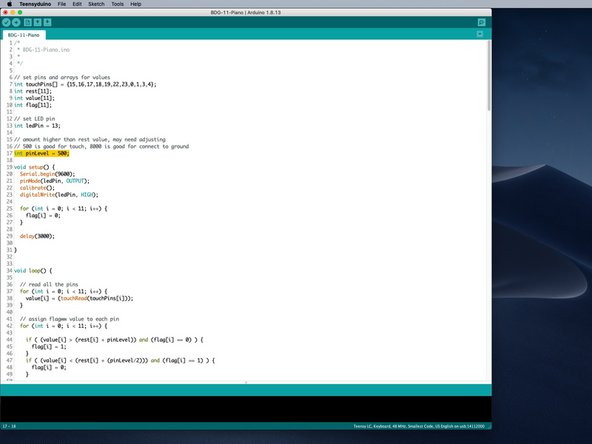
We've set a variable called pinLevel that you may need to adjust. We found that 500 worked well for our touch points but you may need to experiment.
-
-
-
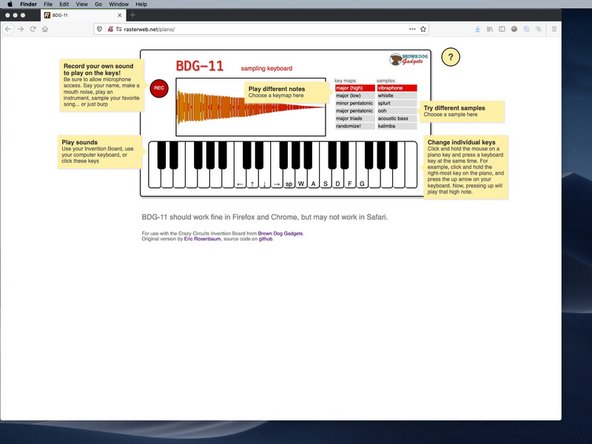
Using Mozilla Firefox or Google Chrome visit the BDG-11 Piano.
-
When the page loads it will show the "help mode" which explains what things are. (You can always see this again by clicking the yellow question mark icon in the upper right corner.)
-
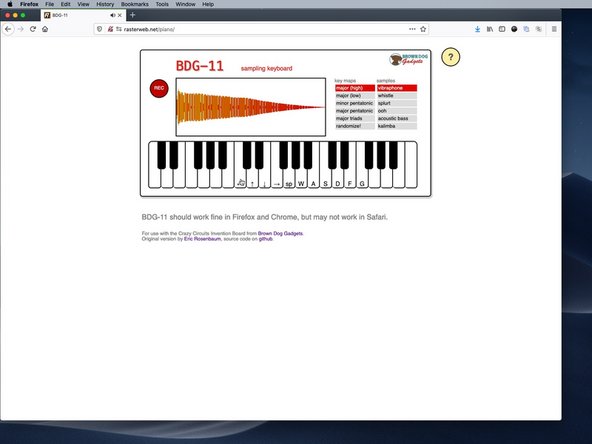
First test by either clicking a key with your mouse or using your keyboard. Type one of the arrow keys, the space bar, or the W, A , S, D, F, or G keys.
-
If you hear some cool sounds you are ready to go!
-
-
-
Got your browser loaded up? Plugged in your Invention Board? Let it calibrate? We're ready to go!
-
Hit that dough! Or alligator clips, or Maker Tape, or whatever conductive material you've got connected.
-
Enjoy the smooth (or jarring?) sounds of your new piano!
-
-
-
We've got a second version of the code called BDG-11-Piano-Adjustable in the repo: https://github.com/BrownDogGadgets/Crazy...
-
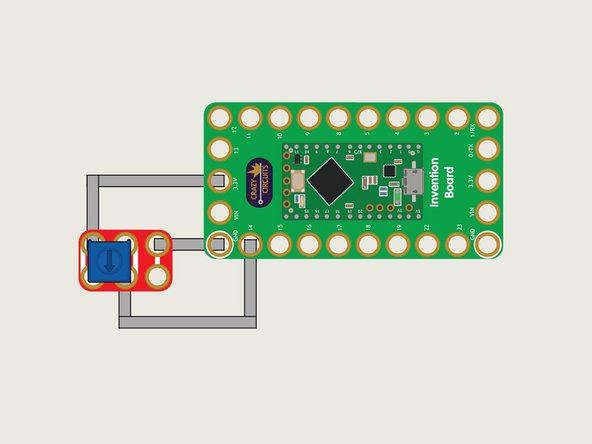
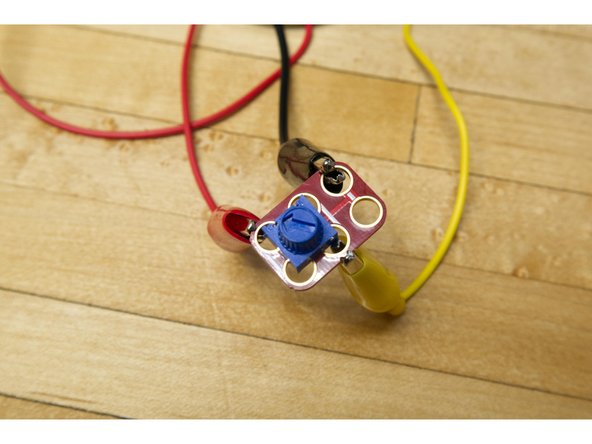
To add adjustability you will need three more alligator clips and a Potentiometer Chip.
-
If you've got Maker Tape and a LEGO baseplate that's another way to connect the potentiometer. The "center" hole of the potentiometer goes to Pin 14, one side goes to GND and one side goes to 3.3v
-
The Potentiometer will act as the adjustment dial making the touch sensitivity greater or lesser when you turn in. This can help prevent false triggers when you are not touching the trigger material.
-
-
-
If you have issues with the touch aspect of the project you also have the option of using a ground wire.
-
The ground wire helps make a more positive connection, but that also means we should raise the pinLevel in the code.
-
It shouldn't take too much effort to get the touch aspect working, but we thought this would be a good alternative if needed.
-
-
-
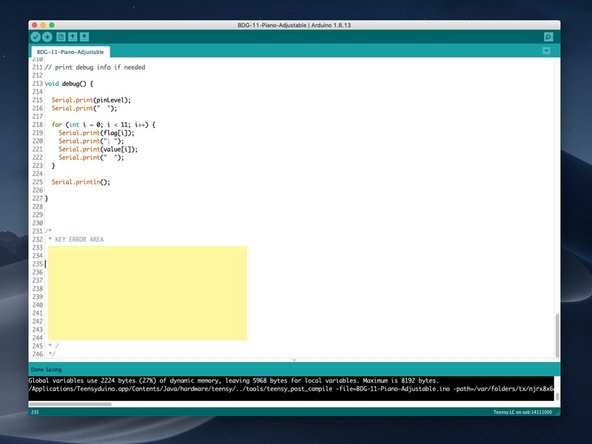
Since we are programming the Invention Board to act as a keyboard, things can go... wrong. If you plug it in and trigger a pin it will start typing! This is great if you have the piano loaded up but bad if you have the code as the frontmost window.
-
the the bottom of the sketch is an area labeled KEY ERROR AREA which is a code in the comment. You can put your cursor there before uploading just in case it starts to type.
-
When you first plug in the Invention Board (after uploading the code the first time) it will calibrate, which gives you a few seconds before any key press would be sent from the board.
-
For the safest programming operation reprogram the board with no alligator clips attached.
-
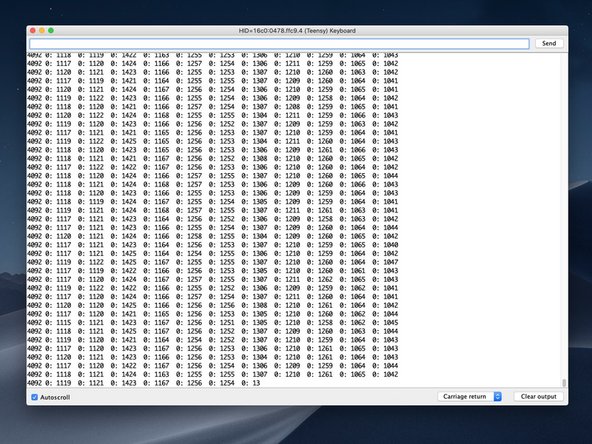
In the Arduino IDE you can use the Serial Monitor to see the values from each of the pins. (And the pinLevel if you are using the adjustable version of the code.) This can help to debug issues.
-
If you've made changes to the touch point material, by adding dough or tape, (or taking away away/removing material) you may want to unplug/replug the board so it can recalibrate. (Or use the potentiometer if you need to adjust sensitivity.)
-


Cancel: I did not complete this guide.
One other person completed this guide.
Attached Documents
