
Introduction
Build a sneaky micro:bit powered balloon popping device to surprise someone. It's a fun (and mostly harmless) April Fools Day prank!
Video Overview
Featured Document
-
-
Get all the parts you need to build your Balloon Popping device.
-
Besides a micro:bit, Bit Board, and 270 Degree Servo, you'll also need some LEGO parts.
-
The attached PDF guide lists the LEGO parts you need.
-
You may also need some miscellaneous LEGO bricks or Technic parts depending on your specific build.
-
You'll also need some 1/8" Maker Tape, a clothespin, a sharp needle, and of course a balloon!
-
-
-
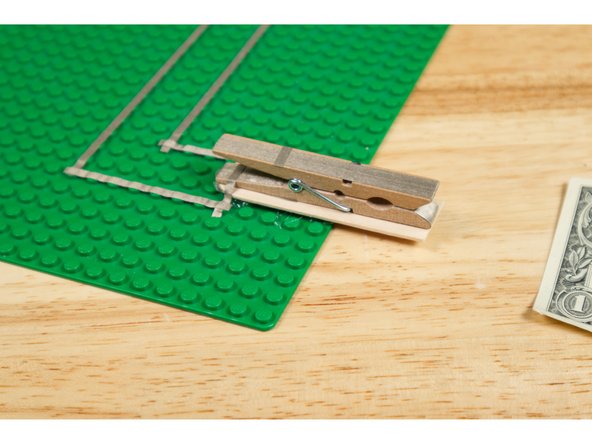
We're going to create a "Normally Closed" (or "NC") switch using a clothespin and some Maker Tape.
-
If you have 1/4" Maker Tape available you can use it for the clothespin switch, otherwise use 1/8" Maker Tape and use multiple strips if needed.
-
A "Normally Closed" switch is "ON" (or "closed") in its normal state and "OFF" (or "open") when activated. We can write our code to accommodate this "reverse" logic.
-
-
-
WARNING! This is a somewhat dangerous project since we're placing a sharp needle on the end of a swinging arm. Proceed with caution!
-
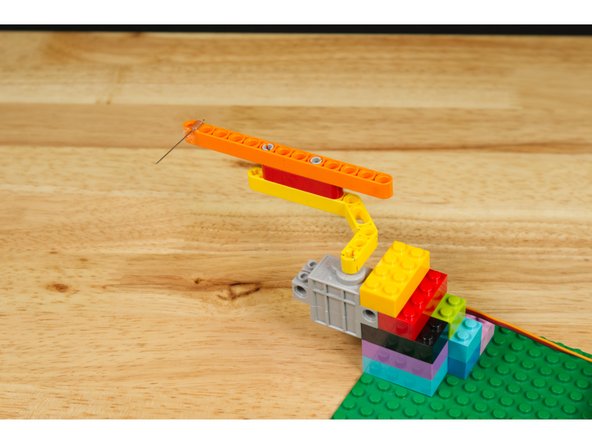
We attached a sewing needle to a LEGO arm and then put it on our servo so when the arm swings into place it pops the balloon!
-
You might also have luck using a push pin or a safety pin. We found a nice sharp sewing needed to be the most reliable in our testing,
-
If you need to adjust the height of the needle you can add more beams or bricks. You may find you need to hit the balloon straight on to get it to pop.
-
-
-
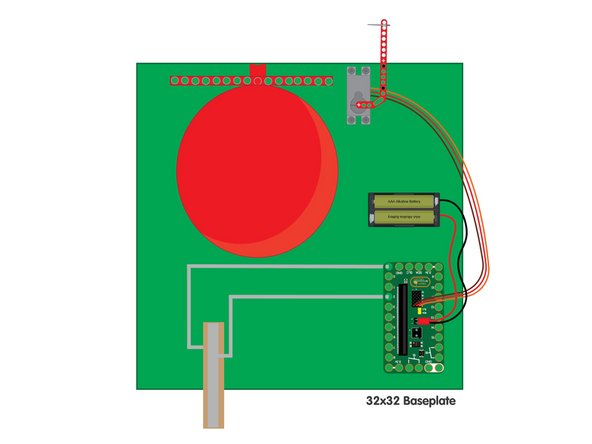
Once you've got all of your parts and components you are ready to build! We built our entire circuit and mechanism on a large LEGO baseplate.
-
Connect the Servo to Pin 1 on the Bit Board. (The servo has a three pin connector, so the other two pins will plug into + (positive) and - (ground).
-
Add your clothespin switch to Pin 2 and GND of the Bit Board using 1/8" Maker Tape.
-
Remember to be careful with the needle! Don't power on the circuit with the needle arm in place until you've loaded the code.
-
-
-
If you've never used a micro:bit before you'll want to check out this guide: Bit Board V1 Setup and Use
-
Connect a USB cable to the micro:bit V2 and then plug it into your computer.
-
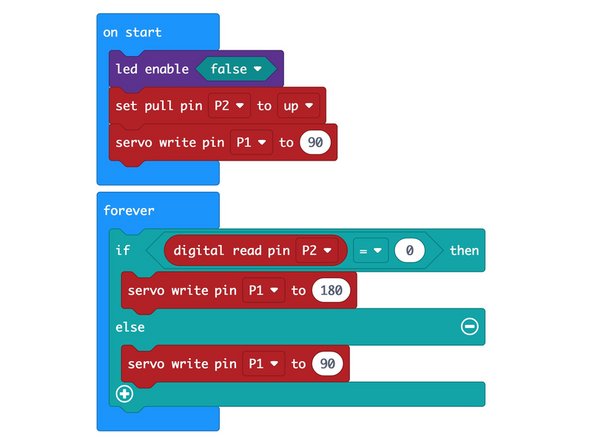
We're going to load the following code for our Balloon Popper program: https://makecode.microbit.org/_CEyUvWVEs...
-
Once you've uploaded the code you can (carefully) move on to the next step!
-
-
-
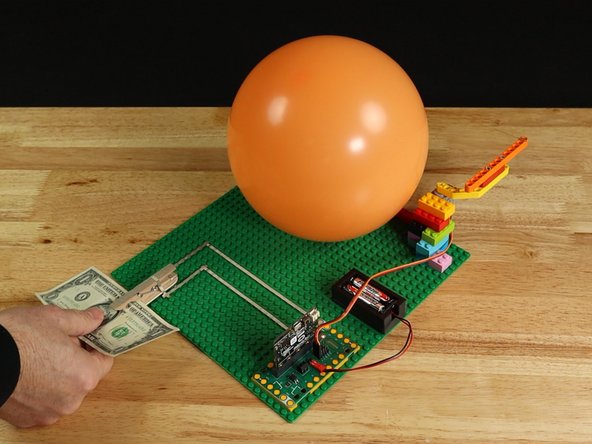
Place an insulator (a card or a dollar bill) in the clothespin switch to disable the switch.
-
Test it by pulling out the insulator. Did the servo arm move to the correct "popping" position? If not, adjust how the arm sits on the servo.
-
Once you're happy with the arm positioning you can add a balloon!
-
-
-
Is everything ready? Let's test it!
-
If it all worked as expected you can add a balloon. If things didn't quite work right check over all the steps in the guide to make sure you didn't miss anything.
-
-
-
We didn't want to alert our unsuspecting victim that there was a balloon so we built up a box using some LEGO bricks and another LEGO baseplate.
-
We also added an enticing sign with FREE MONEY! TAKE ONE because who can resist free money!?
-


Attached Documents
