Introduction
Connect two LEDs to a Bit Board and control them with a micro:bit
We'll make the LEDs fade up and down using a while function.
Video Overview
Featured Document
-
-
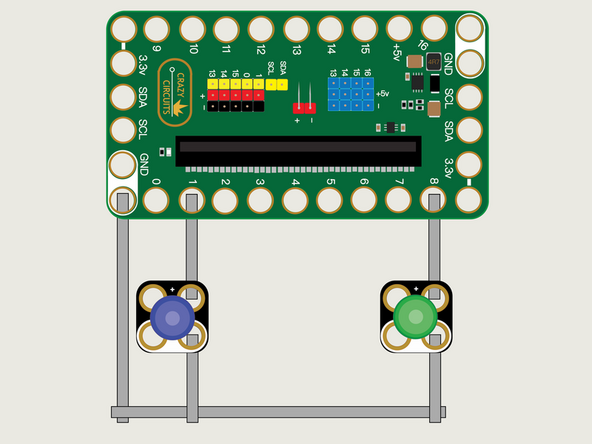
We'll use Maker Tape to connect the LEDs to the Bit Board on a LEGO baseplate.
-
Connect the Negative (-) sides of the LEDs to a Ground (GND) hole on the Bit Board.
-
Connect the Positive (+) side of the first LED to Pin 1 on the Bit Board.
-
Connect the Positive (+) side of the second LED to Pin 8 on the Bit Board.
-
You'll notice the Ground on the Bit Board (as well as the LED and other Crazy Circuits components we'll use) is color coded White.
-
-
-
If you've never used a micro:bit before you'll want to check out this guide: Bit Board V2 Setup and Use
-
We're going to load the following code for our LED Fade Up and Down While program: https://makecode.microbit.org/_HEPUfAdYR...
-
In our previous guide we used the repeat function, which worked, but we can improve things with a while loop.
-
In this code we are not looping a certain number of times, instead we are looping until a condition is met.
-
The while block uses a conditional statement to determine when it will be done.
-
For the LED on Pin 1 we do the first while loop as long as the variable brightness1 is less than or equal to 1023.
-
We then have another while loop after that where we run the loop until the brightness1 variable is greater than or equal to 0.
-
If we change our (hardcoded) values for the change or pause functions it will not affect the number of times the loop repeats because we only check for the value of the brightness1 variable.
-
-
-
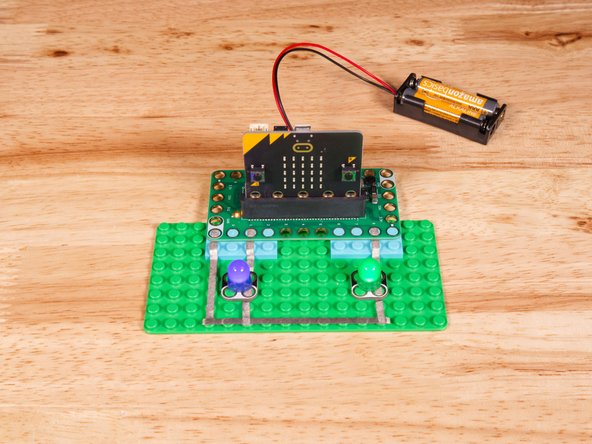
Once the code is loaded it should start running immediately.
-
You can power the micro:bit via the USB cable you used to load the code or you can use a battery pack plugged into the Bit Board.
-
The LEDs will fade up and down, at different rates, and in different steps, and you can now easily change your hardcoded values without it affecting the number of loops.
-
-
-
Follow along with our recorded Live Stream!
-
You can watch the full video of us walking through this project, along with explaining and exploring the code: https://youtube.com/live/QZck9h1C3A8
-


Attached Documents
