
Introduction
Connect a 270˚ Servo to a Bit Board and control it with code.
We'll explore how to control a servo motor.
Video Overview
Featured Document
-
-
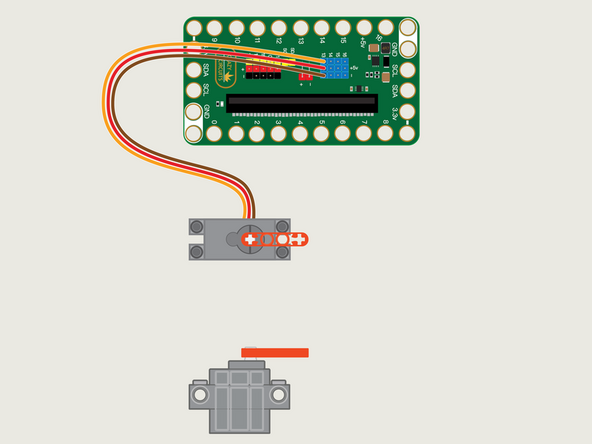
The 270 Degree Servo Motor has a 3-wire connector on the end that can plug directly into the pins on the back of the Bit Board.
-
Make sure the Orange Wire is closest to the number 13 for the Pin 13 column.
-
Then the Brown Wire should be closest to the micro:bit (in the - row) and the Red Wire will be in the middle (the +5v row).
-
-
-
If you've never used a micro:bit before you'll want to check out this guide: Bit Board V2 Setup and Use
-
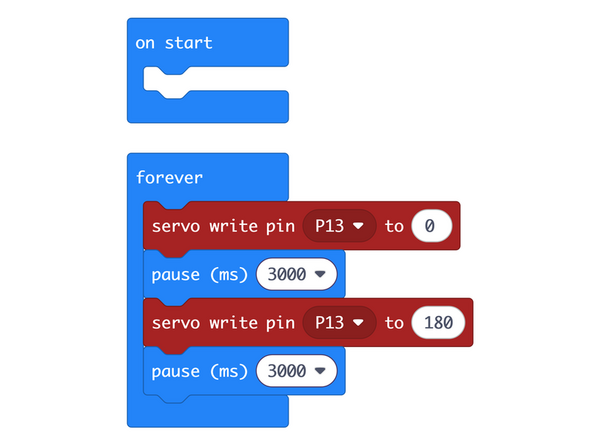
We're going to load the following code for our Servo Sweep program: https://makecode.microbit.org/_W1EC3K5z2...
-
The Pins section contain the blocks you'll need to control a 270 servo.
-
We're just going to set the servo to the 0 position, wait 3 seconds, then move it to the 180 position, and wait another 3 seconds. (And then repeat!)
-
-
-
Once the code is loaded it should start running immediately.
-
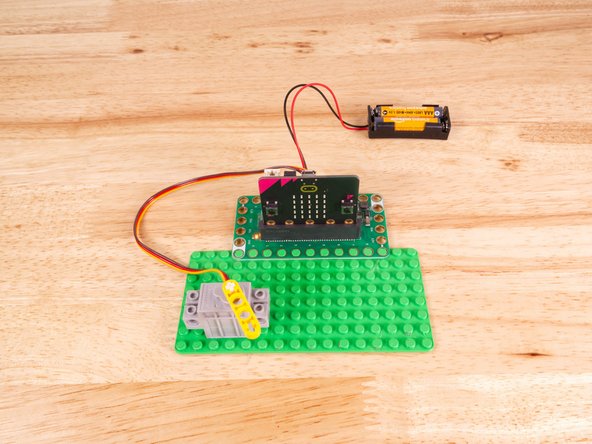
You can power the micro:bit via the USB cable you used to load the code, but now that we are using servos we recommend using a battery pack plugged into the Bit Board.
-
The Blue Pins on the Bit Board provide extra power (5 volts instead of 3 volts) by boosting the voltage coming from the battery pack. This helps improve servo performance, especially with multiple servos.
-
You can see the difference in power and speed by first running the code with just the USB cable powering the the micro:bit and then plugging in the battery pack to the Bit Board.
-
The servo should sweep back and forth between 0 and 180 degrees... but wait! This is a 270 degree servo, so it will actually move from 0 to (approximately) 270 degrees.
-
MakeCode expects 180 degree servos, not 270 degree servos, but we can still make it work. We'll discuss this limitation in future guides, and you can see our other guide: LEGO Compatible 270 Degree Servo for a more in-depth look.
-
-
-
Follow along with our recorded Live Stream!
-
You can watch the full video of us walking through this project, along with explaining and exploring the code: https://youtube.com/live/T8jrPuhOp_g
-

Attached Documents
