
Introduction
Connect a 270˚ Servo to a Bit Board and control it with code.
We'll explore how to control a servo motor.
Video Overview
Featured Document
-
-
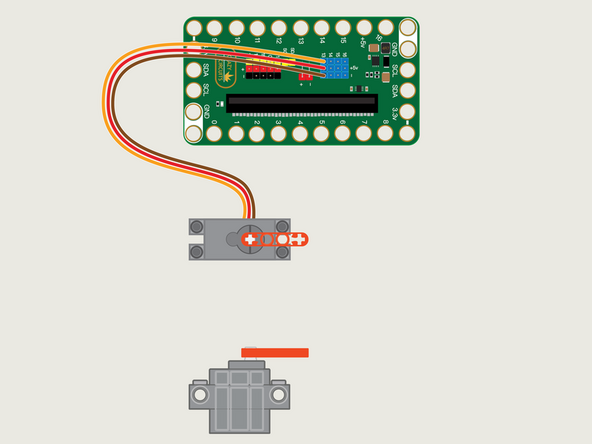
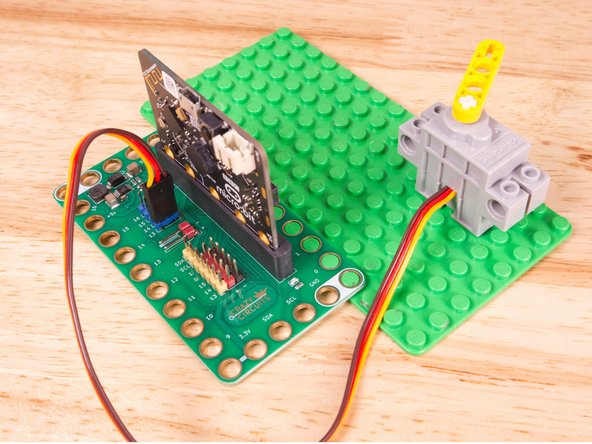
The 270 Degree Servo Motor has a 3-wire connector on the end that can plug directly into the pins on the back of the Bit Board.
-
Make sure the Orange Wire is closest to the number 13 for the Pin 13 column.
-
Then the Brown Wire should be closest to the micro:bit (in the - row) and the Red Wire will be in the middle (the +5v row).
-
-
-
If you've never used a micro:bit before you'll want to check out this guide: Bit Board V2 Setup and Use
-
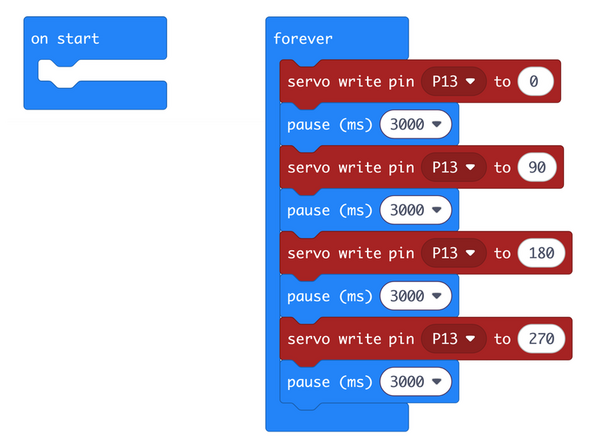
We're going to load the following code for our Servo Angles program: https://makecode.microbit.org/_64AaVe8mP...
-
We'll move the servo to a number of positions, 0, 90, 180, and then it will attempt to move it to 270.
-
There's a pause between each move, to allow the servo to move and then stop for a bit.
-
-
-
Once the code is loaded it should start running immediately.
-
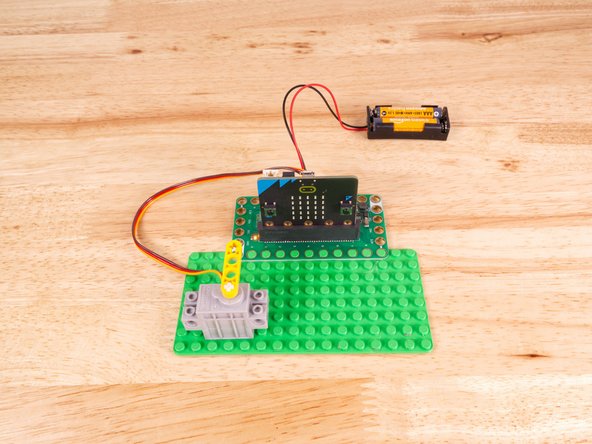
You can power the micro:bit via the USB cable you used to load the code, but now that we are using servos we recommend using a battery pack plugged into the Bit Board.
-
The Blue Pins on the Bit Board provide extra power (5 volts instead of 3 volts) by boosting the voltage coming from the battery pack. This helps improve servo performance, especially with multiple servos.
-
The servo should start at the 0 position (all the way clockwise) then move to the center, and finally all the way anti-clockwise). But wait! Shouldn't the servo move to four positions? This is where it gets tricky...
-
While we can see the servo moves about 270 degrees in total, MakeCode only recognizes values between 0 and 180. This means that 180 degrees in the code is really 270 degrees on the servo, and 90 degrees in the code is really 135 degrees (or halfway) on the servo.
-
This guide helps explain things: LEGO Compatible 270 Degree Servo
-
-
-
Follow along with our recorded Live Stream!
-
You can watch the full video of us walking through this project, along with explaining and exploring the code: https://youtube.com/live/T8jrPuhOp_g
-
Attached Documents
