
Introduction
Connect a 270˚ Servo to a Bit Board and control it with code.
We'll explore how to control a servo motor.
Video Overview
Featured Document
-
-
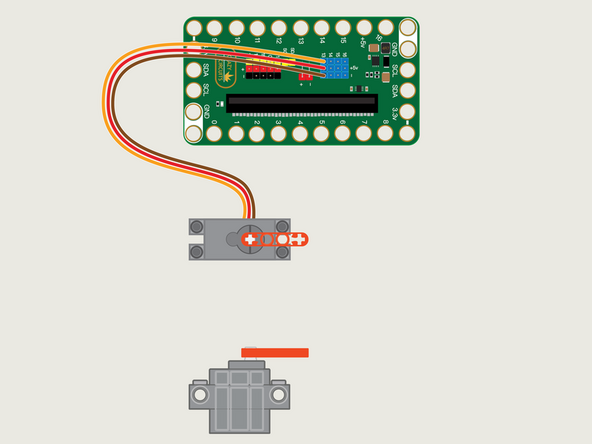
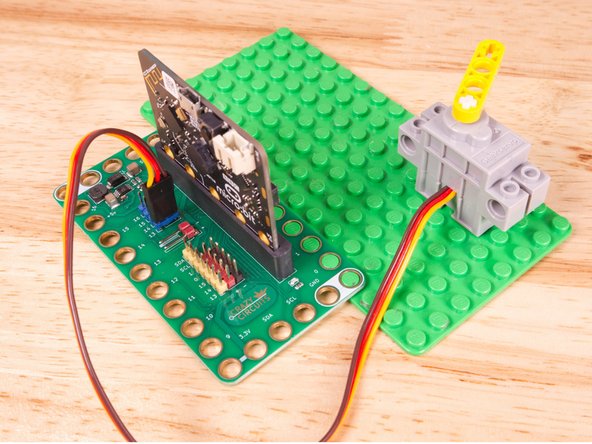
The 270 Degree Servo Motor has a 3-wire connector on the end that can plug directly into the pins on the back of the Bit Board.
-
Make sure the Orange Wire is closest to the number 13 for the Pin 13 column.
-
Then the Brown Wire should be closest to the micro:bit (in the - row) and the Red Wire will be in the middle (the +5v row).
-
-
-
If you've never used a micro:bit before you'll want to check out this guide: Bit Board V2 Setup and Use
-
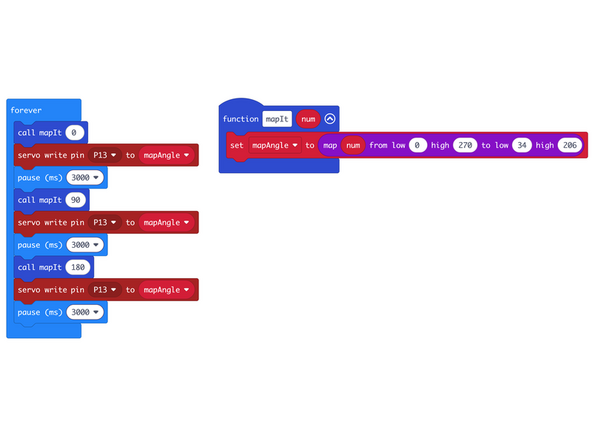
We're going to load the following code for our Servo Map Angles program: https://makecode.microbit.org/_TWzAWxhFa...
-
We've written a function so we can get our 270˚ servo to function like a 180 servo.
-
Using the map function we can convert the angles so that calling the mapIt function with 0, 90 or 180 will move the servo to those actual positions.
-
How did we get the numbers 34 and 206? We started by taking 270-180 for 90, then divided in half for 45 and tried using 45 and 225 which has a 180 degree range...
-
When that didn't quite work we started adjusting the numbers until the angles for 90 and 180 were close to correct. It took a few tries to get right.
-
It may not be exact, and it may not work the same for every servo... but it's close enough for our needs.
-
-
-
Once the code is loaded it should start running immediately.
-
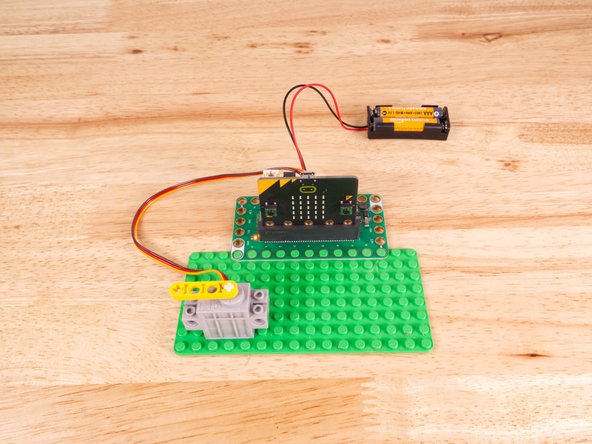
You can power the micro:bit via the USB cable you used to load the code, but now that we are using servos we recommend using a battery pack plugged into the Bit Board.
-
The Blue Pins on the Bit Board provide extra power (5 volts instead of 3 volts) by boosting the voltage coming from the battery pack. This helps improve servo performance, especially with multiple servos.
-
The servo will start at the 0 position, move approximately 90 degrees, and then move another 90 degrees, approximately.
-
These servos are never 100% accurate, but that is the nature of working with hobby servos. They are excellent for what they can do, with some limitations of course.
-
-
-
Follow along with our recorded Live Stream!
-
You can watch the full video of us walking through this project, along with explaining and exploring the code: https://youtube.com/live/T8jrPuhOp_g
-
Attached Documents
