Introduction
Connect a 360˚ Servo to a Bit Board and control it with code.
We'll explore code to control the movement of a continuous rotation (360 degree) servo motor.
Video Overview
Featured Document
-
-
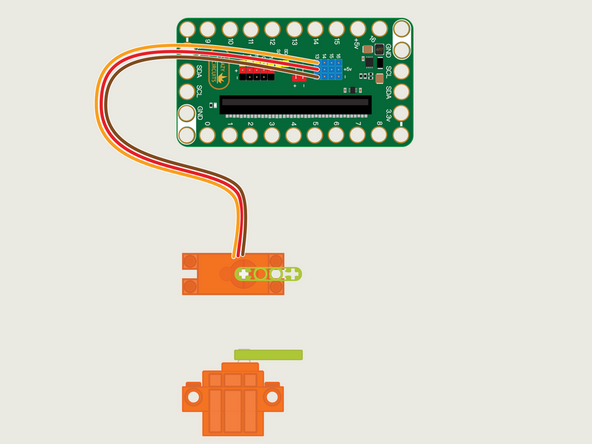
The 360 Degree Servo Motor has a 3-wire connector on the end that can plug directly into the pins on the back of the Bit Board.
-
Make sure the Orange Wire is closest to the number 13 for the Pin 13 column.
-
Then the Brown Wire should be closest to the micro:bit (in the - row) and the Red Wire will be in the middle (the +5v row).
-
A 360 Degree Servo is also called a "Continuous Rotation Servo" because it can spin around continuously without the hard stops that a 270 Degree Servo has.
-
-
-
If you've never used a micro:bit before you'll want to check out this guide: Bit Board V2 Setup and Use
-
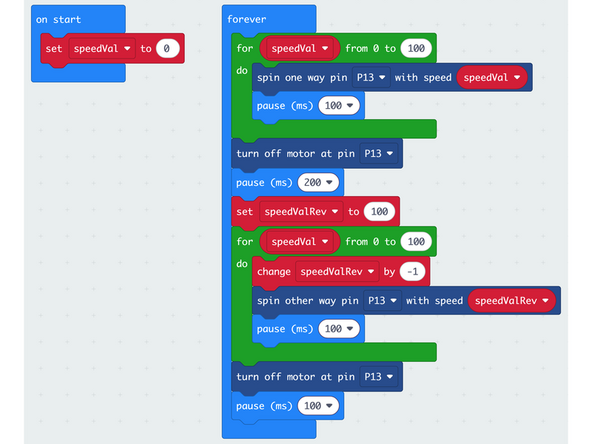
We're going to load the following code for our 360 Servo Ramp program: https://makecode.microbit.org/_PAe52YThq...
-
We'll use the speedVal variable to set the speed of the servo rotation.
-
In the forever block we'll run through two loops. The first loop will make the servo spin one way, and the speed will increase with each iteration of the loop. We pause 100 milliseconds after each change in speed.
-
In the second for loop we get a little tricky. Since the for loop always starts at 0 (zero) we'll use it to iterate, but we'll use a second variable named speedValRev to hold the value we use to control the speed.
-
We start speedValRev at 100, and then with each iteration of the loop we change it by -1 (which decreases it by 1).
-
We described the method above as "tricky" because while other languages allow for loop iterations to start at any value, MakeCode does not, but it's an easy workaround.
-
-
-
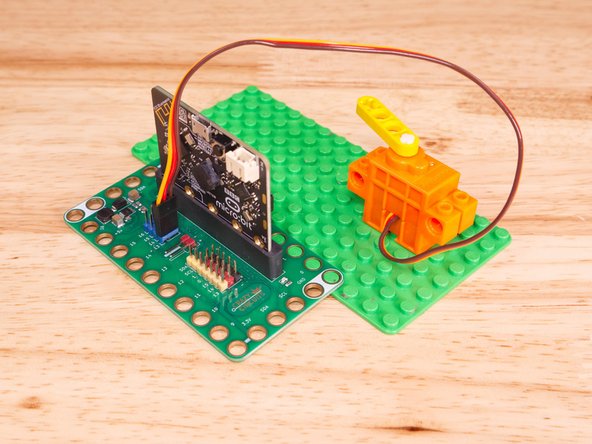
Once the code is loaded it should start running immediately.
-
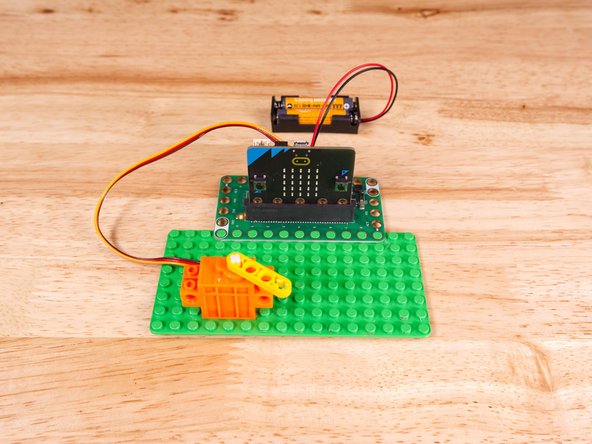
You can power the micro:bit via the USB cable you used to load the code, but now that we are using servos we recommend using a battery pack plugged into the Bit Board.
-
The Blue Pins on the Bit Board provide extra power (5 volts instead of 3 volts) by boosting the voltage coming from the battery pack. This helps improve servo performance, especially with multiple servos.
-
The Servo will start spinning slowly and gain speed as it spins. It will then stop and spin the opposite direction, this time spinning at full speed and then slowing to a stop.
-
-
-
Follow along with our recorded Live Stream!
-
You can watch the full video of us walking through this project, along with explaining and exploring the code: https://youtube.com/live/6SM5-RuBkuY
-

Attached Documents
