Introduction
Connect a pushbutton to a Bit Board and control an LED with it.
We'll explore how we can use a pushbutton as an input for the micro:bit
Video Overview
Featured Document
-
-
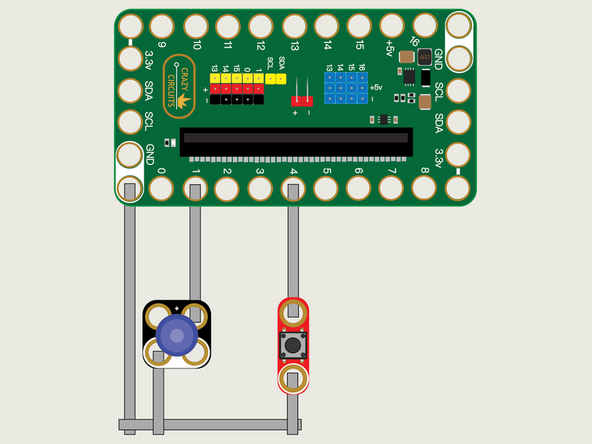
We'll use Maker Tape to connect the Button and LED to the Bit Board on a LEGO baseplate.
-
We've already connected an LED in Chapter 1 so our new addition this time is the Button.
-
We'll connect our LED to Pin 1 and our Button to Pin 4.
-
And of course we'll connect the Ground (GND) sides of each component to Ground on the Bit Board.
-
You'll notice the Ground on the Bit Board (as well as the LED and other Crazy Circuits components we'll use) is color coded White.
-
While the LED has Polarity our Button does not. If you connect it the other way around it will still work fine. Not all components have Polarity.
-
-
-
If you've never used a micro:bit before you'll want to check out this guide: Bit Board V2 Setup and Use
-
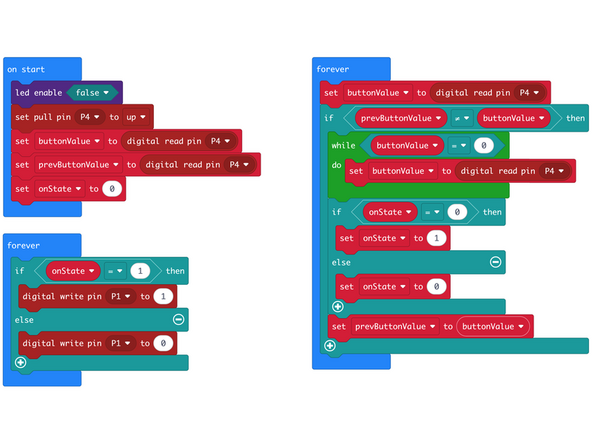
We're going to load the following code for our Button Toggle Better program: https://makecode.microbit.org/_iu15AwF0x...
-
This code will turn on the LED when the button is pressed the first time, and then turn off the LED when the button is pressed a second time. (It's like the previous Toggle example, but Better.)
-
This code is a bit more complex, so we'll explain what's going on. Notice in the setup block we are creating two variables, buttonValue and prevButtonValue. The prevButtonValue will be used to track the previous value of the buttonValue variable so we can compare to see if buttonValue has changed.
-
In our larger forever block we set the buttonValue to the value of digital read of Pin 4. If this value does not match the previous value set in prevButtonValue then we go into a while loop...
-
In the while loop we keep check in for the buttonValue, and when it changes we exit the while loop...
-
We then do our "bit flipping" operation (setting 1 to 0 or 0 to 1) and finally set the value of prevButtonValue to be the same as the buttonValue.
-
Finally, the smaller forever block either turns on or turns off the LED connected to Pin 4.
-
-
-
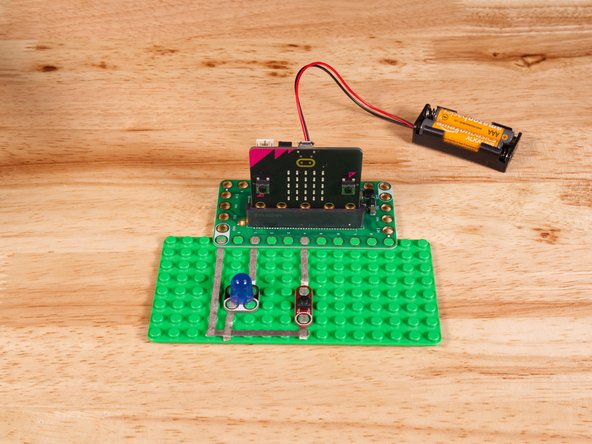
Once the code is loaded it should start running immediately.
-
You can power the micro:bit via the USB cable you used to load the code or you can use a battery pack plugged into the Bit Board.
-
The LED should turn on when the button is first pressed, turn off when the button is pressed again, and so on, toggling on and off with each press.
-
Press the button repeatedly as fast as you can and see if the LED always responds properly!
-
-
-
Follow along with our recorded Live Stream!
-
You can watch the full video of us walking through this project, along with explaining and exploring the code: https://www.youtube.com/live/sWfe8znn6C0
-

Attached Documents
