
Introduction
Connect a Thumbstick to a Bit Board and use it to control a 270˚ Servo.

Video Overview
Featured Document
-
-
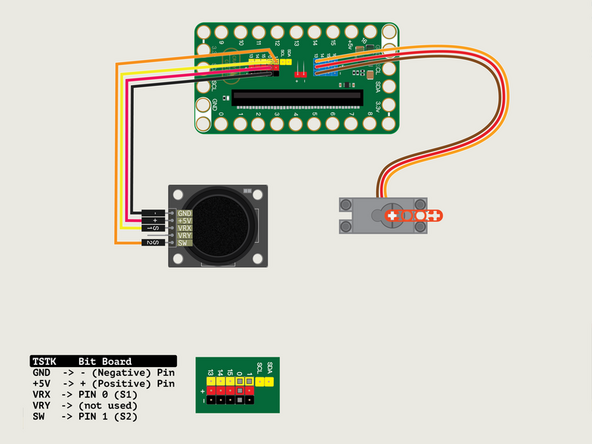
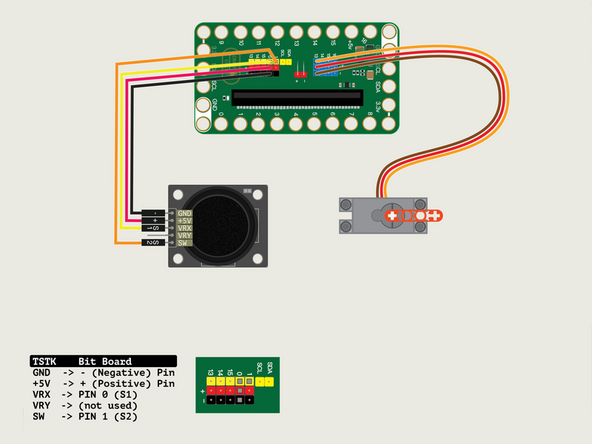
We'll connect the Thumbstick with a Crazy Circuits Ribbon Cable using all four wires.
-
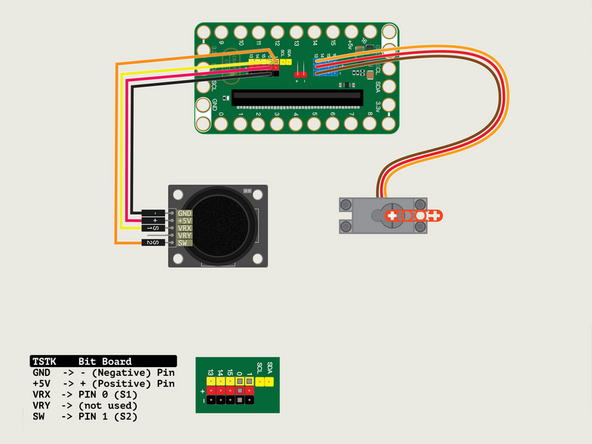
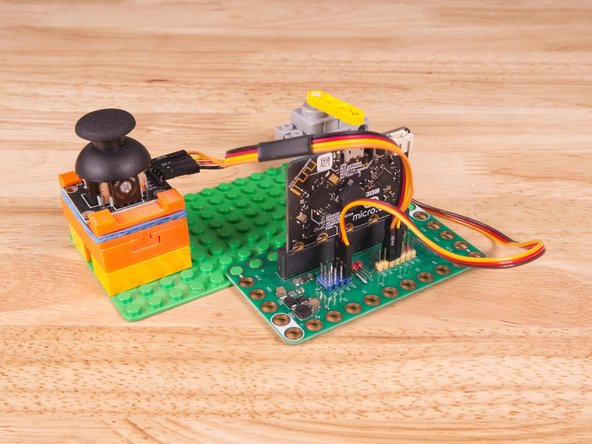
Plug the three-wire connector of the Crazy Circuits Ribbon Cable into the row with Pin 0 on the Bit Board. The wire colors should match the pin header colors, with S1 (yellow) going to the yellow pin.
-
Next, plug S2 (orange) into Pin 1. (S2 is separated from the three-wire connector to allow you to plug it into another row.)
-
To the Thumbstick plug - (black) into GND, + (red) into +5V; S1 (yellow) into VRx; S2 (orange) into SW.
-
We won't plug anything into VRy pin for this example.
-
-
-
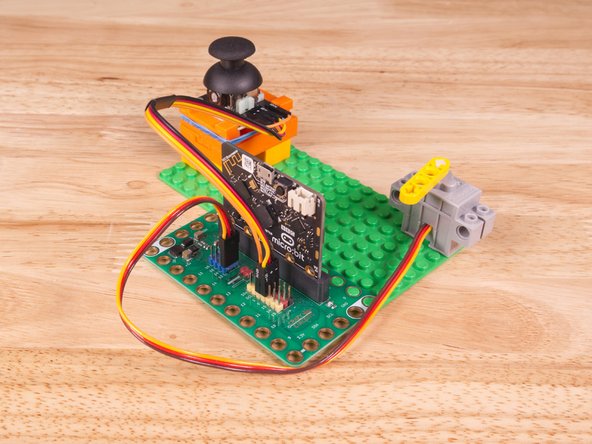
The 270 Degree Servo Motor has a 3-wire connector on the end that can plug directly into the pins on the back of the Bit Board.
-
Make sure the Orange Wire from the servo is closest to the number 13 for the Pin 13 column.
-
Then the Brown Wire should be closest to the micro:bit (in the - row) and the Red Wire will be in the middle (the +5v row).
-
-
-
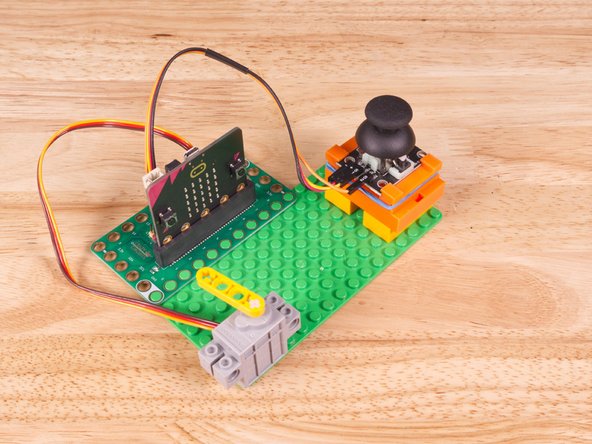
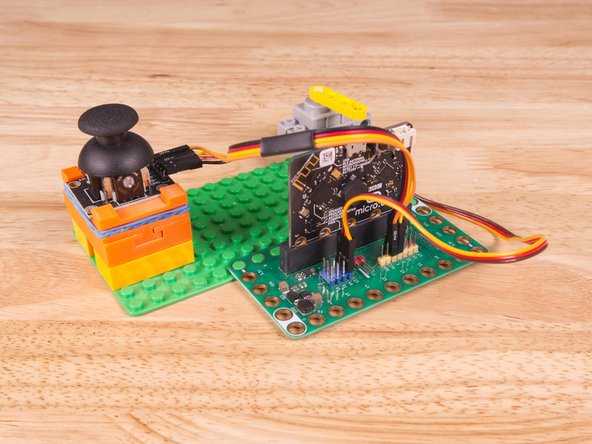
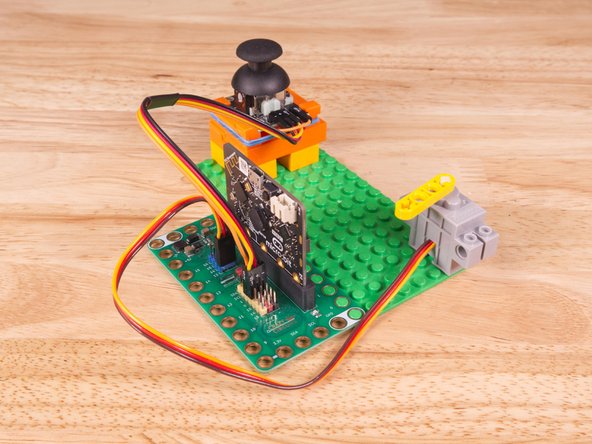
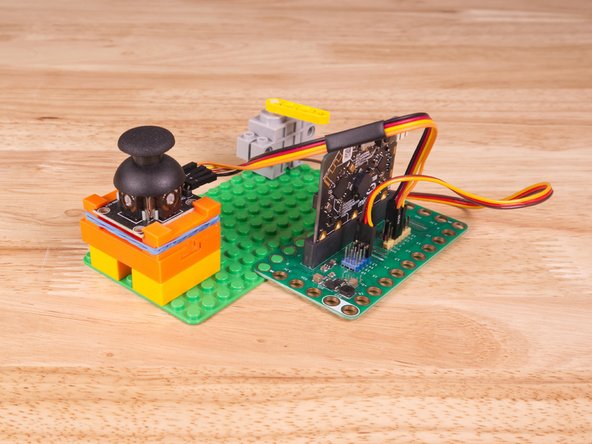
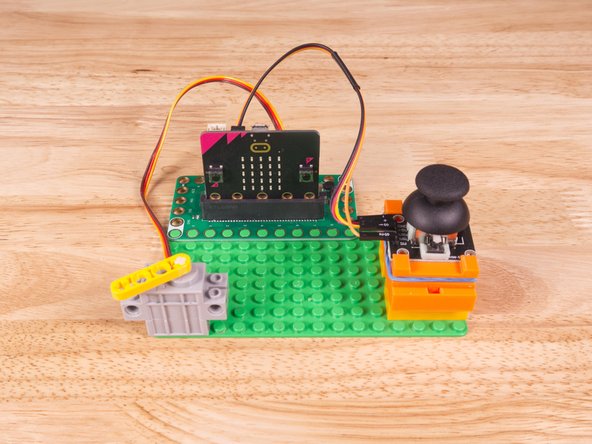
We used a 3D printed part we designed to hold the Thumbstick in place on a LEGO baseplate.
-
We attached two 2x4 LEGO Bricks to the bottom of the 3D printed holder to allow it to snap onto the LEGO Baseplate a bit easier.
-
Alternately you can try to use some LEGO bricks and some rubber bands to hold the sensor in place, or just hold it in your hand.
-
3D print your own Thumbstick Sensor Holder.
-
-
-
If you've never used a micro:bit before you'll want to check out this guide: Bit Board V2 Setup and Use
-
We're going to load the following code for our Thumbstick 270 Servo Step program: https://makecode.microbit.org/_e73XMPREw...
-
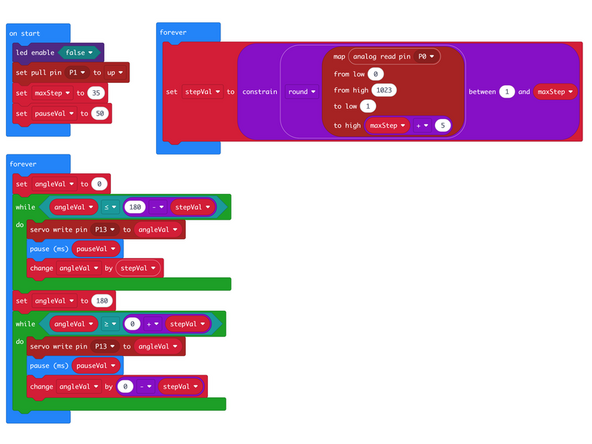
In the on start block we'll disable the LED matrix and set Pin 1 to pull up, as we'll attach this to the button on the Thumbstick. We'll also set two variables, maxStep and pauseVal.
-
In the first forever loop we'll read analog Pin 0 and map the value from 0 to 1023 to a scale going from 1 to maxStep + 5. We'll also use constrain to limit the values to be between 1 and maxStep (which is 35).
-
Why do we use maxStep + 5 in the map function? We've seen before that sometimes the Thumbstick sometimes doesn't reach 1023. This allows the value to overshoot to ensure we get to 1023, and then the constrain makes sure we don't go over maxStep.
-
In the second forever loop we will again use two for loops to sweep the servo back and forth, but this time stepVal is used to change how much the servo moves each time while the pause uses a constant value.
-
-
-
Once the code is loaded it should start running immediately.
-
You can power the micro:bit via the USB cable you used to load the code or you can use a battery pack plugged into the Bit Board.
-
The servo will start moving as soon as the code starts running, sweeping back and forth.
-
Move the Thumbstick left and right and you'll see the speed of the servo change due to changing how much the servo moves per step.
-
Chapter 24 has a few notes on using 270 Servos with the Bit Board and some MakeCode limitations: CH24-A - Servo Sweep
-
-
-
Follow along with our recorded Live Stream!
-
(We'll add the video to this step after we do the stream!)
-

Attached Documents
