Introduction
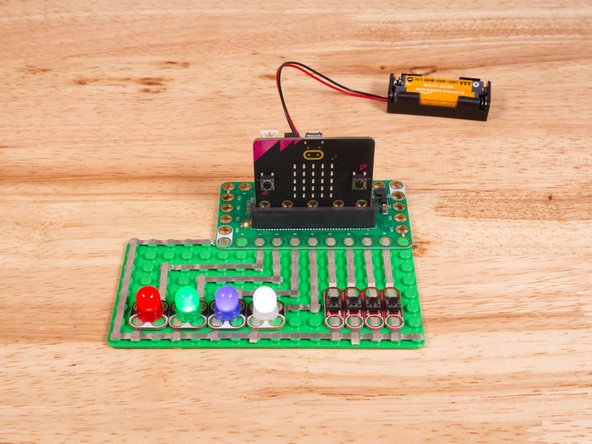
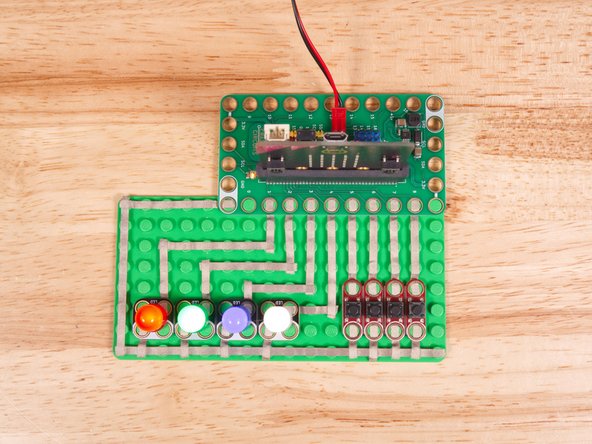
Connect four pushbuttons to a Bit Board to control four LEDs with code.
We'll explore how we can use four pushbuttons as inputs for the micro:bit and control four LEDs as the output.
Video Overview
Featured Document
-
-
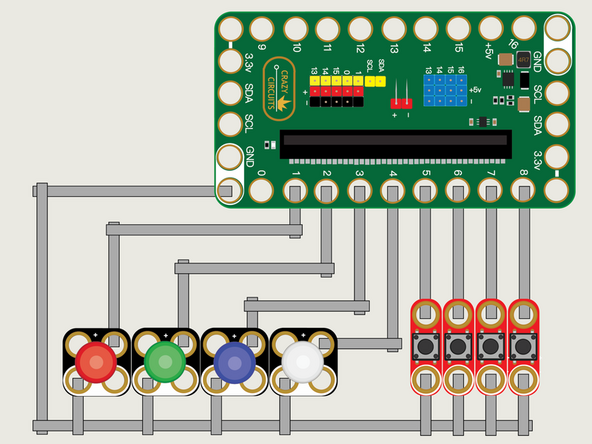
We'll use Maker Tape to connect the four Buttons and the LED to the Bit Board on a LEGO baseplate.
-
If you use a larger baseplate you can space out your your components a bit more, but if you're using a small one pay close attention to the tape paths as there isn't room for deviation on a 16x8 baseplate.
-
Connect LEDs to Pin 1, Pin 2, Pin 3, and Pin 4. Connect Buttons to Pin 5, Pin 6, Pin 7, and Pin 8.
-
And of course we'll connect the Ground (GND) sides of each component to Ground on the Bit Board.
-
You'll notice the Ground on the Bit Board (as well as the LED and other Crazy Circuits components we'll use) is color coded White.
-
While the LED has Polarity our Button does not. If you connect it the other way around it will still work fine. Not all components have Polarity.
-
-
-
If you've never used a micro:bit before you'll want to check out this guide: Bit Board V2 Setup and Use
-
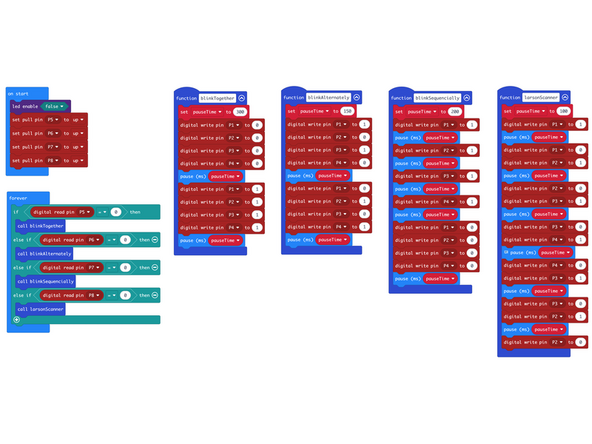
We're going to load the following code for our Four Patterns V1 program: https://makecode.microbit.org/_07jeTq333...
-
We've written four different functions and each can be called by holding down a specific button. Note that you need to press and hold the button. Once you release a button the if is no longer true, so the function stops running.
-
We've seen these functions before (in a previous chapter) so they are not new, but now we've got them all together in one single program.
-
We need to hold down the button if we want the function to get called repeatedly because there is no loop of any kind in the function, which means it just runs once and then returns.
-
We use the word return for what a function does at the end. Sometimes it actually returns a value, and sometimes it returns nothing.
-
-
-
Once the code is loaded it should start running immediately.
-
You can power the micro:bit via the USB cable you used to load the code or you can use a battery pack plugged into the Bit Board.
-
When you press and hold a button a corresponding function will run. You'll get a different light show depending on the button you press!
-
-
-
Follow along with our recorded Live Stream!
-
You can watch the full video of us walking through this project, along with explaining and exploring the code: https://youtube.com/live/LXTZHnrCIRk
-

Attached Documents
