Introduction
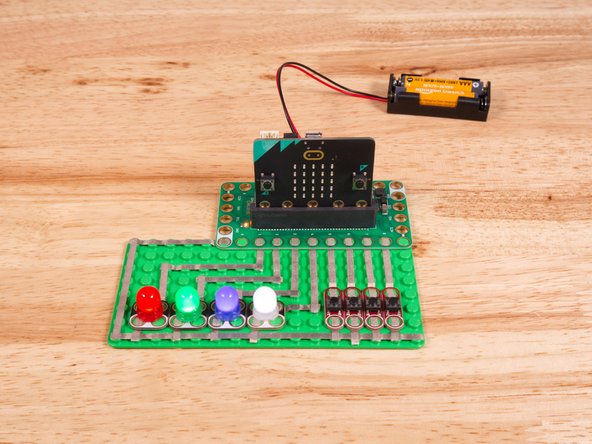
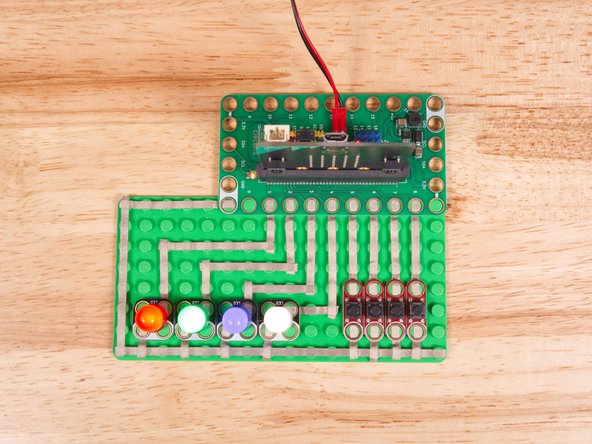
Connect four pushbuttons to a Bit Board to control four LEDs with code.
We'll explore how we can use four pushbuttons as inputs for the micro:bit and control four LEDs as the output.
Video Overview
Featured Document
-
-
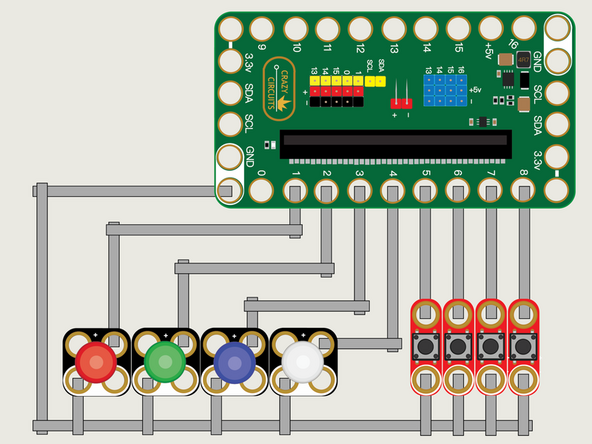
We'll use Maker Tape to connect the four Buttons and the LED to the Bit Board on a LEGO baseplate.
-
If you use a larger baseplate you can space out your your components a bit more, but if you're using a small one pay close attention to the tape paths as there isn't room for deviation on a 16x8 baseplate.
-
Connect LEDs to Pin 1, Pin 2, Pin 3, and Pin 4. Connect Buttons to Pin 5, Pin 6, Pin 7, and Pin 8.
-
And of course we'll connect the Ground (GND) sides of each component to Ground on the Bit Board.
-
You'll notice the Ground on the Bit Board (as well as the LED and other Crazy Circuits components we'll use) is color coded White.
-
While the LED has Polarity our Button does not. If you connect it the other way around it will still work fine. Not all components have Polarity.
-
-
-
If you've never used a micro:bit before you'll want to check out this guide: Bit Board V2 Setup and Use
-
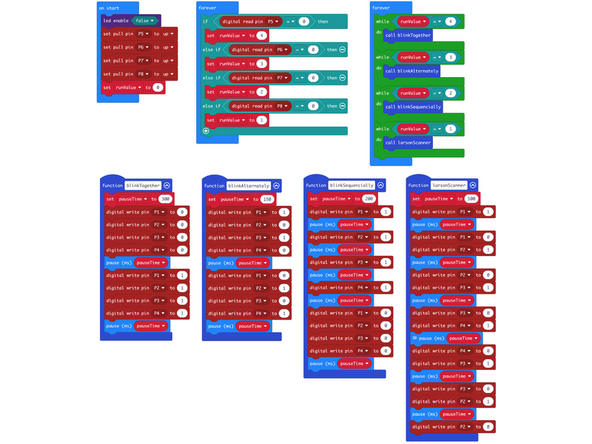
We're going to load the following code for our Four Patterns V2 program: https://makecode.microbit.org/_gWfWw2FvP...
-
We've written four different functions and each can be called by pressing a specific button.
-
We've seen these functions before (in a previous chapter) so they are not new, but now we've got them all together in one single program.
-
This version does not require holding the button down. We use the while loop to keep the function running until the value named runValue changes, which only happens if a button is pressed.
-
-
-
Once the code is loaded it should start running immediately.
-
You can power the micro:bit via the USB cable you used to load the code or you can use a battery pack plugged into the Bit Board.
-
When you press a button a corresponding function will run. You'll get a different light show depending on the button you press!
-
-
-
Follow along with our recorded Live Stream!
-
You can watch the full video of us walking through this project, along with explaining and exploring the code: https://youtube.com/live/LXTZHnrCIRk
-

Attached Documents
