Introduction
This project uses micro:bit, a Crazy Circuits Bit Board from Brown Dog Gadgets, Maker Tape, Cardboard, and Paint to create a flying piggy bank.
Video Overview
-
-
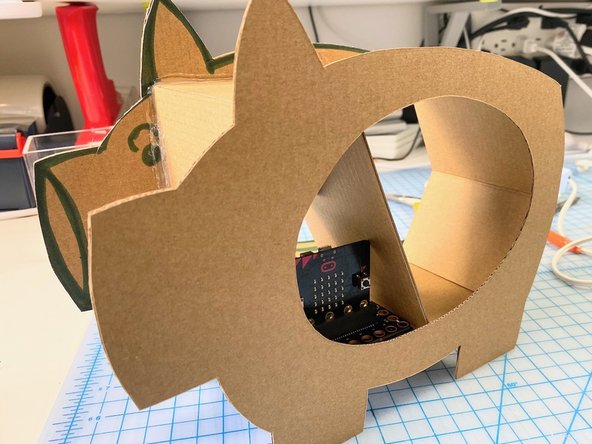
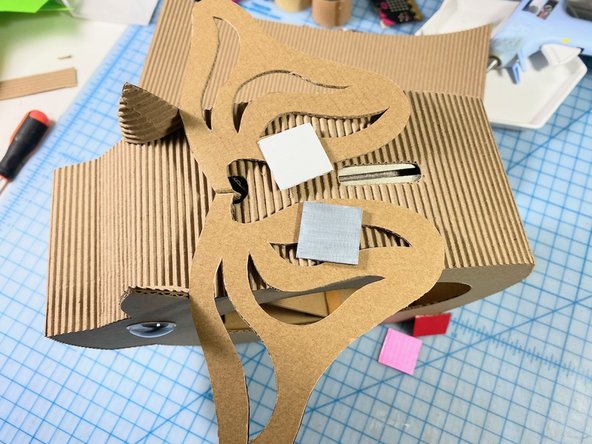
Draw a pig onto cardboard with a large oval in the center. Make sure it is large enough to fit the Bit Board and micro:bit, with extra room for money.
-
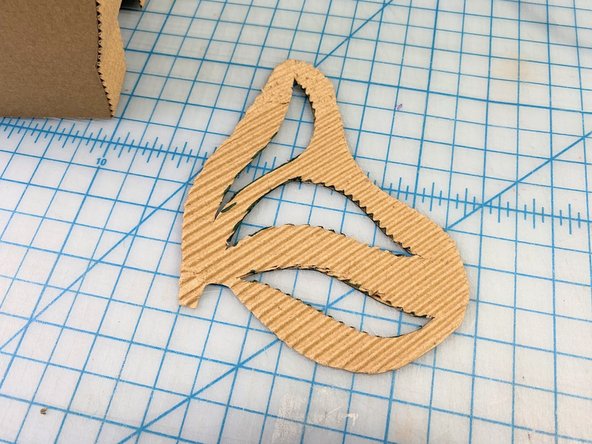
Draw one wing on a separate piece of cardboard to use as a template for both wings later.
-
-
-
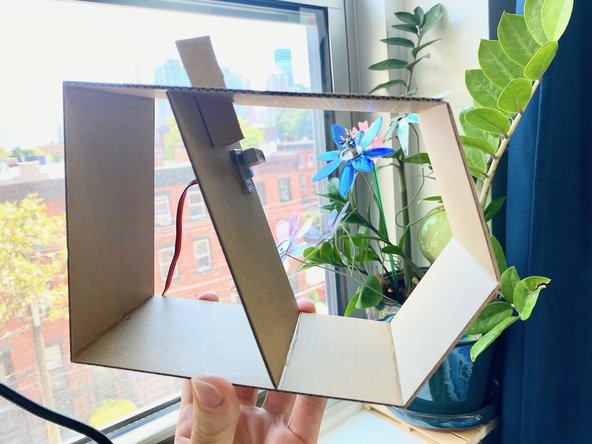
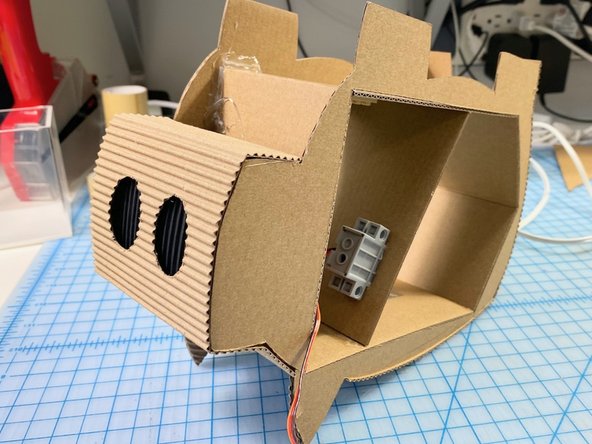
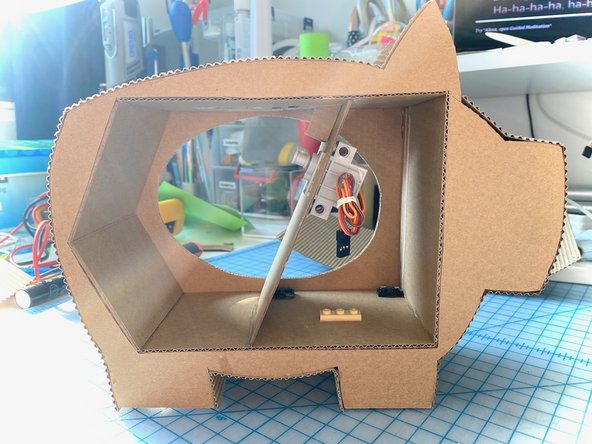
Create a house-shaped box. This will contain the electronics and the money collection area. Our walls were about 3.5 inches deep, and we measured it so that the entire box would fit nicely inside the pig that we drew in Step 1.
-
Use superglue to adhere the sides together. (This will be visible from the inside, so hot glue would not look as nice.)
-
-
-
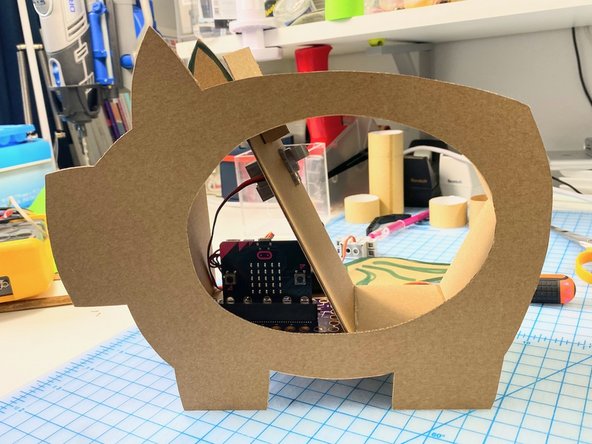
To keep the electronics and the money separate, we made a divider wall.
-
We placed the micro:bit and Bit Board inside the box to make sure we placed the divider in a position that would allow it to fit.
-
We used superglue to hold it in place.
-
-
-
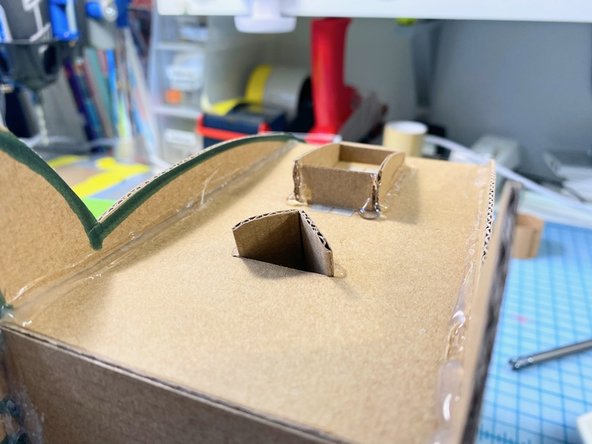
We positioned the servo toward the back of the box so that the arm would be approximately in the center (front to back).
-
We cut a square hole in the cardboard, threaded the motor wires through, and placed the servo into position.
-
-
-
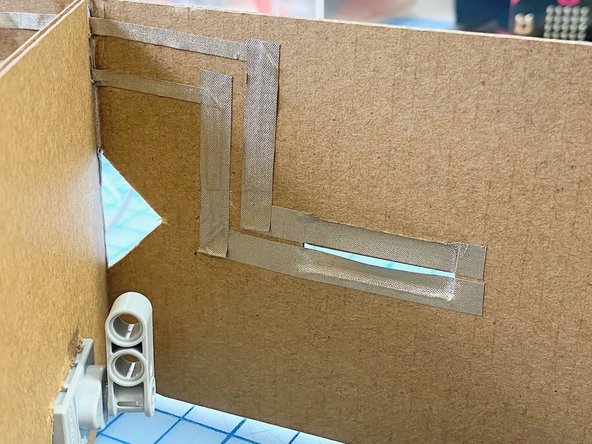
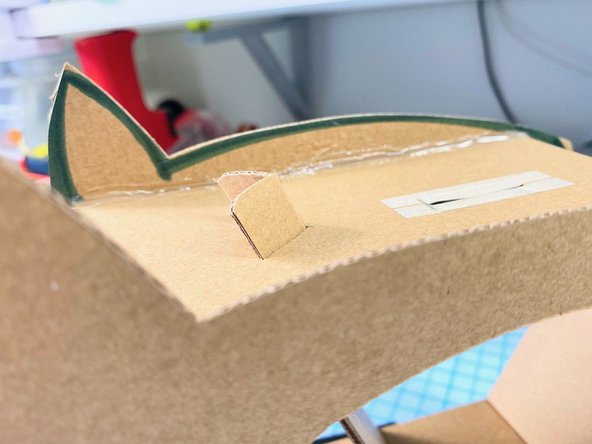
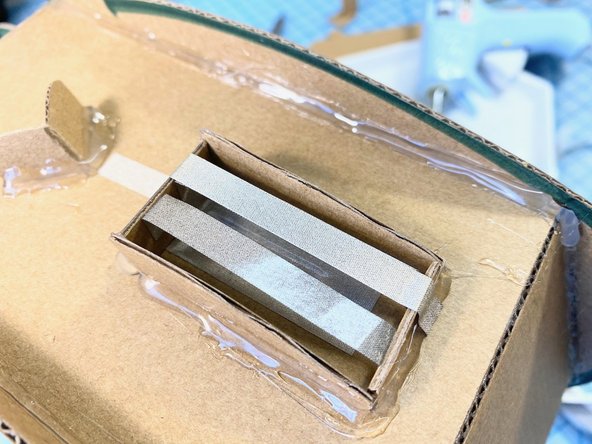
To keep the wings stable, we created a track for the wing wire to travel through. It will have a joint that is connected to the servo head and move it up and down.
-
We chose a triangle-shaped hole to focus the opening and closing of the wings, then folded a piece of cardboard to fit inside.
-
-
-
We used Maker Tape to line the hole on both sides without the two pieces touching. This way, when a coin comes in contact with both of these pieces, it will complete the circuit and trigger the servo.
-
We ran the Maker Tape from each of the two pieces, around the box, and down to where the LEGO connections to the Bit Board were located. One is connected to pin 0 and the other is connected to Ground.
-
-
-
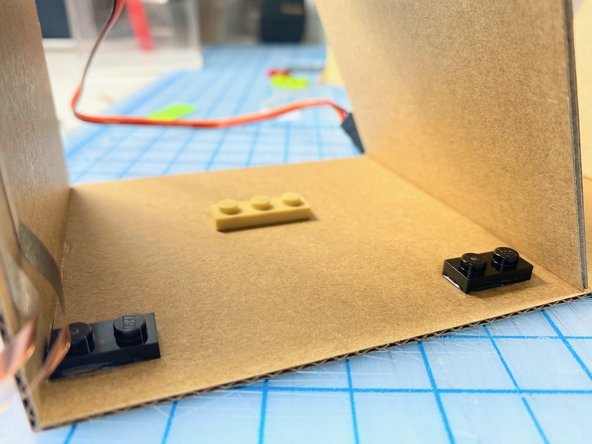
To keep the micro:bit in the same spot, but be able to remove it easily while building, we used superglue to attach the LEGO to the cardboard to match the holes of the Bit Board. To get the positioning right we placed the Bit Board over the LEGO while gluing, then removed it to let it dry.
-
We placed the Maker Tape over the LEGO pegs to connect to the Bit Board later.
-
-
-
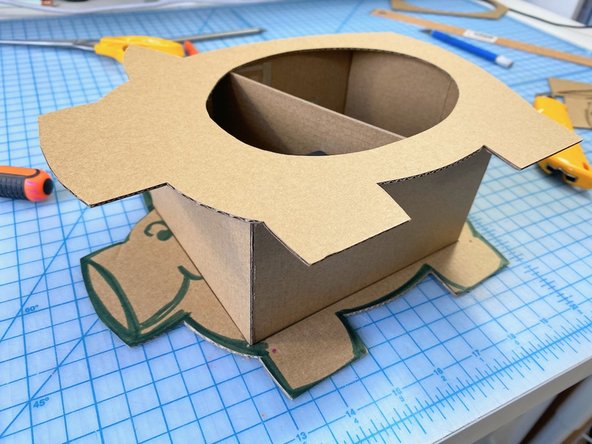
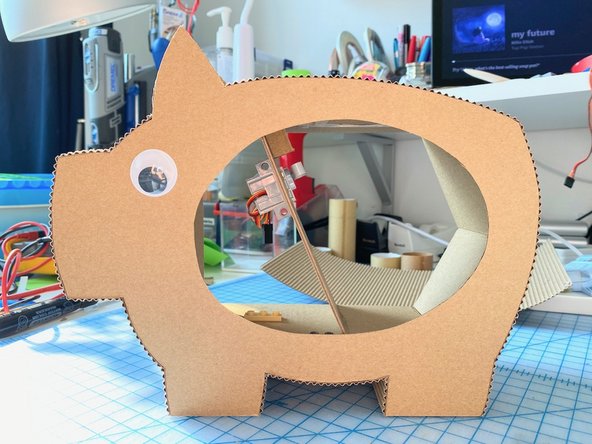
We traced and cut a second pig silhouette out of cardboard, but didn't cut the round hole.
-
Instead, we traced the house shape onto the pig and cut it out. This way, the back would be open, and we could add a door so that we can replace the circuit and retrieve the money!
-
-
-
We stood the pig up and used hot glue to attach the box to the two pig sides. We made sure that all four feet were flat before gluing so that the pig would be sturdy when standing.
-
We used hot glue on the outside of the box between the two pig silhouettes because we would be covering it later with other cardboard (so you won't see it in the end). Hot glue is quicker than superglue (but looks a bit messy).
-
-
-
We cut a curve into the top of the wing channel so that it matched the curve of the pig's back.
-
-
-
Because we were was making this as we go, we realized that we needed to raise up the slot of the pig so that it would be tall enough to touch the top of the pigs back.
-
We created a box to add strength and placed a new set of Maker Tape pieces.
-
-
-
We added more Maker Tape to this taller slot and connected it to the respective pieces below. Luckily It worked just fine! (Whew!)
-
-
-
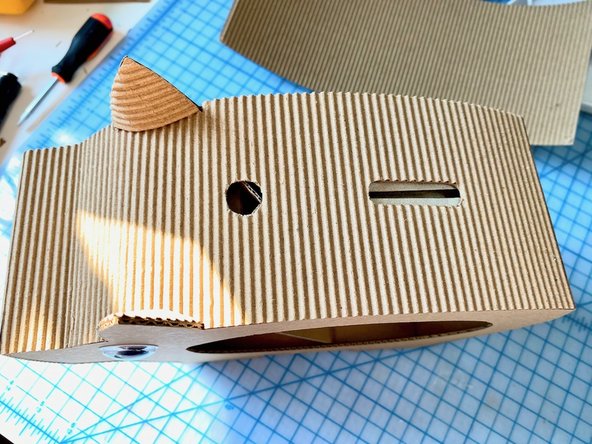
We removed one side from the cardboard to make it bendable and glued it around the exterior of the pig using superglue.
-
We were especially careful to align the cardboard edge on the front side of the pig perfectly.
-
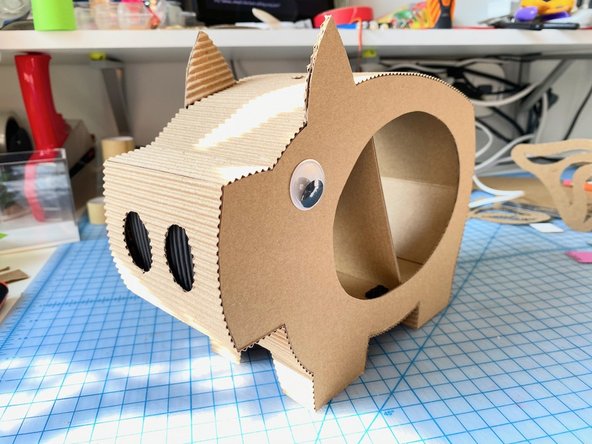
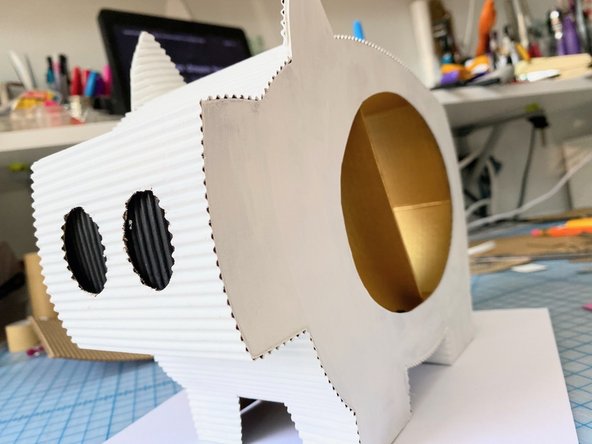
For the front of the nose, we cut out two ovals for the nostrils. Before gluing it in place, we painted another piece of cardboard black and glued it behind the holes. We did this because it would have been harder to paint the interior of the nostrils later. :)
-
-
-
Here are some photos of the front and back of the pig once everything was glued in place. It's looking pretty good! :)
-
-
-
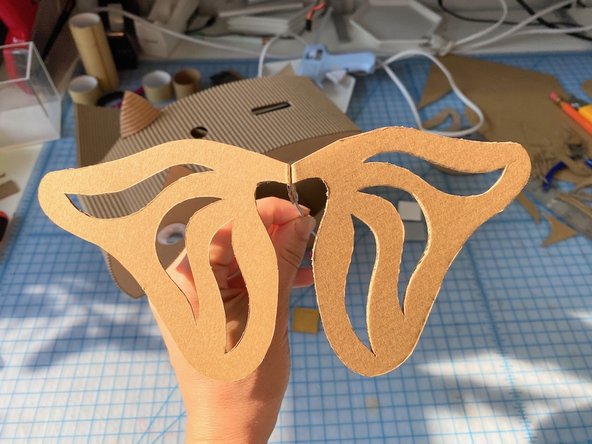
We drew one wing and made a template to cut two more.
-
We attached both wings in the center with a piece of armature wire and folded them outwards.
-
Then we kept folding back and forth on the same spot to make them easily "flappable."
-
-
-
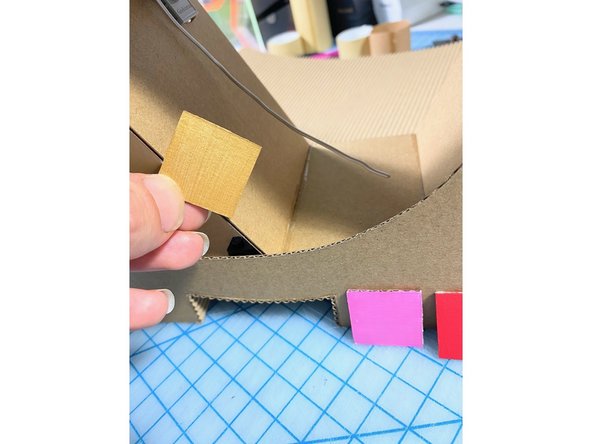
We tested our acrylic paints on cardboard squares to choose colors. (Sometimes paint shows up differently when you paint it on the brown cardboard color.)
-
-
-
We chose to paint the inside gold to reflect the shiny money and exuberance of golden things representing wealth!
-
We painted the exterior of the pig white as a base coat to make the shimmer pink paint pop!
-
-
-
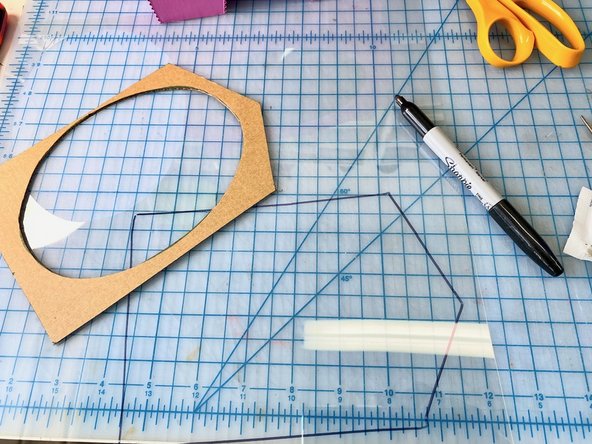
We traced the piece of cardboard that we cut out of the back of the pig onto a piece of craft plastic to act as the window in the front of the pig. We placed it inside and used a dab of hot glue to keep it in place.
-
We did the same for the back door, cutting the house shape out of gold mirror paper to reflect the interior color of the pig. (This also helps make it look like there is more money in there!)
-
-
-
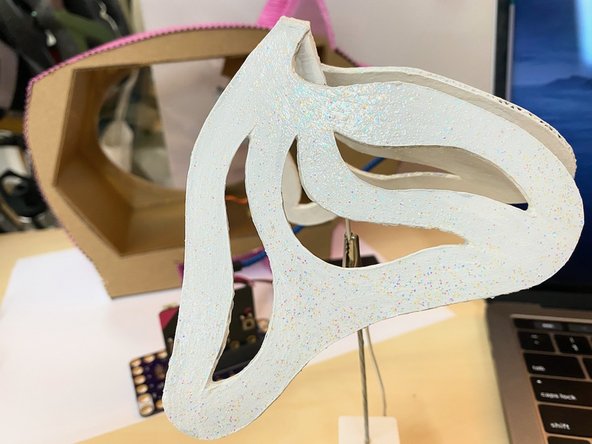
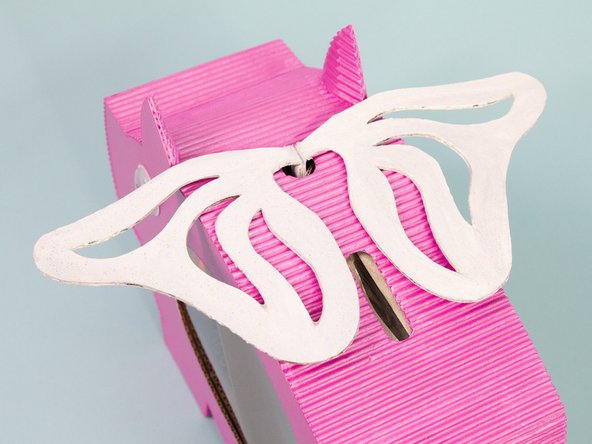
We painted the wings white, then covered them with a coat of glitter Mod Podge to add some sparkle.
-
-
-
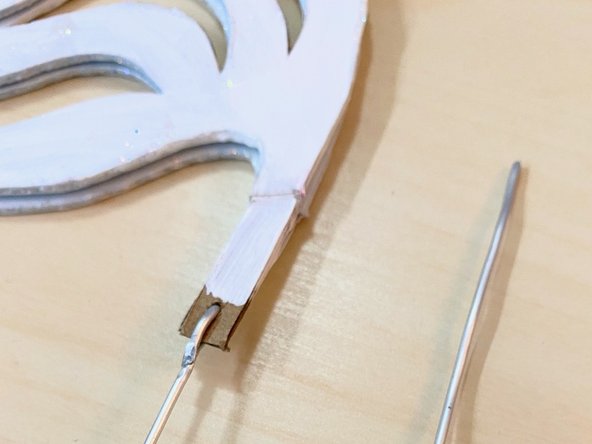
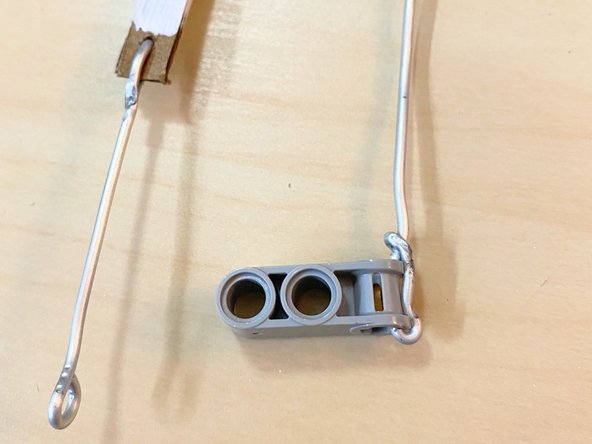
We attached the armature wire to the LEGO piece that goes on the servo and created a chain link connection to the wing wire.
-
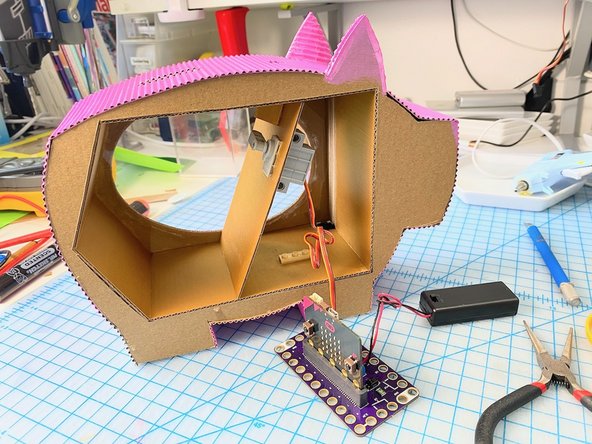
We placed all the electronics into the pig.
-
-
-
We added a pink pipe cleaner for the tail.
-
-
-
We used makecode.microbit.org to program our board. It uses a simple drag and drop block interface.
-
We loaded the following code for our When Pigs Fly program: https://makecode.microbit.org/52127-5192...
-
-
-
We gave the Pig some coins and he flew away! :)
-
Fun Note! Because the Bit Board with micro:bit can do capacitive touch, this flying piggy bank works with paper money too! As long as your fingers touch both pieces of the Maker Tape when putting in a dollar bill, the pig will fly.
-