
Introduction
We absolutely LOVE the new LEGO Star Wars sets that have come out over the last couple of years. They're well designed, fun to build, and look great. What would make them even more fun is if they also moved on their own!
We took an off the shelf LEGO BB-8 set and automated it so the head spins around! Even better, we added sound effects and lighting effects! But if that isn't enough we also added a motion sensor so that it would activate when someone walks by.
Overall this project isn't overly difficult to do, but does take awhile and requires a healthy amount of random Technic LEGO parts to built the gear box area.
Video Overview
Featured Document
-
-
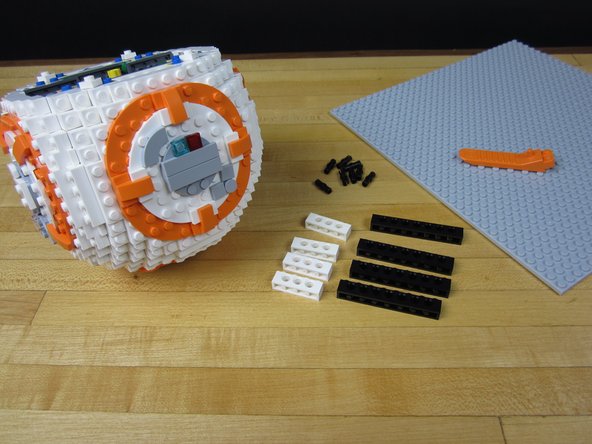
Build your LEGO BB-8 as normal.
-
-
-
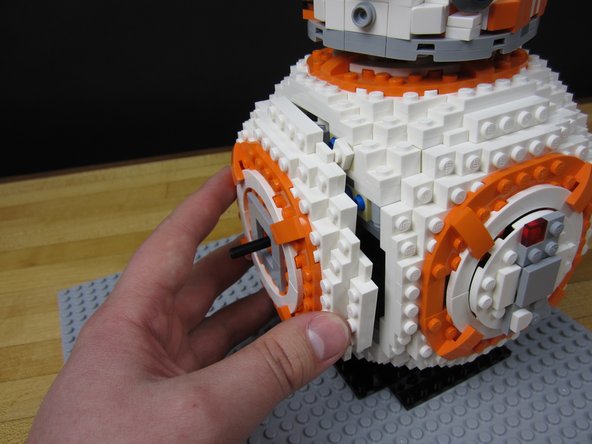
Using a pry tool, remove the side of BB-8 that controls the head.
-
Put inside half of the axel back in if it comes out.
-
-
-
Using 1x4 and 1x8 Technic bricks, construct an adaptor to mount the BB-8 onto your large Base Plate.
-
Remove all the extra parts on the bottom of your BB-8. You want to leave the bottom white area completely flat.
-
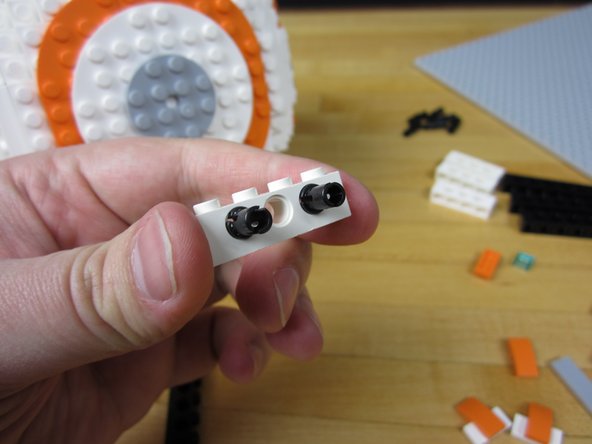
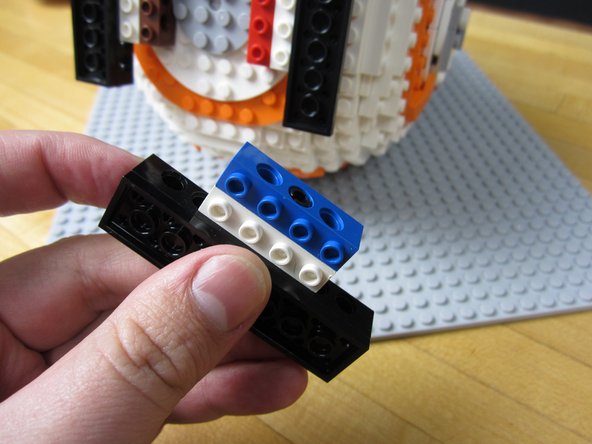
Connect your white bricks UPSIDE DOWN to your black technic bricks.
-
We ended up using two of the 1x4 bricks per adaptor for extra strength, but it's probably not necessary.
-
-
-
Attach your adapters to your BB-8.
-
If possible, use some 2x8 plates to increase the footprint and connection area.
-
As mentioned before, we also added in a second 1x4 brick to be on the safe side.
-
-
-
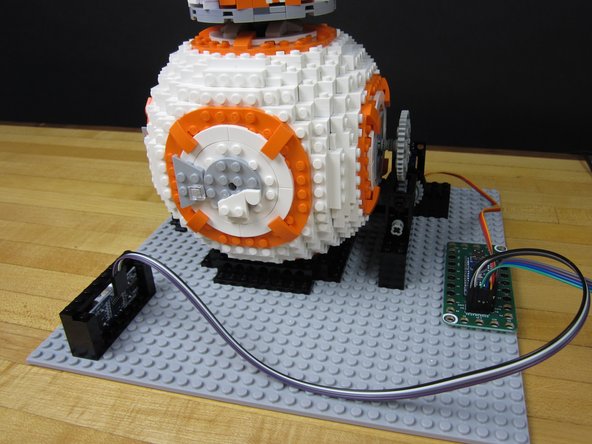
We connected everything to a large base plate.
-
Give yourself some space in the front and back in order to add the rest of your parts.
-
Make sure the empty "gear area" is pointed towards the BACK of your project. We need space for the gearing and electronics.
-
-
-
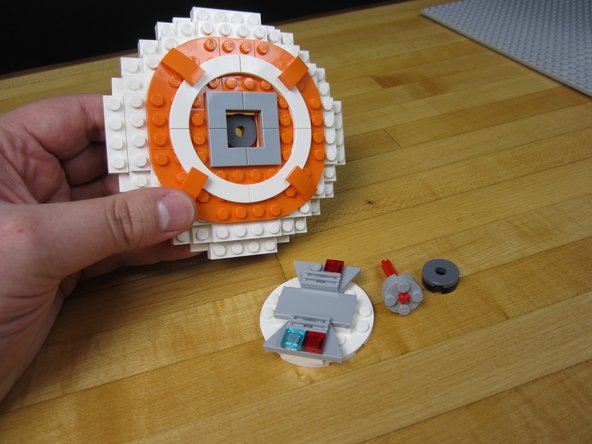
Remove the spinning section from your head control area.
-
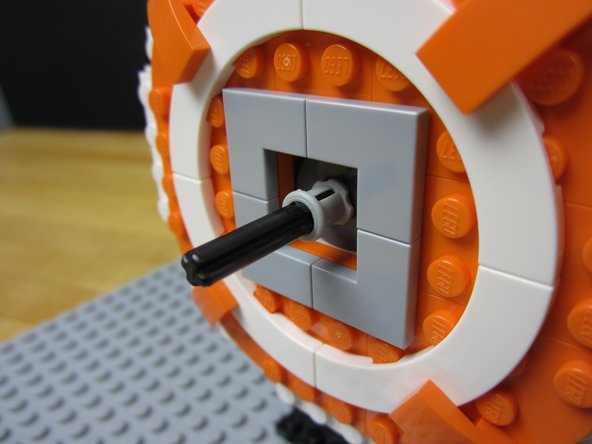
Grab a long size 12 or better axle and attach it to the connector inside the BB-8.
-
Reattach the entire side.
-
-
-
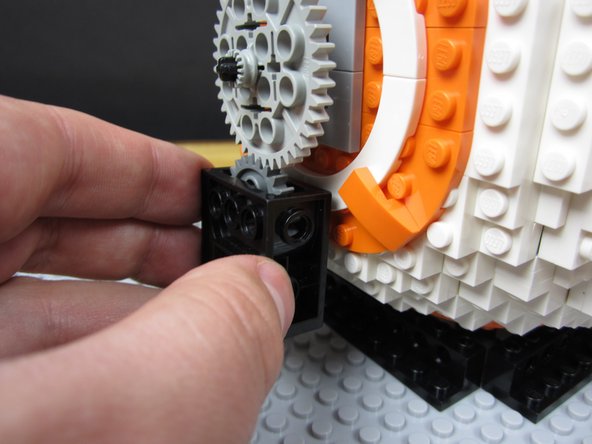
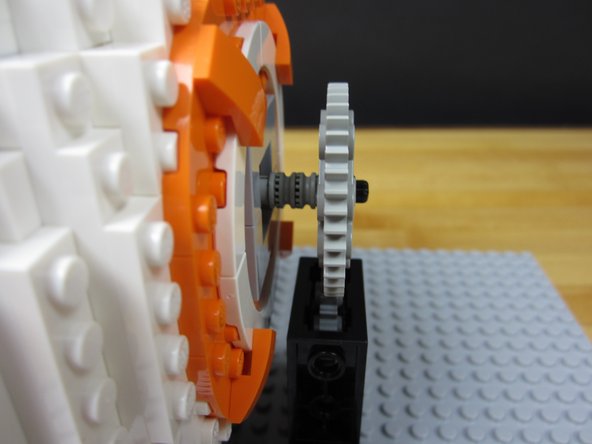
You'll need to attach a couple of different sized spacers before attaching your large Technic Gear.
-
We also added a small bushing to the end of our axle to hold everything tightly in place.
-
-
-
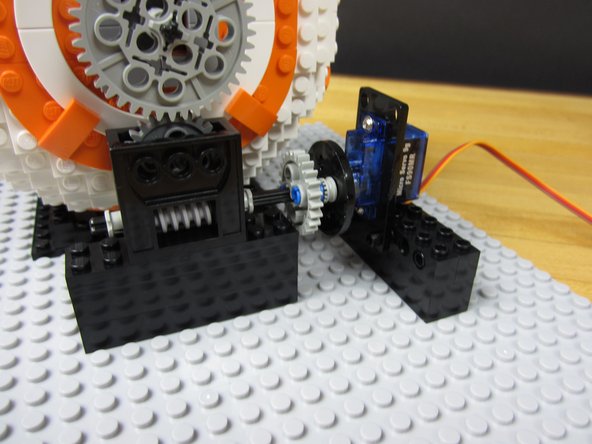
Use a couple of standard LEGO 2x8 sized bricks along with 2 2x8 sized plates to create a platform for your worm drive.
-
Connect everything below your large technic Gear.
-
Adjust parts as needed to make sure everything connects and fits well. Give the axle a spin to make sure they work.
-
-
-
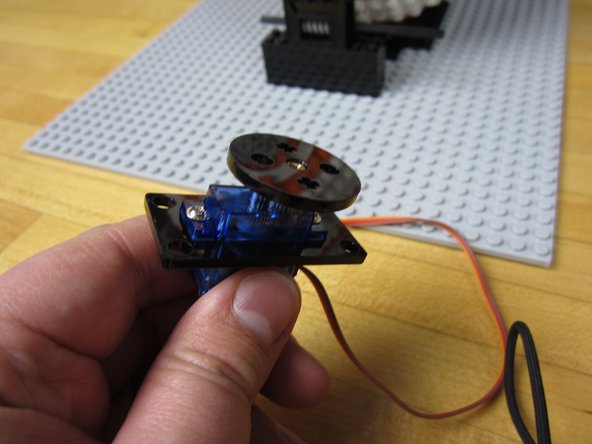
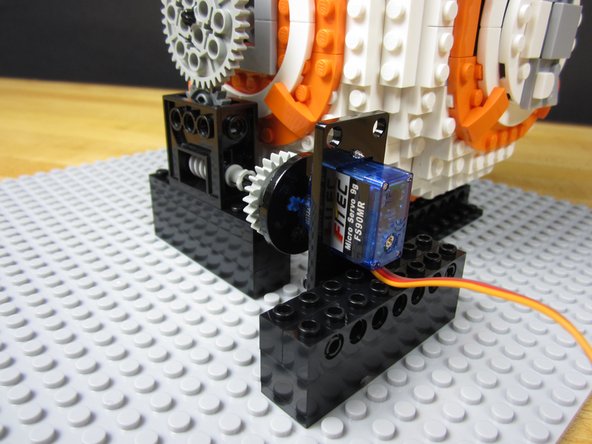
We're using a 9G sized Continuous Rotation Servo with metal gearing, connected to LEGO using our Crazy Circuits adaptors. (Laser cut and open source!)
-
Attach the laser cut Crazy Circuits adaptors to the 9G sized servo.
-
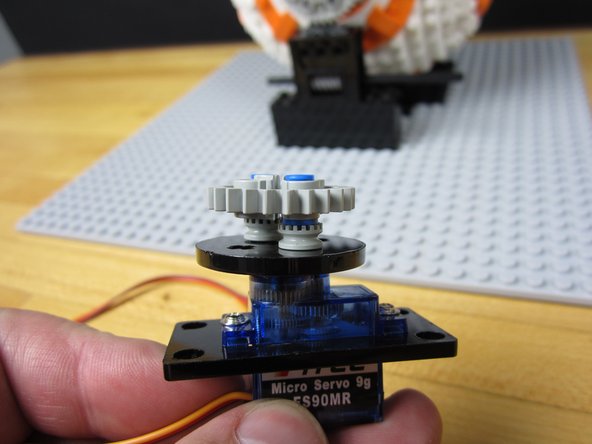
Connect the round Servo Horn (laser cut disc) to the Servo. Using a couple of technic pieces and a gear, build out an adaptor on the end.
-
This allows your servo to directly interface with the axle on the worm drive.
-
-
-
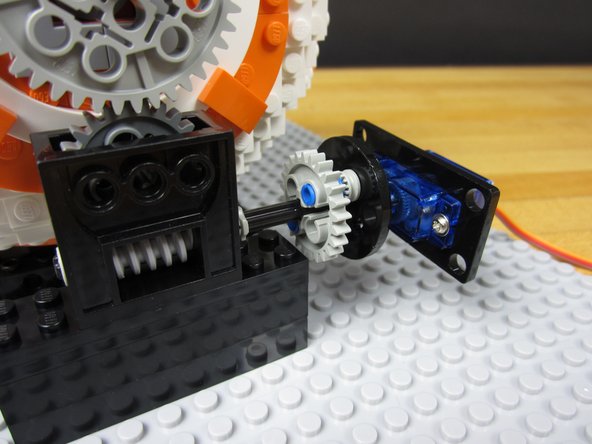
We connected two 1x8 Technic bricks together and then attached the servo to those pieces.
-
Below them is a single 2x8 brick.
-
The main concern here is to keep everything secured and tightly together. The servo moves around a lot and the last thing you want is for your pieces to start popping off the large base plate.
-
-
-
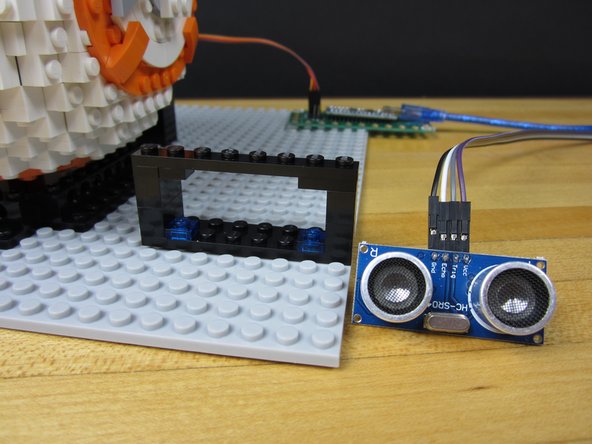
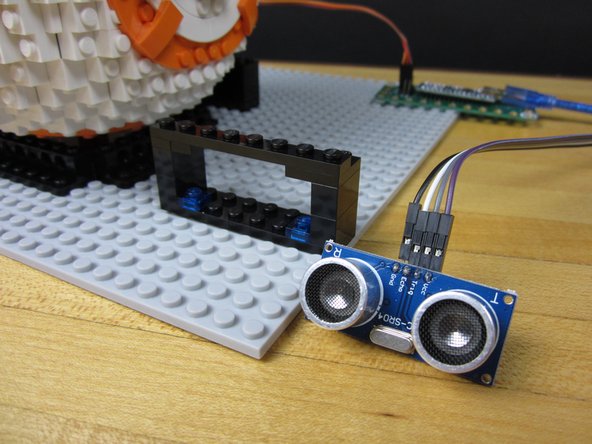
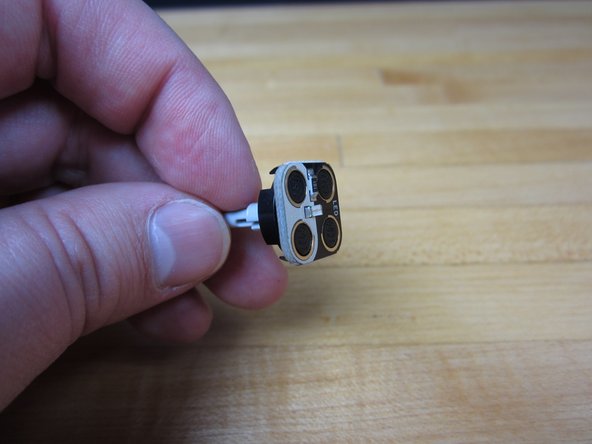
We went all fancy and included an Ultrasonic Motion Sensor. To make it look nice we build a small LEGO based holder for it to hang out in. We can't take credit for this design, we randomly found it in a google image search.
-
Start with a 2x8 plate, attach some 1x2 bricks onto the side, two L shaped plates on the top edge, and a 1x8 across the top. Use a couple of 1x1 plated on the bottom (blue in our design).
-
-
-
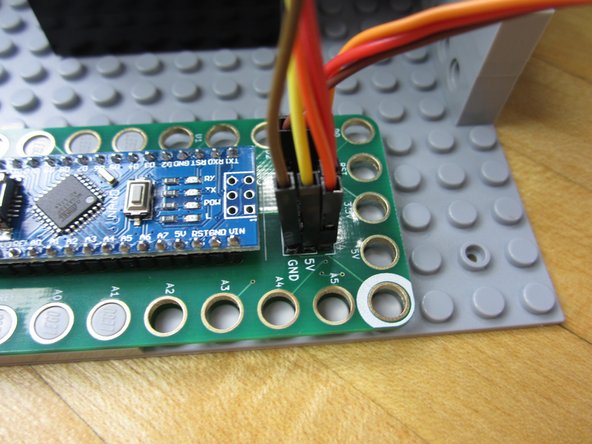
Use two 1x6 or 1x8 plates to create a small platform for the Robotics Board to sit on.
-
You can also plug the Servo into the D3 Row Header Set at this time.
-
-
-
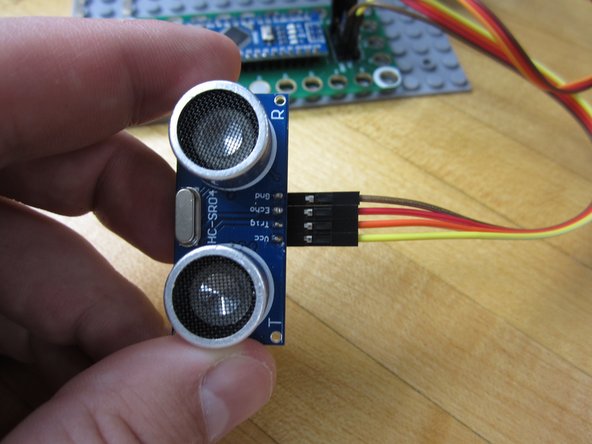
The Diagram at the start of the guide is a good reference to show you how to wire up the Range Finder.
-
Connect VCC to a 5V Pin.
-
Connect Trig to A4.
-
Connect Echo to A5.
-
Connect GND to a GND Pin.
-
-
-
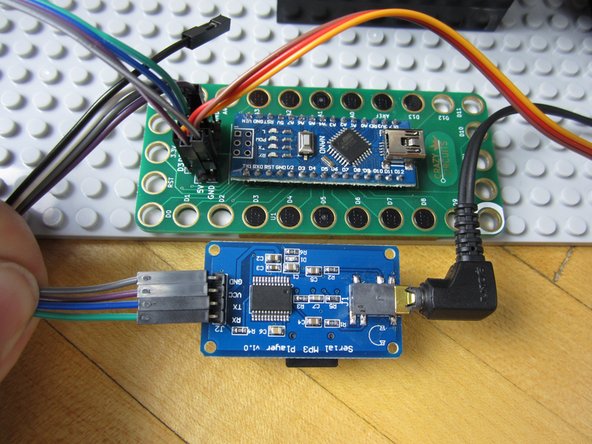
Use the diagram again to help you out.
-
Connect GND to a GND Pin.
-
Connect VCC to a 5V Pin.
-
Connect TX to 5.
-
Connect RX to 6.
-
Online documentation for this board is weird. Trust us, this is the correct wiring.
-
-
-
We grabbed our sound clip via a YouTube Video. You can use any sound file as long as it's a .WAV or .MP3. (We can't give you a sound clip for Copyright reasons.)
-
You'll want to use just one sound clip for our code. Once you find one put it on a micro SD card formatted in FAT.
-
Put the Micro SD Card into the MP3 Player.
-
Make sure you take note as to how long your clip is, as it will be quite helpful when modifying the code.
-
BB-8 sounds are great as well as some classic Star Wars music.
-
-
-
If you've never used our Robotics Board before you'll need to read the user guide and install the right software and drivers.
-
You'll also need to grab and install the NewPing library as well.
-
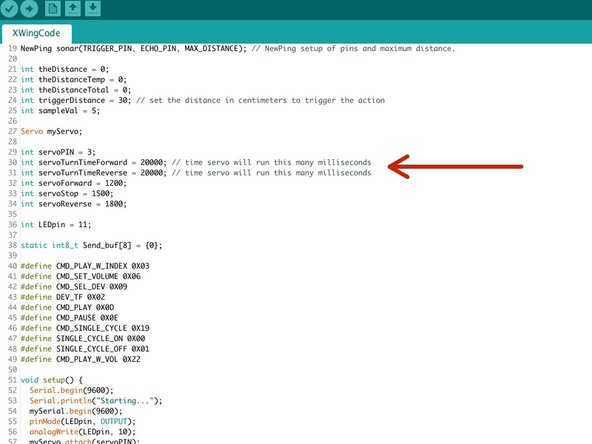
New line. Open up your Arduino software and copy our code into a new project window.
-
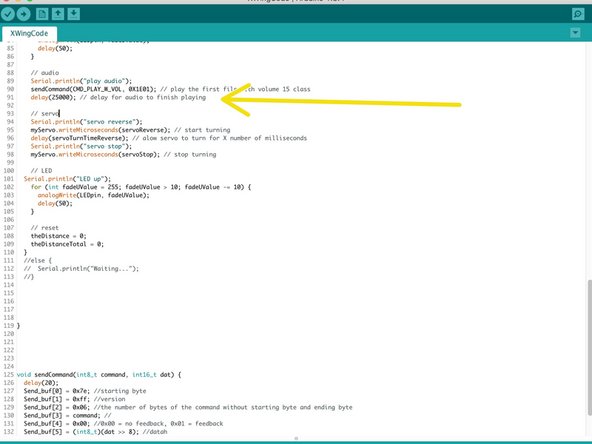
Lines 30 & 31 control how long the Servo will move when opening and closing the wings. We find that 20000 ms is about right. You can change the time by changing those values.
-
Line 91 controls how long the Servo pauses to wait for your audio clip. Since we want the head to spin constantly we just made this a big fat zero.
-
-
-
At this point it doesn't hurt to just test everything out to make sure things are working properly.
-
Attach some headphone or some small speakers to the MP3 player. If you have small desktop (computer) speakers that are wall powered, use them. They work best with this module.
-
Plug your system into a USB power source (computer or wall) and see if everything works. Wave your hand in front of the distance sensor to start everything off.
-
-
-
To give our BB-8 a bit of "flair" we added a blue LED to his head. This was rather easy as there is plenty of room inside for a small battery.
-
Using a prying tool, remove the top of his head.
-
Clear out the couple of spacer bricks on the inside, giving you plenty of room to work with.
-
-
-
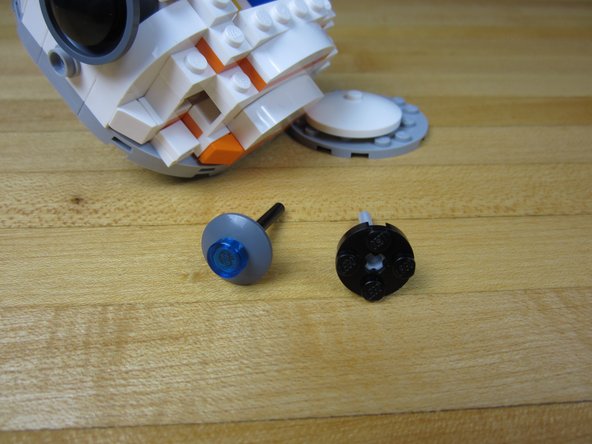
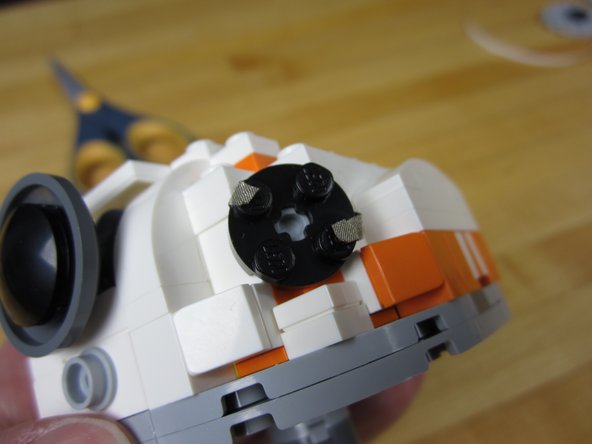
Remove the blue "holographic" emitter.
-
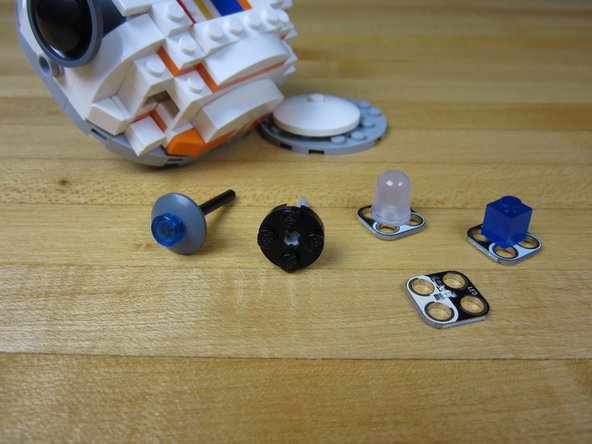
Use a small axle and attach it to a 2x2 round plate.
-
We chose to use a blue "novelty brick" Crazy Circuits LED, but a 10mm or SMT LED will work just fine.
-
-
-
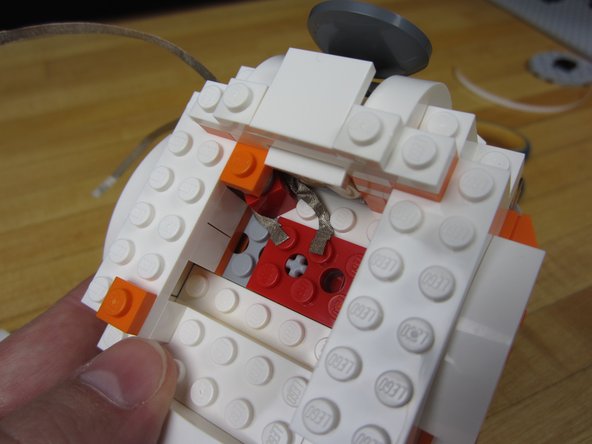
Run two lines of Nylon Conductive Tape from the outside to the inside of the head.
-
Press them down onto two studs.
-
This is a very annoying part of the build. Remove more parts of the head if your fingers are having issues.
-
-
-
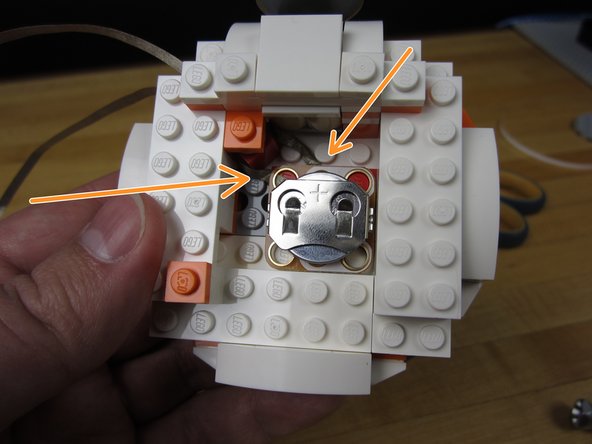
Put a battery into the Crazy Circuits CR2032 Holder.
-
Place the holder inside the head, on top of the studs.
-
Make sure that one line of tape goes to the White (Negative) side of the battery holder and the other goes to the Orange (Positive) side.
-
-
-
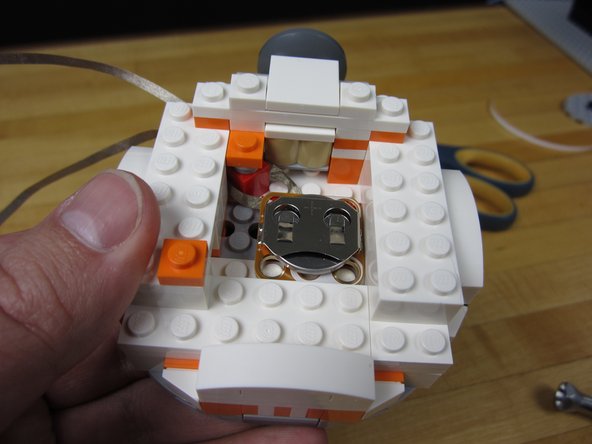
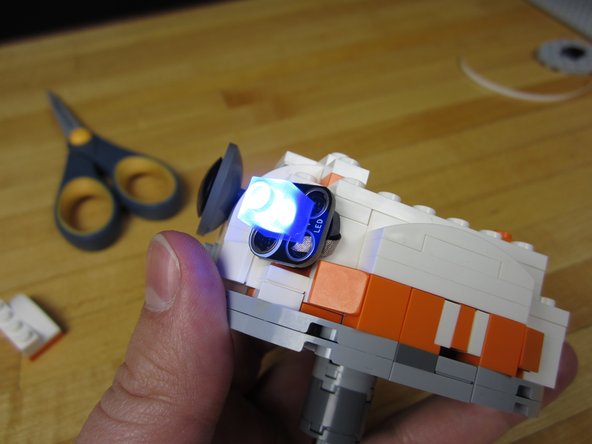
Push your LED holder (2x2 Round Plate) into place.
-
Trim your lines of tape and attach them to the studs.
-
Connect your LED. (If it doesn't turn on, rotate it. You probably have it put on backwards compared to you battery holder.)
-
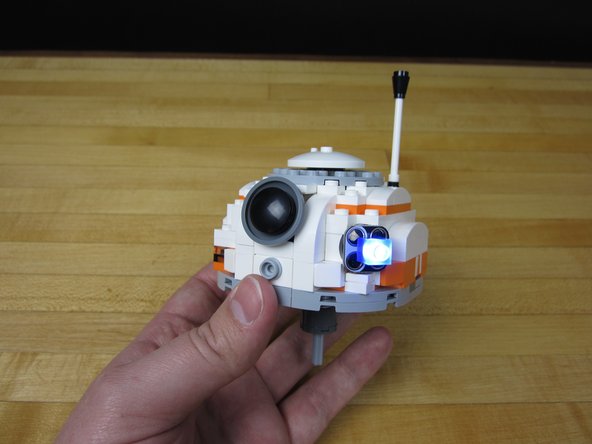
Rebuild the head. Attach it to the body.
-
To easily turn your LED On and Off, just remove it.
-
When putting the head back on go very slowly. The connecting axle will push up through the head and disconnect your battery. Stop pushing when you feel a slight resistance.
-
-
-
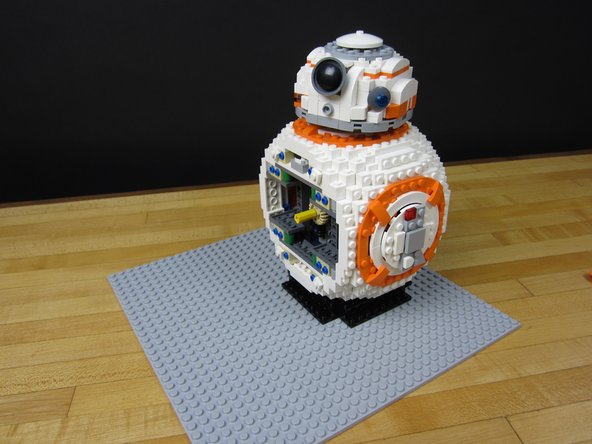
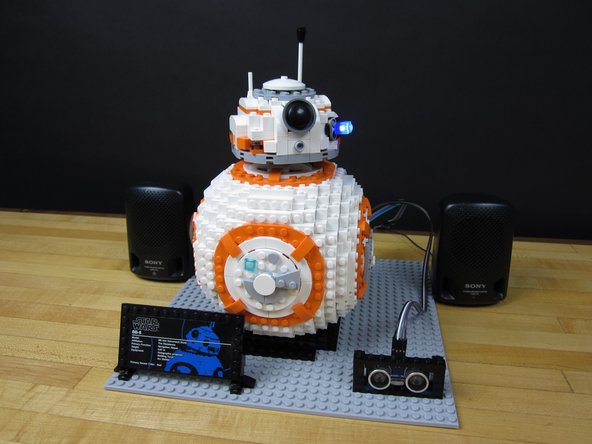
Your BB-8 is now complete! Maybe this IS the droid you're looking for!
-
Apply this build to other LEGO projects. We more or less did the same build with our X-Wing and Clone ARC Fighter.
-


Attached Documents
