
Introduction
Note: This is a project that predates our Rover Tank. This is a complex project requiring many components. We recommend you look at the simplified Rover Tank Body guide instead.
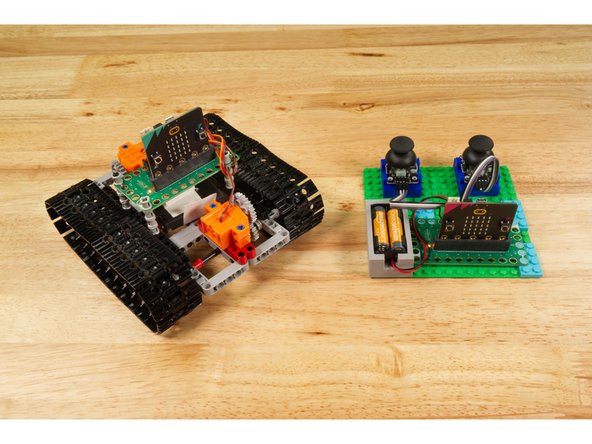
This tank can be controlled with our LEGO Tank Remote Control (Prototype).
Parts
- Crazy Circuits Bit Board
- micro:bit
- Brick Compatible 360 Degree Servo × 2
- LEGO Beam Frame 5 x 7 (64179) × 6
- LEGO Large Tread Link (57518 / 88323) × 58
- LEGO Technic Sprocket Wheel 40.4 (57519) × 6
- LEGO Beam 15 (32278 / 64871) × 4
- LEGO Beam 7 (16615 / 32524) × 4
- LEGO Technic Pin with Friction Ridges and Slots (2780 / 61332) × 26
- LEGO Long Pin with Friction (6558 / 42924) × 4
- LEGO Bushing (6590 / 42798) × 30
- LEGO Half Bushing (32123 / 42136) × 4
- LEGO Axle 8 (3707) × 8
- LEGO Axle 5 (32073) × 2
- LEGO Gear with 16 Teeth Unreinforced (4019) × 2
- LEGO Gear with 24 Teeth (3648 / 24505) × 2
Video Overview
-
-
Tank Steering works differently than steering for a car. Most cars have rear wheels that are fixed and cannot turn/pivot left or right, and front wheels that can turn/pivot left or right. The turning/pivoting of the front wheels allows the car to make left and right turns (while moving) in addition to just going forward and backward.
-
For a tank the wheels do not turn/pivot left or right, but by spinning the "wheels" (which typically have a set of tracks attached to them) a tank can drive left or right, or even spin around clockwise or anticlockwise depending on if the wheels on opposite sides of the vehicle are turning the same direction or opposite directions.
-
Tank steering is similar to how a wheelchair works. If both wheels spin the same direction one of them rotating faster will allow for turning of the vehicle. If they are spinning opposite directions the vehicle will spin around.
-
Our Obstacle Avoiding Robot (micro:bit) and WALL-E projects both use a form of tank steering.
-
-
-
We're going to use a Crazy Circuits Bit Board along with a micro:bit and two LEGO Compatible 360 Degree Servos. (We'll power it all with a 2 AAA Battery Pack.)
-
The electronics portion of this project will be very easy since we just need to plug the two servos into the Bit Board and then plug the battery pack into the Bit Board.
-
-
-
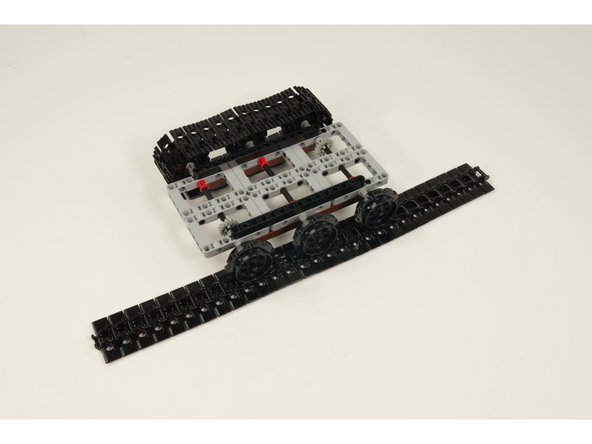
Gather all of the LEGO parts needed to build the tank chassis.
-
If you don't have these exact parts you can often make substitutions. For instance, if you have longer axles they can still work, or if you have half bushings instead of regular bushings they should work fine.
-
LEGO is about building what you want to build! Consider our guide a suggestion for your own build which should be based on the parts you have available.
-
-
-
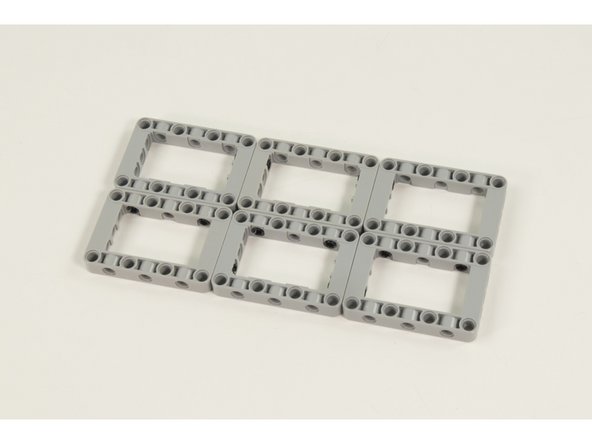
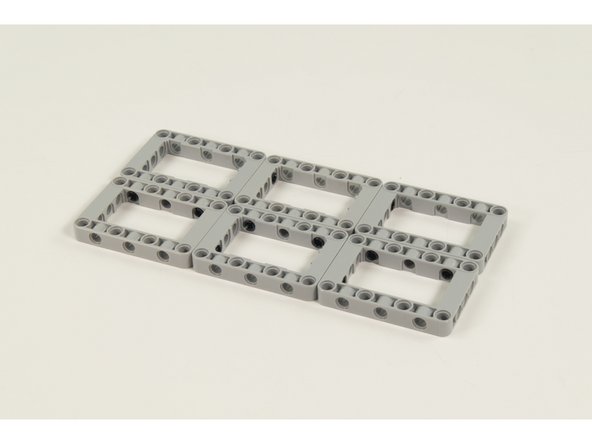
The frame will be built using 6 LEGO Beam Frame 5 x 7 parts.
-
Connect them as shown using 10 LEGO Technic Pin with Friction Ridges and Slots
-
-
-
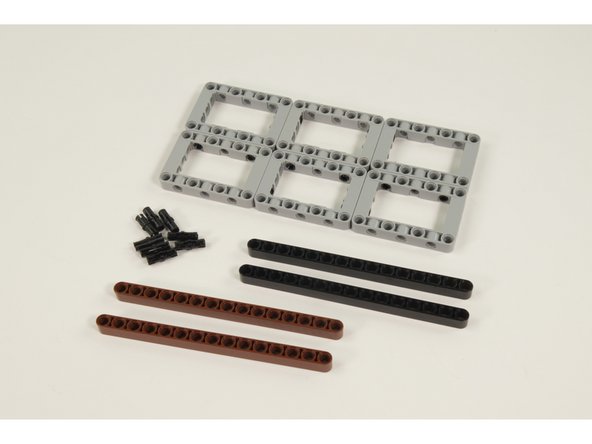
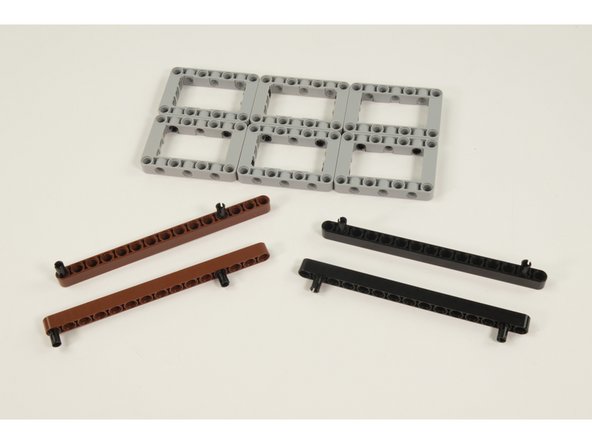
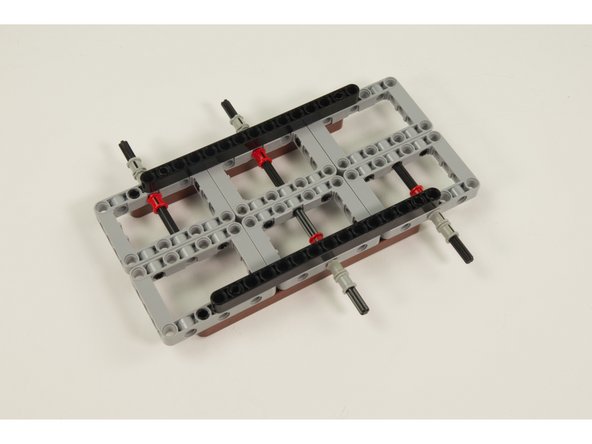
Once your frame is complete you'll want to reinforce it using 4 LEGO Beam 15 parts.
-
On the top we placed them centered between the front and rear of the vehicle.
-
On the bottom we offset the beams by one hole on the LEGO frame, putting them closer to the rear of the vehicle.
-
You'll need to make sure you leave the center hole on the side of each frame piece open for the axles to go through,
-
-
-
Next we'll add 4 of the LEGO Axle 8 pieces.
-
Use 12 LEGO Bushing to hold the axles in place.
-
Each axle gets three bushings. Two on the outside, and one on the inside.
-
We need to use two separate axles for each "pair" of wheels because they need to spin independently of each other. One long axle won't work.
-
-
-
The last two axles will be used to drive the vehicle, so we need to add a LEGO Gear with 16 Teeth Unreinforced along with a LEGO Half Bushing.
-
Like the first four axles, there are two bushings on the outside, and then the gear and the half bushing go on the inside of the frame.
-
-
-
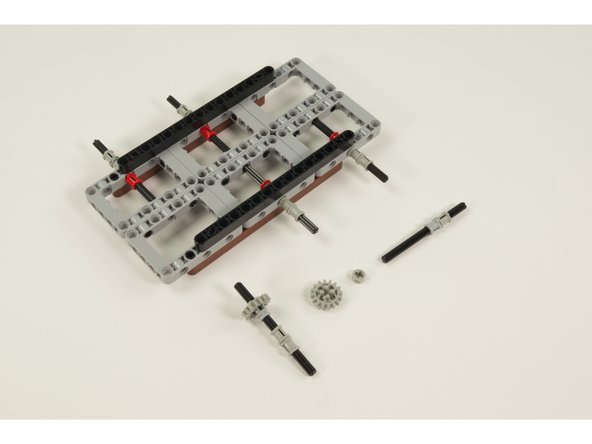
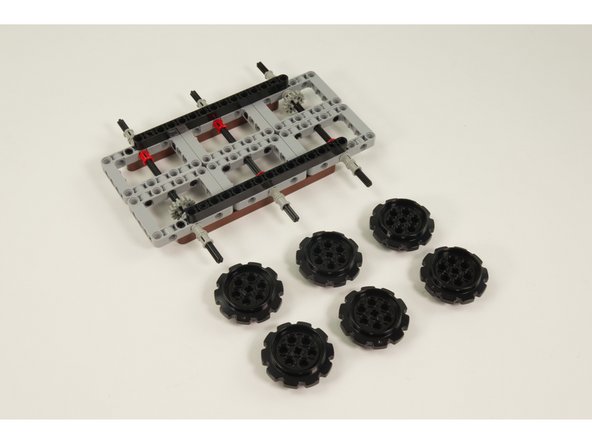
Slide the 6 LEGO Technic Sprocket Wheel 40.4 parts onto the axles.
-
At this point your vehicle could probably roll around!
-
In the next step we'll add the treads so the drive sprockets can transmit motion to the other sprockets.
-
-
-
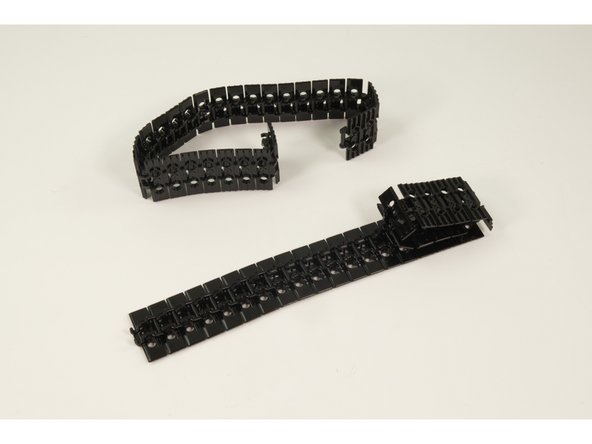
You'll need 58 LEGO Large Tread Link to build your treads as each side uses 29 treads.
-
Connect the treads together to form two sets of treads, but don't connect them into a loop yet!
-
-
-
Wrap the treads around the sprockets and attach into a loop by clicking the two end treads together on each set of treads.
-
You should now have a full set of treads on each side of your tank!
-
-
-
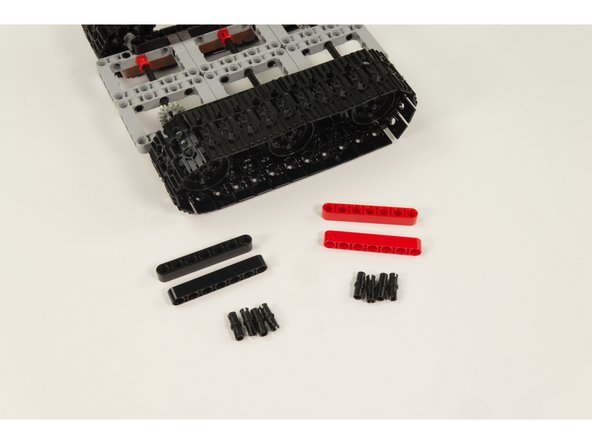
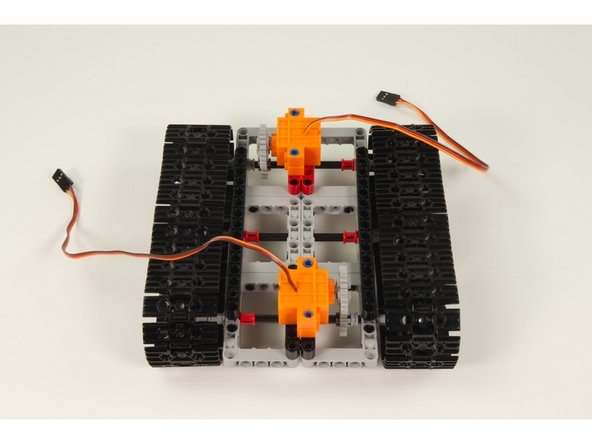
We'll use the 4 LEGO Beam 7 parts to raise and mount the servos to the proper position.
-
Use 2 LEGO Technic Pin with Friction Ridges and Slots for each beam and connect them to the frames as shown.
-
-
-
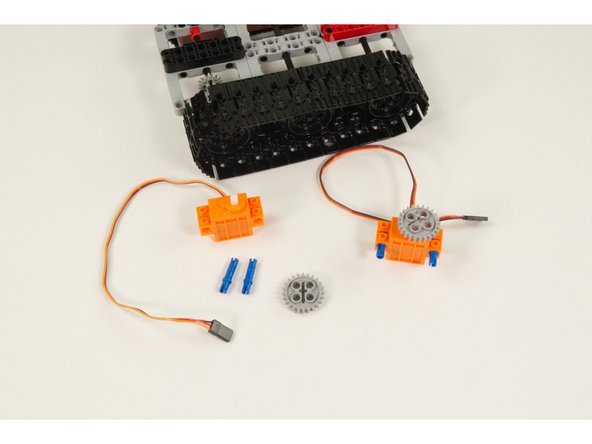
For each servo press a LEGO Gear with 24 Teeth into place on the servo shaft.
-
For each servo use 2 LEGO Long Pin with Friction parts to attach the servo as shown,
-
Make sure the servo wires are facing upward.
-
Make sure the gears line up when putting the servos in place.
-
-
-
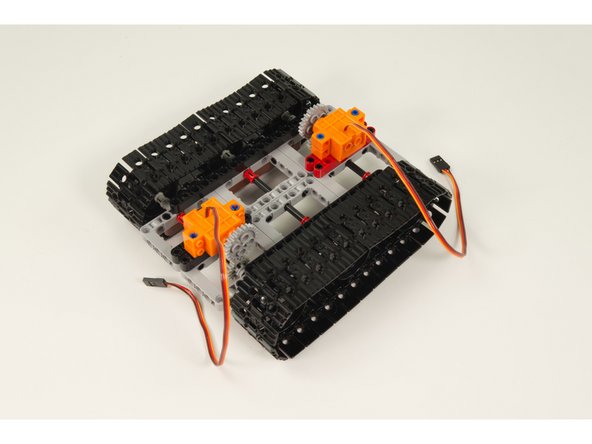
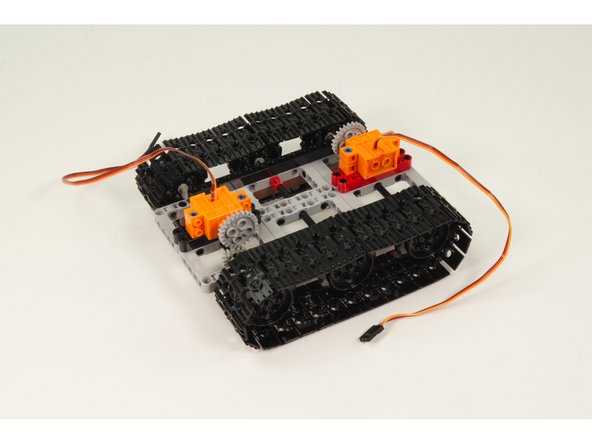
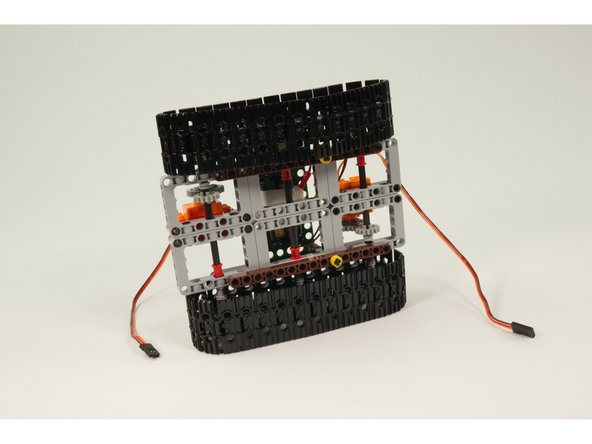
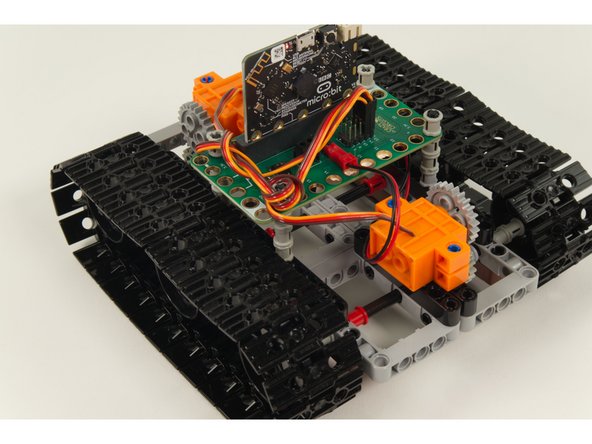
You should now have a complete tank chassis!
-
Fun fact: In vehicle building this is what would be referred to as a rolling chassis.
-
We still need to add power & control. Also known as batteries and a micro:bit
-
-
-
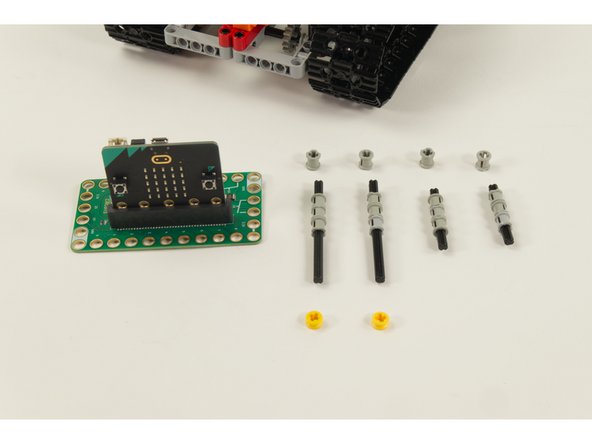
Gather the LEGO parts shown so we can attach our Bit Board to the tank chassis.
-
We're basically making 4 "legs" for the Bit Board so it can be fit into the frame pieces of the chassis.
-
As always, if you don't have these specific parts, others can work. Longer axles? No problem! Less bushings? You can probably still make it work.
-
-
-
Slide 3 of the LEGO Bushing parts onto a LEGO Axle 8.
-
Repeat using a second LEGO Axle 8 and 3 more LEGO Bushing parts.
-
Do the same with the two LEGO Axle 5.
-
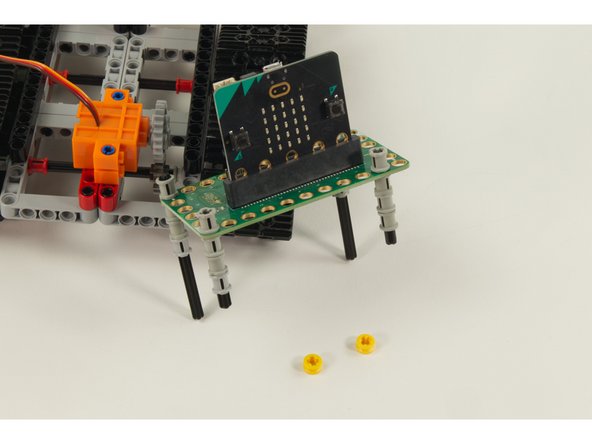
Place the Bit Board onto the "legs" and add 4 LEGO Bushing pieces to the top.
-
You should have a Bit Board with 4 adjustable legs ready to mount to the tank chassis.
-
-
-
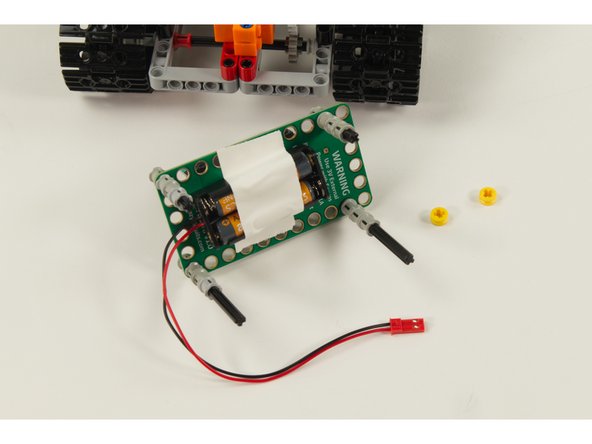
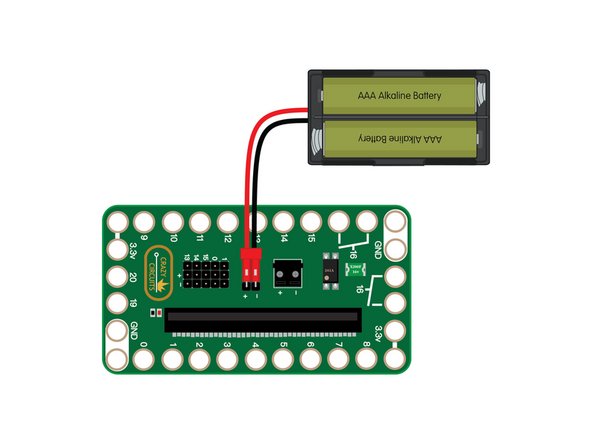
We chose a very simple method of adding the 2 AAA Battery Pack. We just taped it to the bottom of the Bit Board!
-
Alternately, you can find a way to mount it to the tank chassis beneath the Bit Board, but we thought this method was easy and allowed it to work as one single unit.
-
Once you've got the assembly ready you can slide it into the holes of the frame.
-
You can add 2 LEGO Half Bushing to the bottom to hold the Bit Board in place if you want. (Totally optional!)
-
-
-
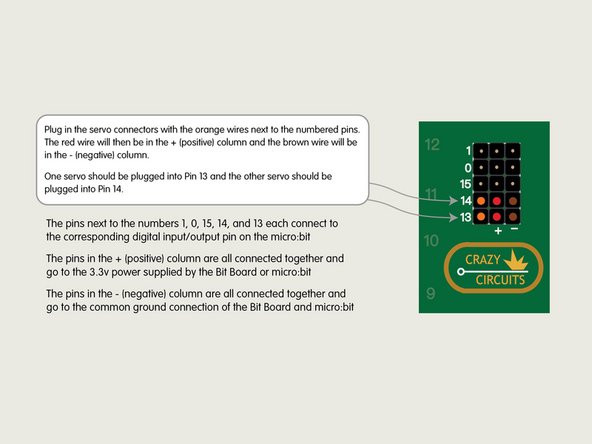
With the Bit Board mounted onto the tank chassis we can now plug in the servos.
-
Plug in the servo connectors with the orange wires next to the numbered pins. The red wire will then be in the + (positive) column and the brown wire will be in the - (negative) column.
-
One servo should be plugged into Pin 13 and the other servo should be plugged into Pin 14.
-
With the servos connected we're ready to load the code onto the micro:bit, so let's keep going!
-
-
-
Connect a USB cable to the micro:bit and then plug it into your computer.
-
We'll be using makecode.microbit.org to program our board. It uses a simple drag and drop block interface.
-
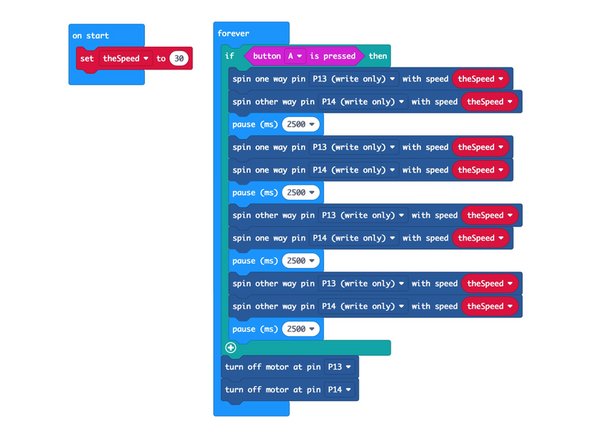
We're going to load the following code for our Tank Motion program: https://makecode.microbit.org/_iwd5Vt2kK...
-
Load the code, but don't press the button yet! We're not quite ready...
-
-
-
Okay, you've got your tank assembled and the code is loaded. We're almost ready to test.
-
If you've still got the USB cable connected you can remove it now.
-
If the tank is on a table you might want to put it on the floor.
-
You'll need to connect the battery pack to the Bit Board for power.
-
One more thing! Make sure the wires running from the servos and the battery pack are not in danger of getting hit by the treads! Secure them away from the treads using LEGO, tape, or rubber bands.
-
Okay, we're ready for testing!
-
-
-
The code won't do anything when you first load it onto your micro:bit as it's waiting for you to press a button.
-
So as long as you've disconnected the USB cable, plugged in the battery pack, and placed the tank on the floor...
-
You can press Button A on the micro:bit!
-
Your tank should go through a series of movements. It should go straight, turn left, go backwards, turn right, and then stop.
-
Remember that in the code we set our speed to 30 which is slow, but good for testing. Later we'll change it to 100 for maximum speed!
-
Did it work? If not, re-check all the previous steps. If everything did work properly, we can keep going!
-
-
-
There's no doubt our LEGO Tank is totally awesome... but what would make it more awesome?
-
How about a Remote Control for our Tank? Check out this guide LEGO Tank Remote Control (Prototype) and you'll be commanding your tank from afar in no time!
-


Cancel: I did not complete this guide.
One other person completed this guide.
