Introduction
Connect an Audio Player Board to the Bit Board and control playback of sounds with the micro:bit
Video Overview
Featured Document
-
-
We're going to use simple buttons to trigger our sounds, but you can later swap them for other input or sensors. You can even create paper switches using Maker Tape.
-
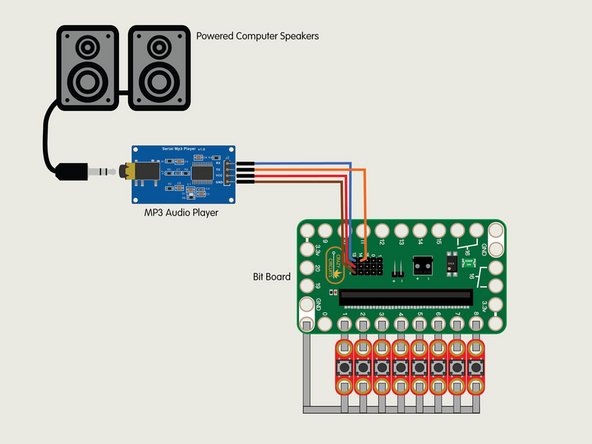
Using Maker Tape connect eight Crazy Circuits Standard Pushbutton Chips as shown. Each button will connect to a pin (1 through 8) and will also connect to GND (ground).
-
Buttons do not have a polarity, which means you cannot connect them backwards. If a button doesn't work make sure you've got a good electrical connection with the Maker Tape.
-
-
-
The "YX5300 MP3 Player Module" is a common audio board that can be found on Amazon and other web sites. It has four pins we'll need to connect to our micro:bit using F/F Jumper Wires.
-
Connect RX from the Audio Player to Pin 13 on the Bit Board.
-
Connect TX from the Audio Player to Pin 14 on the Bit Board.
-
Connect VCC to any pin in the + (positive) row.
-
Connect GND to any pin in the - (negative) row.
-
The Bit Board will provide power to the Audio Board using the + and - pins and control it using the TX (transmit) and RX (receive) pins.
-
-
-
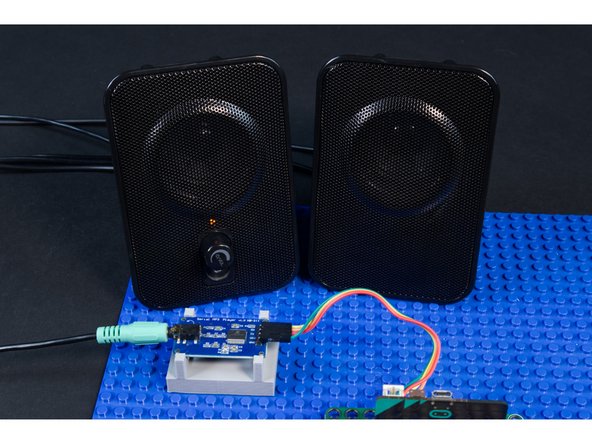
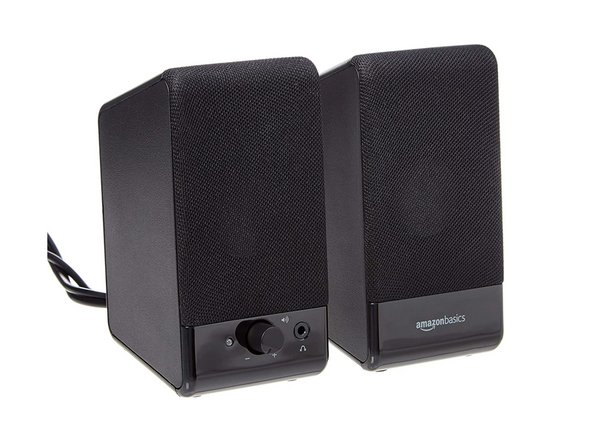
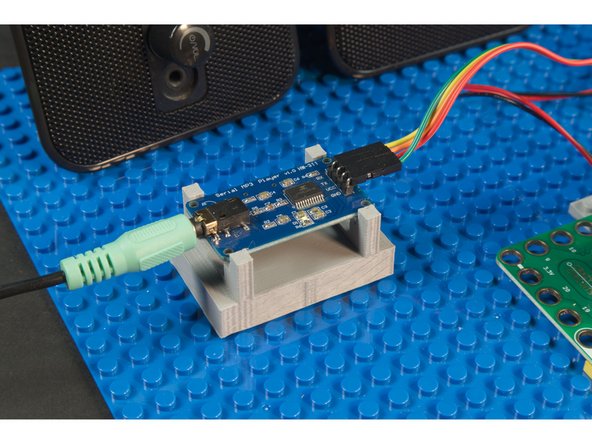
The audio player has a 1/8" stereo jack suitable for headphones or computer speakers. Any powered computer speakers with a 1/8" stereo plug should work fine.
-
If you use an unpowered speaker it will still work, but be much quieter. You can also use headphones if you prefer.
-
-
-
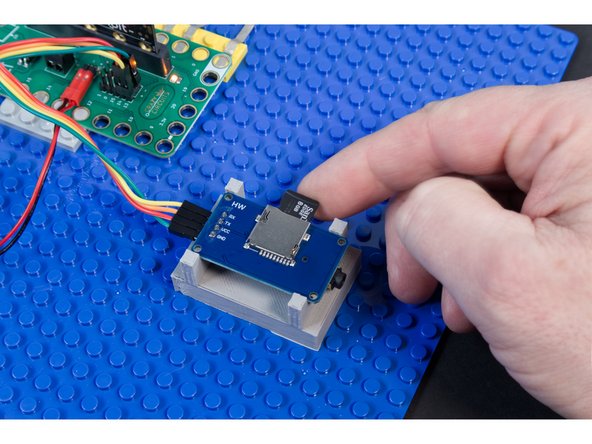
You will need audio files. The module will work with MP3 files and WAV files.
-
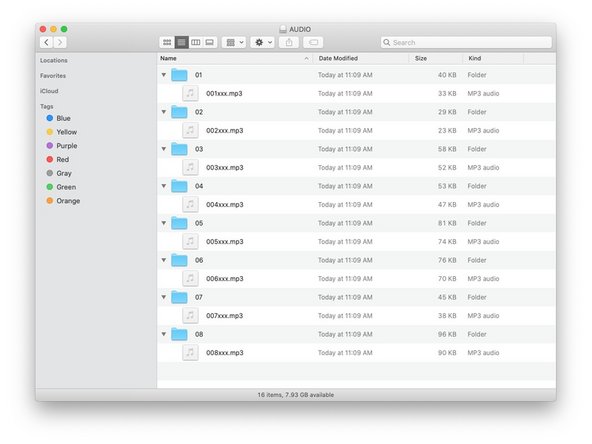
The files must be named appropriately, and placed in folders that are name appropriately.
-
Notice that folder 01 has a file named 001xxx.mp3 - This is the naming structure you'll need to use so the audio module can recognized the files.
-
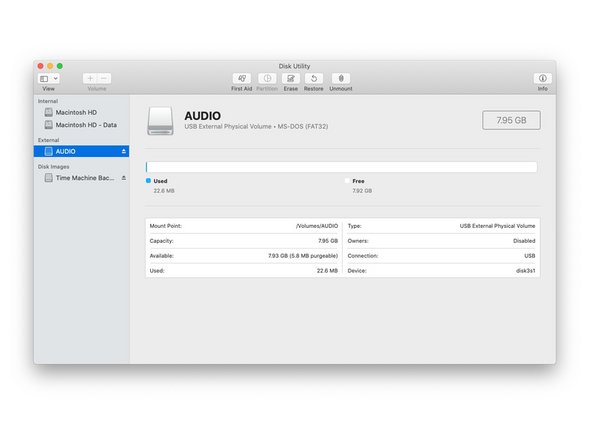
The SD card will need to be formatted as an MS-DOS (FAT32) volume for the audio player to recognize it.
-
If you are using macOS it is a good idea to reformat the SD Card using disk utility each time you load a new set of files.
-
-
-
If you are not using macOS you can skip this step... If you are using macOS keep reading!
-
macOS creates some invisible files called "dot underscore' files, but these files can confuse the audio player when they are found on the SD Card. We have a solution for that...
-
First, each time you load a new set of sound files, it is recommended to reformat the SD Card using Disk Utility. Just erase the SD Card and make sure you choose MS-DOS (FAT32) format. Once erased, copy your new sound files to the SD Card.
-
You may still have the "invisible files" problem, so if the wrong sounds are playing or the module is doing something unexpected, download DotClean from GitHub and follow the instructions (also shown in the video for this step.)
-
Download DotClean for macOS: https://github.com/raster/DotClean
-
-
-
Connect a USB cable to the micro:bit and then plug it into your computer.
-
We'll be using makecode.microbit.org to program our board. It uses a simple drag and drop block interface.
-
We're going to load the following code for our MP3 Audio Player program: https://makecode.microbit.org/_VoJ8UrC9F...
-
Our code is pretty simple. We're setting up eight pins to work with buttons, and configuring the pins for the audio player. We then check for a button press and play the appropriate audio files.
-
-
-
You can power the micro:bit via a USB cable or by plugging a 2 AAA Battery Pack into the Bit Board.
-
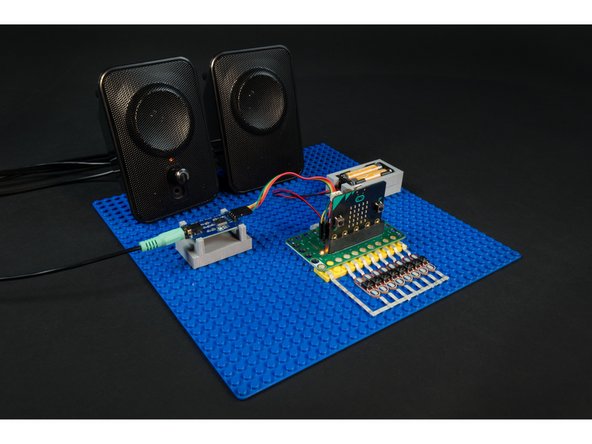
Make sure you've got your SD Card in the audio board, make sure you've speakers plugged into the audio board, turn on your speakers... and press a button!
-
Did you hear a sound? If so, it works! Check all the buttons... do they each play a sound? Good!
-
If anything doesn't work as expected, double-check all of your connections, and re-read the steps for the SD Card. It can be a bit tricky the first time you prepare the sound files.
-
Cancel: I did not complete this guide.
One other person completed this guide.


