
Introduction
Connect a small OLED Display to the Bit Board and control it using MakeCode on the micro:bit. Display text and simple shapes.
Video Overview
Featured Document
-
-
An OLED (or organic light-emitting diode) is a type of light-emitting diode (LED) in which the emissive electroluminescent layer is a film of organic compound that emits light in response to an electric current.
-
Without getting too deep into the science of it, OLED displays are small screens you can connect to a micro:bit or other electronics controller to display text and graphics.
-
OLED Displays (like most electronic components) have come down in price in recent years. We found a 5-pack for under $15 on Amazon.
-
We'll cover connecting an OLED Display to a micro:bit using our Bit Board, and share code and examples of how you can use it.
-
OLED Displays come in all different sizes. The one we are using is listed as 128x64 (resolution). It can work at 3.3v to 5v DC, so it's perfect for most microcontrollers.
-
-
-
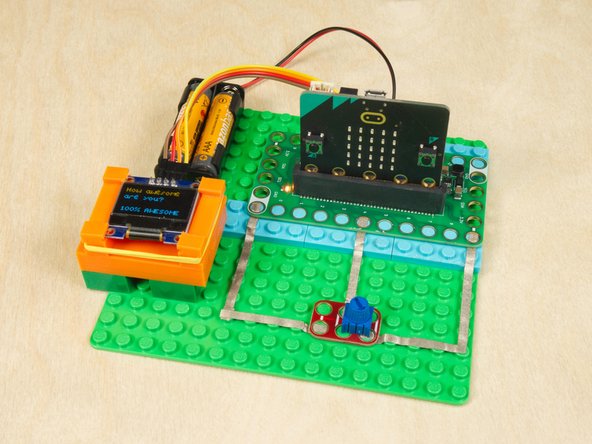
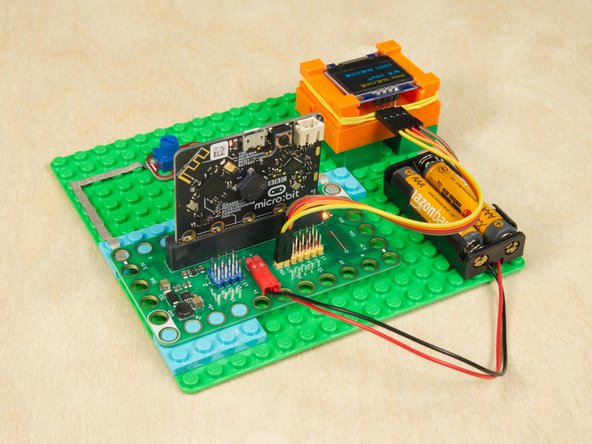
The OLED Display will connect to the Bit Board using the I2C bus.
-
We have a potentiometer connected to Pin 4 to read an analog value as our input.
-
We connect the OLED Display module to the Bit Board using the SDA and SCL pins.
-
We also need to provide power to the display, so VCC and GND from the display connect to any of the + (Positive) and - (Negative) pins on the Bit Board.
-
-
-
Connect a USB cable to the micro:bit and then plug it into your computer.
-
We'll be using makecode.microbit.org to program our board. It uses a simple drag and drop block interface.
-
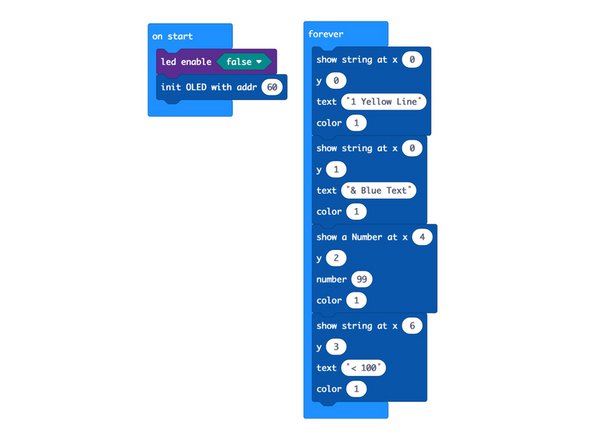
We're going to load the following code for our OLED Test program: https://makecode.microbit.org/_ivdauuMce...
-
You code should run after it's loaded onto the micro:bit and you should see text appear on the OLED Display.
-
-
-
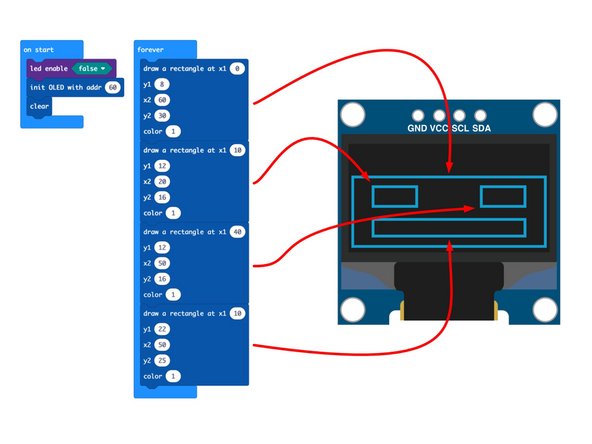
The OLED Display isn't just limited to text. You can also draw lines and rectangles, as well as turn on individual pixels.
-
Now load this code for our OLED Rectangle Face program: https://makecode.microbit.org/_eLvFDa8EP...
-
You should see a simple face displayed on the screen. (It's just four rectangles.)
-
-
-
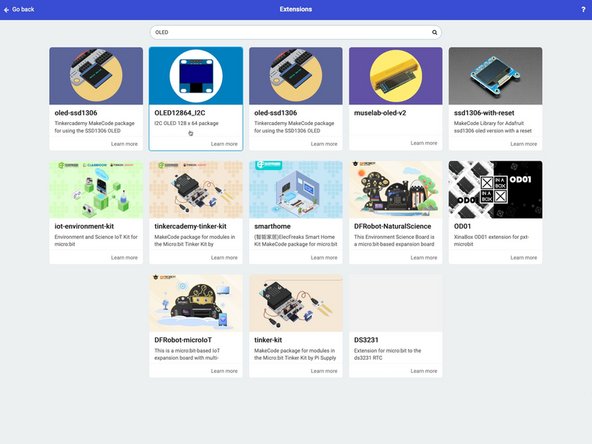
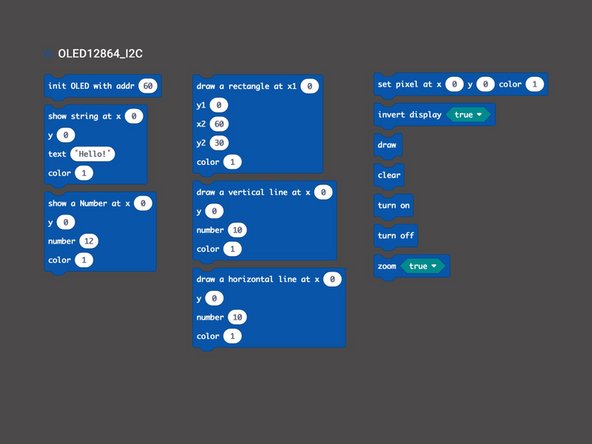
There are a few different extensions in MakeCode for using OLED Displays with the micro:bit
-
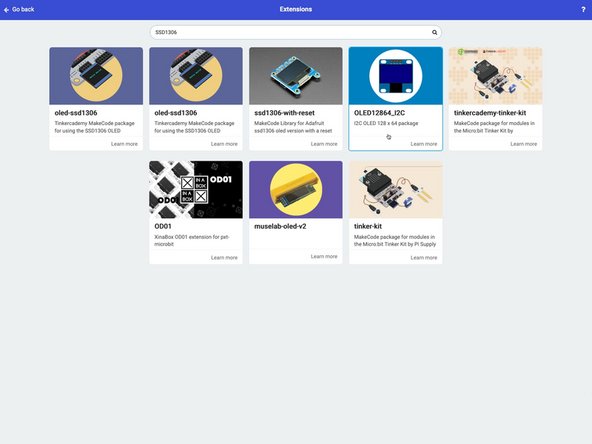
You can search for OLED and you'll get a lot of results. We searched for SSD1306 (since this is the controller chip used by the display) and it helped narrow down the results a bit.
-
Each extension is a little different, so check out the commands that each offers. We used the OLED12864_I2C extensions for our code. (And if you use our code it will automatically load it for you.)
-
-
-
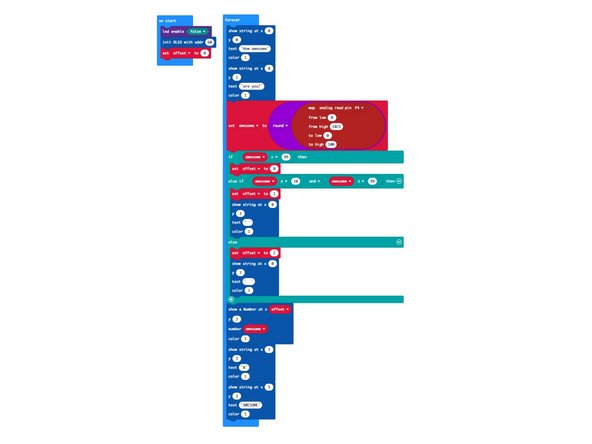
Let's get our awesome project going! Load this code for our OLED Awesome Meter program: https://makecode.microbit.org/_4whF69UAP...
-
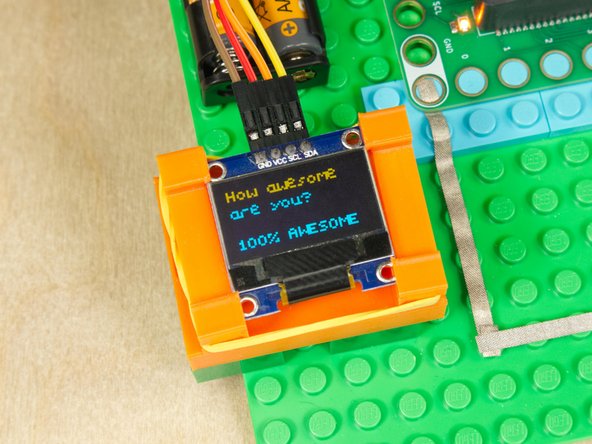
Once the code is loaded to your micro:bit it should start running right away... prepare to be awesome!
-
The code may look a little complex, but this is due to wanting things to line up when we change from 1 digit (0-9) to 2 digits (10-99) to 3 digits (100).
-
We set a variable named offset and then use it to adjust where it starts displaying the number. Then we just check the awesome variable with some if/else statements and adjust the offset variable accordingly.
-
-
-
Turn the potentiometer and you can see how AwEsOmE you are... 10%? 33%? Or maybe you are 100% Awesome!!!
-
If you turn the potentiometer clockwise and you become less awesome, just lift it from your circuit, rotate it 180 degrees, and put it back in place. (Connecting it backwards means it will decrease instead of increase when turned clockwise.)
-
-
-
Hopefully you'll have fun determining how awesome you are, but your OLED Display can do a lot more! What else might you display?
-
You could connect a Distance Sensor and then have the display show you how far away an object is...
-
You could connect a Temperature and Humidity Sensor and then display data on the small screen...
-
You could make a simple score keeping device for up to four players. Each player could have a button to increase their points and you could add a reset button to start a new game!
-


Cancel: I did not complete this guide.
One other person completed this guide.
Attached Documents
