
Introduction
Use these easy to make Paper Circuits Cubes to demonstrate the basics of circuitry. Learn about open and closed circuits, polarity, power, and components.
Besides our Paper Circuits Kit (which contains Maker Tape, batteries, and LEDs) you'll need a few magnets, washers, and tape.
Video Overview
Featured Document
-
-
Paper Circuits Cubes are just Paper Circuits... in cube form!
-
Instead of building circuits on flat paper the Paper Circuits Cubes are a modular system that allow you to quickly and easily build circuits using various components.
-
To build your own Paper Circuits Cubes you'll need some Maker Tape, CR2032 batteries, and some LEDs. (You can find those in our Paper Circuits Kit.)
-
You'll also need to print out the attached PDF template using thick card stock, and assemble the cubes with tape.
-
Finally, you will need some magnets and washers to put inside of the cubes to make the connections. (We'll cover those in the next step.)
-
-
-
Magnets and kids don't always mix. While neodymium magnets are super strong they can be dangerous. We used ceramic magnets for this project, which provide plenty of pull.
-
We got a set of 18mm (0.709 Inch) ceramic magnets from Amazon. You can choose a smaller diameter magnet for your cubes, but larger diameter probably won't fit.
-
You can use neodymium magnets if you have some that are small and weak enough. We tested with some that were 10mm in diameter and 1.5mm thick. They were strong enough to work but still weak enough to be safe. (We paired them with an equally small washer.)
-
A note about washers. We used zinc washers which are magnetic. Most stainless steel washers are not magnetic so they will not work! When in doubt, bring a magnet to the hardware store to test washers before you buy them.
-
If you prefer to order online these magnets from Amazon should work.
-
Unless you already have small (fairly weak) neodymium magnets we recommend just getting ceramic magnets for this project.
-
-
-
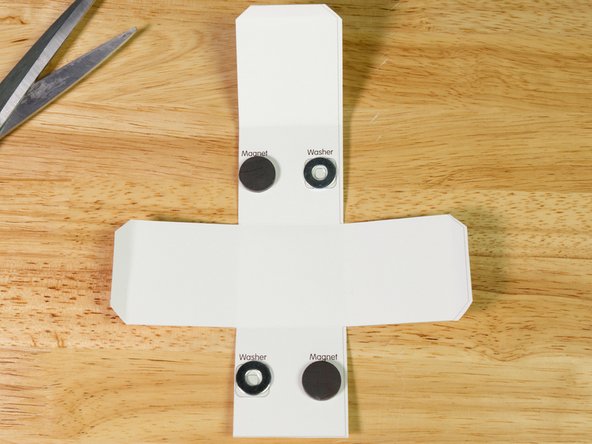
For each pair of cubes there is a magnet that lines up with a washer, and a washer that lines up with a magnet.
-
We chose to use a "magnet to washer" connection because if you try to align two magnets you need to get the polarity correct or they will repel and not line up properly!
-
We even saw that some magnets wouldn't allow a washer to center properly and would slightly repel it off-center, so you may need to experiment to find the correct combination of magnets and washers.
-
If you have the right magnets (and washers) they'll provide just enough pull to make a good connection between the layers of paper and Maker Tape, ensuring you have a good electrical connection.
-
Luckily once you build your cubes the magnets and washers are inside, so there's less chance of any magnet mishaps!
-
-
-
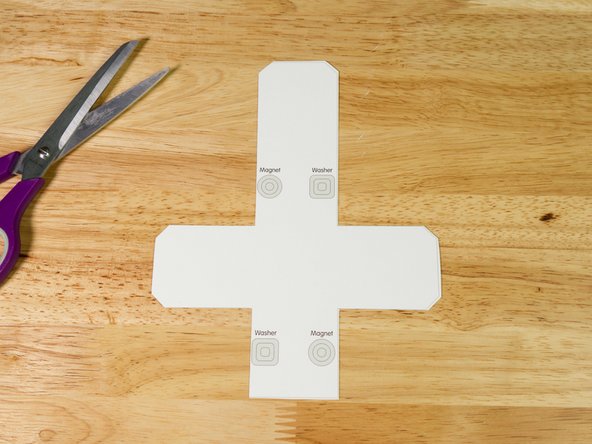
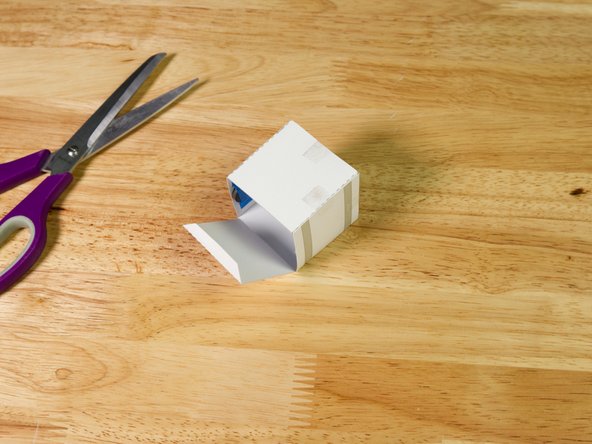
Let's make a cube! First, you'll need to print the attached PDF template. It should be printed double-sided on heavy card stock.
-
If you can't print double-sided you can just use the template as a guide for where to stick the magnets and washers.
-
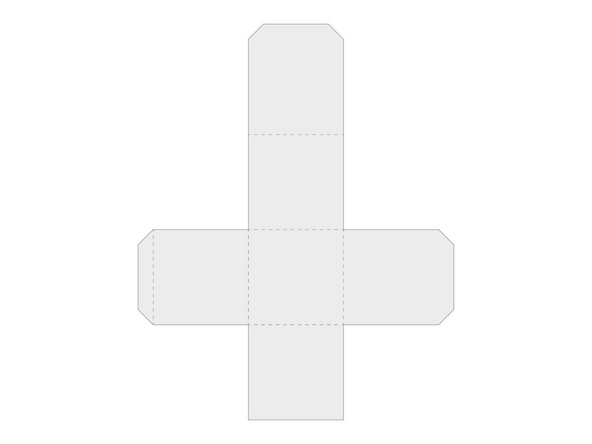
Once you've printed some templates you'll need to cut out the flattened cube and score along the dotted lines.
-
The dotted lines (on the "outside" of the cube) indicate where the folds will be when we assemble the cube.
-
-
-
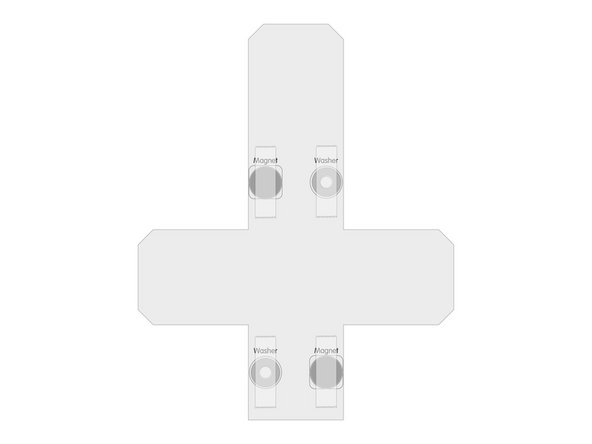
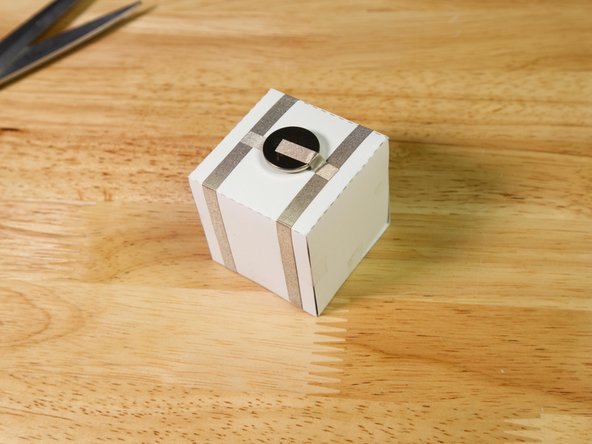
With your cube cut out (and the fold lines scored) you can flip your cube over to reveal the inside.
-
Use tape to stick down two magnets and two washers, alternating placement as shown.
-
You do not need to glue things down. Tape will work fine. It's also a bad idea to heat up magnets because they can lose their magnetism!
-
We used blue painter's tape, but masking tape works as well. The forces of the magnet are not against the tape when in use, so the tape just needs to hold them in alignment.
-
-
-
With the magnets and washers on the inside, fold up your cube.
-
Use tape to hold the cube together. We stuck a little piece of clear tape wherever two edges came together.
-
-
-
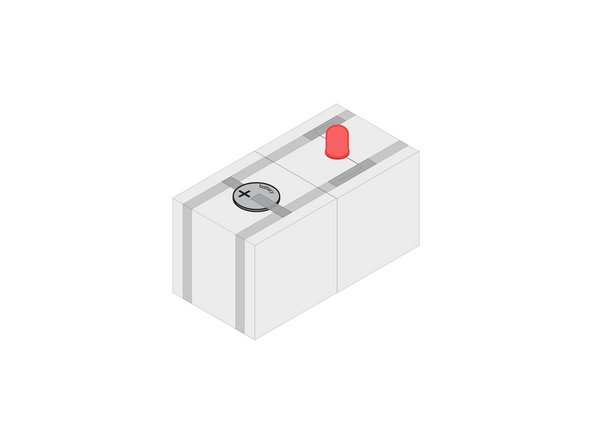
Run a strip Maker Tape along three sides of the cube as shown. You'll need two strips for each cube. The printed template will serve as a guide.
-
Remember that Maker Tape is conductive on the top and bottom and all the way through! This means if you cut a piece too short you can easily overlap another piece on top and it will work just fine.
-
Note the Switch and Large Component cubes need the tape run a bit differently.
-
For a switch you need a gap in the tape on one side. Your switch will cross the gap and complete the circuit.
-
For larger components you may need to run the tape along the side to leave room for the component. (We did this with our small DC motor and fan blade.)
-
-
-
The templates show how (and where) to add components.
-
Basically a component like a battery, LED, motor, etc. will have a positive and negative, and one attaches to one piece of tape, and the other attached to the other piece of tape.
-
What if you do it backwards!? Well, then you just turn the cube around. 😀
-
You can "reverse the polarity" by spinning a cube 180 degrees. This can be a great way to learn about how polarity works in a circuit.
-
Batteries and LEDs have a specific polarity, but switches do not, and small DC motors will typically just spin the opposite direction if you reverse their polarity.
-
-
-
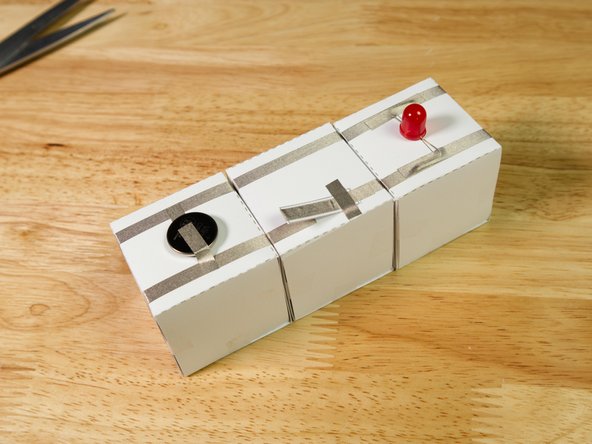
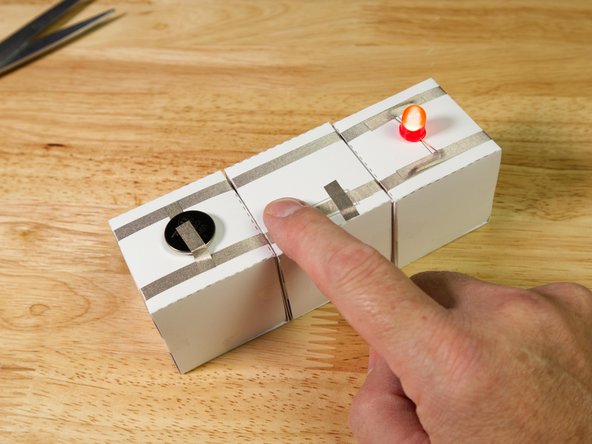
Once you've got a Battery Cube and an LED cube you can try to make a circuit.
-
Remember, if the LED does not light up you can try to reverse the polarity to make it work.
-
There is plenty of space on the paper cube to mark the polarity with a + and - if you prefer.
-
You can even write the names of the components on the cubes, or have students identify and label the cubes based on what components are on them.
-
-
-
Once you've got a Battery Cube and an LED cube you might want a switch so you can keep them stuck together but still turn the circuit on and off.
-
Our Paper Circuit Lever Switch is a good one to start with. You can also try the Push Button.
-
-
-
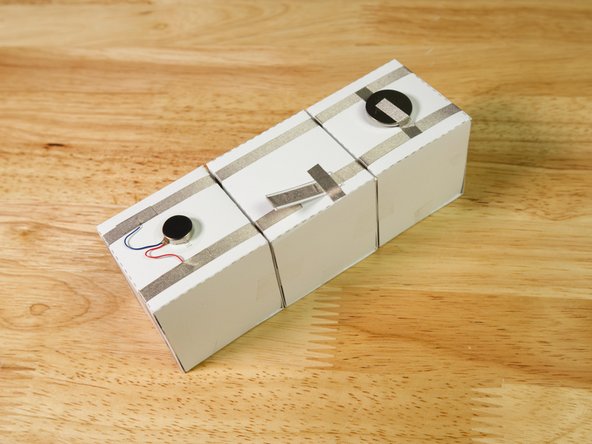
You can add almost any component that runs on 3 volts.
-
Tip: You can stack batteries two high to double the voltage, or connect more than one battery cube to increase the current.
-
We made a cube with a vibrating motor that we use in our Origami Circuits Kit.
-
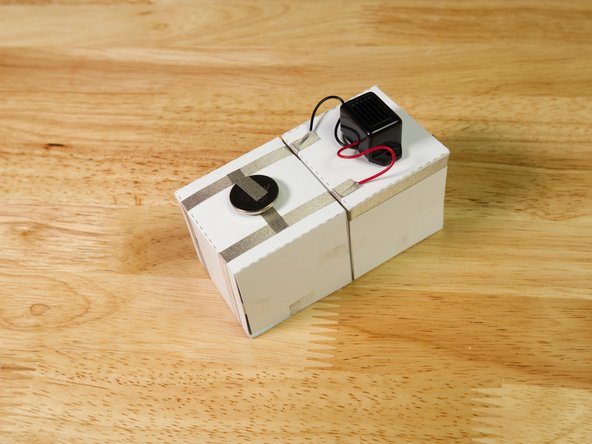
We made another cube that uses a small DC motor with a plastic fan blade attached to it.
-
And we found a little mechanical buzzer that makes noise at just 3 volts.
-
Other fun cubes we made include a tilt switch and a blinking red LED.
-


Attached Documents
