Introduction
New for 2026 is our Crazy Circuits Power Chip! This handy part replaces our CR2032 Battery Chip and lets you connect a 3V AA or AAA battery pack to other Crazy Circuits components. In addition to providing power it also provides Short Circuit Protection and a status LED. This guide will explain how the part is used and show an example simple circuit that you can make.
Tools
Parts
-
-
This component can be found in our Crazy Circuits Starter Set, Circuits 101 Classroom Set, and MakerSpace Set. It's also available on our website.
-
The Power Chip replaced our CR2032 Coin Cell Battery Chip and can be a drop in replacement for guides that use a Coin Cell.
-
The Power Chip comes bundled with a 2 AAA battery pack with JST connector in all our kits. If you happen to have one of our 2 AA battery packs with a JST connector that will also work.
-
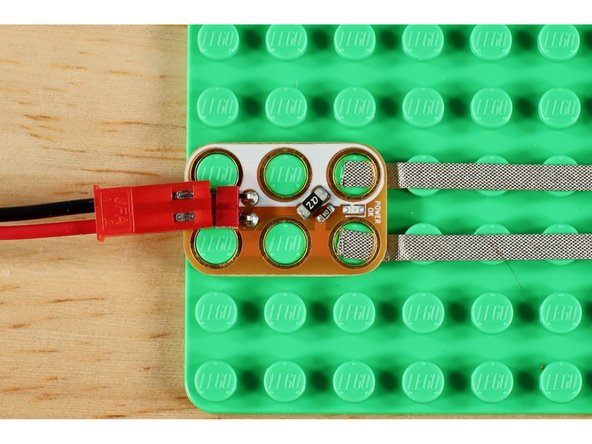
The Power Chip has a Status LED on the front. When a battery pack, with batteries, is plugged into the Power Chip the LED will turn on. If a battery pack is inserted backwards, the LED will NOT light up.
-
The Power Chip provides Short Circuit Protection. In the event of a Short Circuit the status LED on the Power Chip will turn off and no power will flow outwards. This safety feature prevents battery packs running down or getting hot.
-
-
-
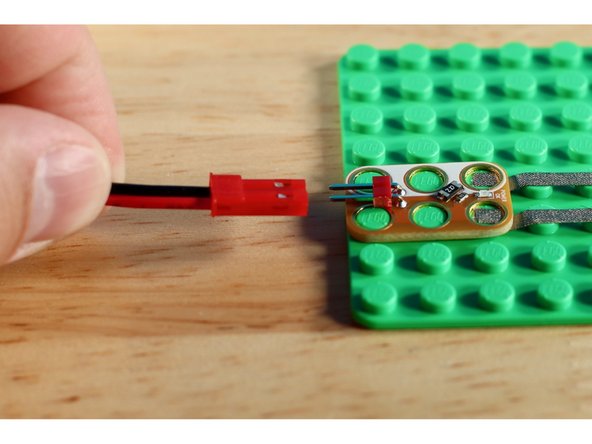
The battery pack should be inserted as shown in our pictures. The flat side of the red connector should face downwards, and the two silver tabs should face upwards.
-
If you insert the battery pack upside down the small Status LED will NOT turn on.
-
Inserting it upside down will not hurt the Power Chip or any other component, it just won't work as directed.
-
-
-
Like all Crazy Circuits components the white holes on the Power Chip are the Negative connections, and the orange colored holes are the Positive connections. All six holes on the Power Chip are live and can be used in projects.
-
-
-
If you've never done a Crazy Circuits project before, PLEASE go back and review our Getting Started With Crazy Circuits guide and video. You'll need to know how our components connect together using our tape and LEGO parts.
-
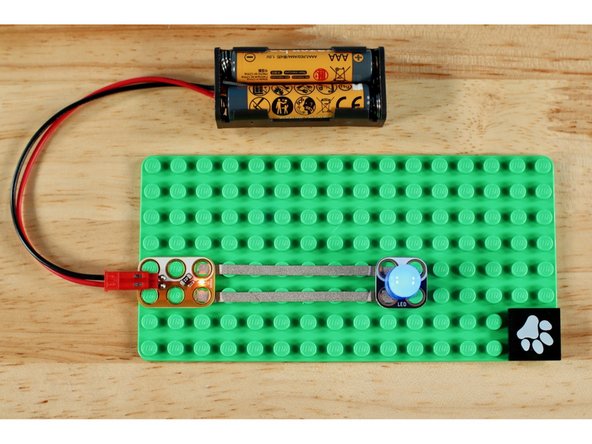
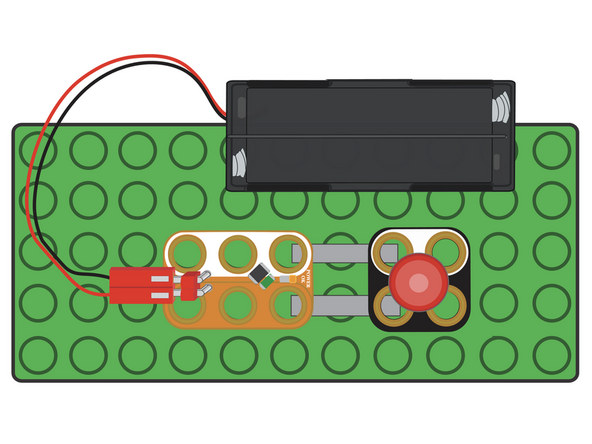
Let's create a circuit. You'll need a Power Chip, Battery Pack with batteries, Maker Tape, an LED Chip, and a LEGO Compatible surface for building.
-
First, inset the battery pack into your Power Chip. Does the LED turn on?
-
Next, place your LED Chip a few studs away from your Power Chip. Line up the colored sides of both chips and the white sides of both chips.
-
Measure out two pieces of Maker Tape to go between the two chips. Pick up your Chips from the LEGO plate and lay your tape down. Then place your parts back down.
-
Your LED should now be lit up. If not, check to make sure your Power Chip status LED is on. Then, make sure tape is going from the a white hole on the Power Chip to a white hole on the LED Chip, and the same with the colored holes on both parts. See the pictures and diagram as an example.
-