
Introduction
Build a Reaction Game and test how quickly you can press a button when an LED lights up. We'll build this on paper using Maker Tape and our own button.
Video Overview
Featured Document
-
-
We’re going to use a micro:bit along with our Bit Board and some LEDs to make a fun game that will test your reaction time.
-
Game design involves thinking about the game objective, rules, parameters, mechanics, and playability. We started with this slide exploring how our game would work.
-
A series of LEDs will light up in sequence, and when the fourth LED is lit you need to press the button. If you time it right you’ll get a point!
-
When you get 25 points you’ll win the game!
-
But wait! Each time you press the button successfully the game will speed up… and if you press the button at the wrong time you’re score will go down.
-
We’ve written all the code, and our attached PDF will show you what to change to affect the gameplay. You can make it easier or much more difficult!
-
We have two other versions of this game that use Crazy Circuits parts. One that uses a 7 Segment Display for the score, and one that uses the micro:bit's built-in LED matrix to show the score: Reaction Game (7 Segment Version), Reaction Game (LED Version)
-
-
-
We're going to build our circuit on paper (or cardboard.) We'll use Maker Tape, along with standard LEDs and we'll fashion our own button using Maker Tape and some paper.
-
Remember, Maker Tape is conductive on both sides and all the way through, so if you need to overlap pieces of it, they’ll still make the needed connections just fine.
-
Feel free to adjust the layout if desired. Maybe you want more space between your LEDs, or want the button placed somewhere else… As long as everything connects to the correct pins it should work fine.
-
The attached PDF for this guide has more information and details for the project.
-
Hey! Those LEDs don't have resistors connected to them! We're using our own Jumbo 10mm LEDs which have built-in resistors made specifically for our paper circuits projects, so even though you don't see a resistor, it's there!
-
-
-
The Bit Board, like all of the Crazy Circuits components, are meant to be used on a LEGO baseplate. Typically the Maker Tape will be attached to the studs on the plate, and then the Crazy Circuits component fits on top, making a good connection.
-
For this project we'll use a different method of connecting things. But first, let's look at the options...
-
While it's possible to just stick Maker Tape onto the connection rings on the Bit Board, it doesn't always create a good connection, especially with the 1/8" tape.
-
So let's explore another connection method...
-
-
-
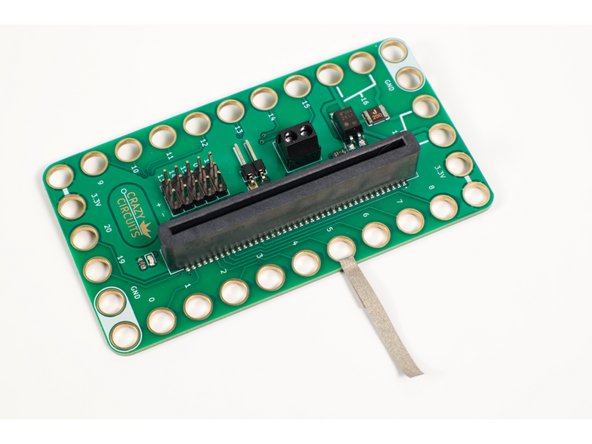
We're going to thread the 1/8" Maker Tape through the holes in the Bit Board, and then fold it over on itself.
-
You can use a short piece for this, since we'll want to do this to all of our connection points. Once they all have these little "tape tails" we can connect them with Maker Tape to the LEDs and the switch.
-
Make sure your loop is tight! A tight connection makes a good electrical connection!
-
Hey! Could I use alligator clips for this project? Sure! We really prefer Maker Tape, but you can use alligator clips to connect things to the Bit Board, as long as you are careful and do not allow them to inadvertently short anything out and cause damage.
-
-
-
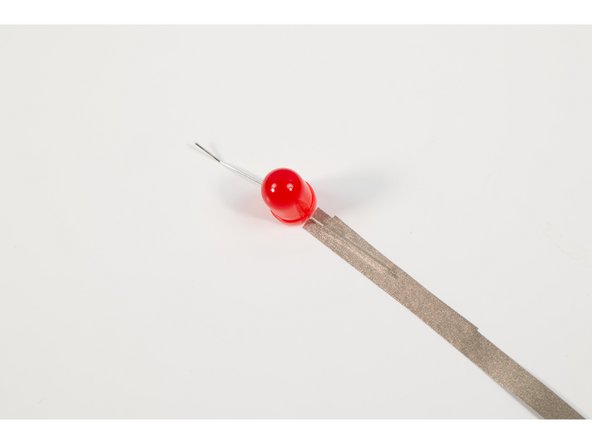
Let's talk about connecting LED legs with Maker Tape. If you've built any of our paper circuits, you'll notice we usually use 1/4" Maker Tape instead of 1/8" Maker Tape. Both will work, but the wider tape works much better when connecting LEDs into paper circuits...
-
That said, you can use 1/8" Maker Tape, but you'll want to get a good connection.
-
Here's a few tips!
-
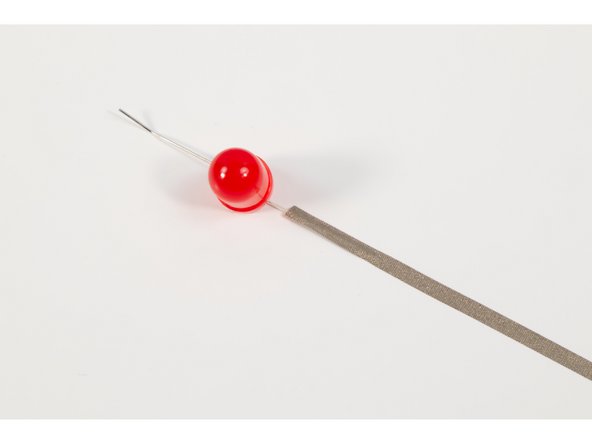
You may find that connecting the tape parallel rather than perpendicular to the leg will create more surface area for the connection.
-
-
-
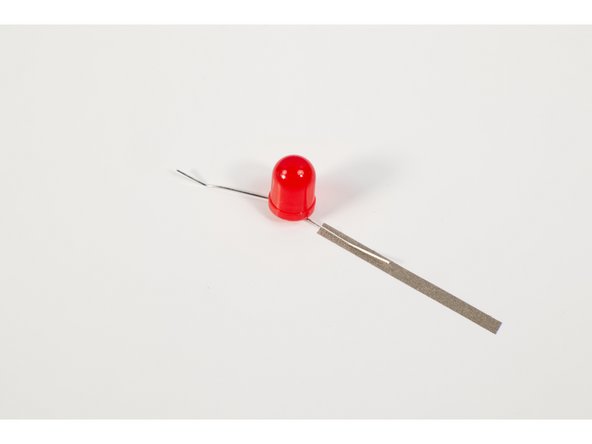
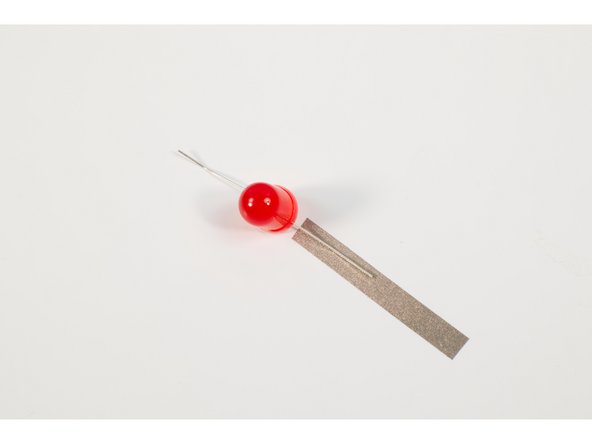
Here's another good trick. You can stick down a piece of Maker Tape, then put the LED leg on top of that, and add another piece of Maker Tape on top to hold it down.
-
This creates a "tape sandwich" and ensures that the LED leg is touching conductive tape on the top and bottom. Again, making a good connection is the goal.
-
If you find that an LED isn't lighting up when it should, check your connections! Press down on the tape to secure things, and if needed, add a bit more tape.
-
-
-
For this project, or any paper-based project, the 1/4" Maker Tape works better for sticking down LED legs and for making paper switches.
-
If you've only got 1/8" Maker Tape, you can always overlap it to make it wider, since it conducts on the top and bottom and all the way through.
-
-
-
The attached PDF shows a short guide on making a simple lever button for this circuit, but you can explore other options and test a variety of switches.
-
You can read the Lever Switch Guide or the Push Button Switch Guide for full instructions.
-
We have a few other guides on paper switches that are worth checking out.
-
-
-
Connect a USB cable to the micro:bit and then plug it into your computer.
-
We'll be using makecode.microbit.org to program our board. It uses a simple drag and drop block interface.
-
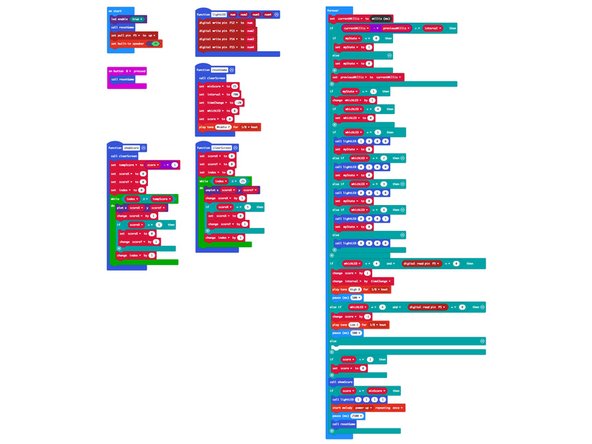
We're going to load the following code for our Reaction Game (Paper Version) program: https://makecode.microbit.org/_6CqWTjct2...
-
The attached PDF for this guide goes into great details explaining the code and what each section does.
-
Remember! This version expects a V2 micro:bit board, since it uses the built-in piezo speaker for the sound output. If you have a previous version micro:bit use the code from the Reaction Game (LED Version) instead or disable the speaker in the code.
-
-
-
Ready to play? Let’s do it!
-
Once you’ve got the code loaded the game should start right away.
-
Get ready to press the button when the fourth LED lights up.
-
Press it at the right time and you get a point! Press it at the wrong time and you lose a point!
-
Every time you get a point the game will speed up.
-
When you win you’ll hear a victory sound and the game will restart so you can try again.
-
If you want to start over or let someone else play, just press the B button on the micro:bit to start a new game.
-
-
-
In the attached PDF we’ve highlighted what parts of the code can be changed to adjust the gameplay.
-
You can change the desired score, the initial speed of the game, and how much faster it speeds up after each correct press.
-
For this game we set the defaults to what we considered to be challenging but not too difficult, you should feel free to adjust things and see what happens!
-


Cancel: I did not complete this guide.
One other person completed this guide.
Attached Documents
