
Introduction
Conductive Dough is extremely fun to use in place of a Potentiometer (variable resistor) in projects and you can use it to control all sorts of things. In this activity we'll be using dough to control the sound being produced by a Piezo Speaker hooked up to one of our Invention Boards.
If you have a Robotics Board you can also do this project, you'll just have to change a couple of pin numbers in the code.
Video Overview
Featured Document
-
-
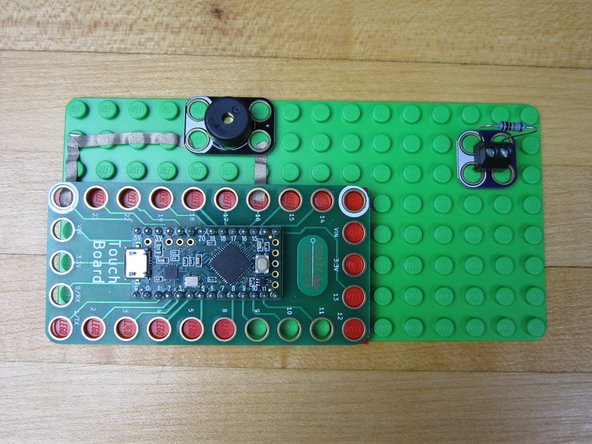
Grab a Resistor and screw it into the Screw Terminal Chip.
-
We're using a 460 ohm resistor, however a resistor of near or similar value will work.
-
If you don't have a Screw Terminal Chip around you can always just use Maker Tape to hold the Resistor down. We attached a small diagram of what that would look like at the end of this write up.
-
-
-
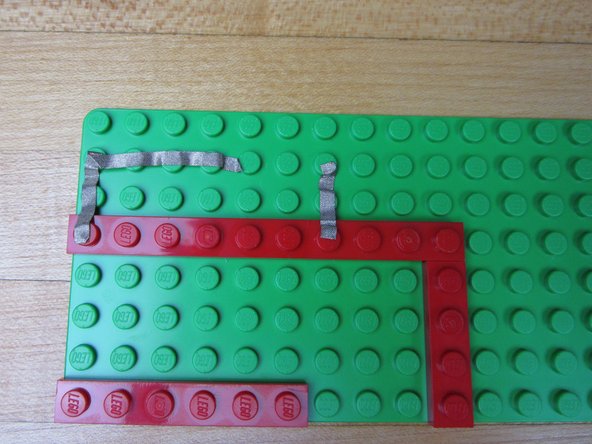
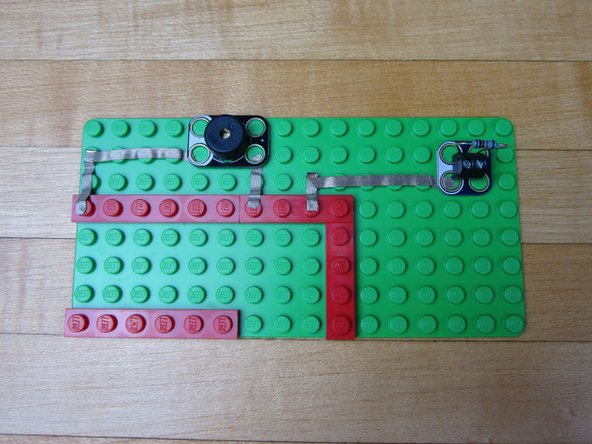
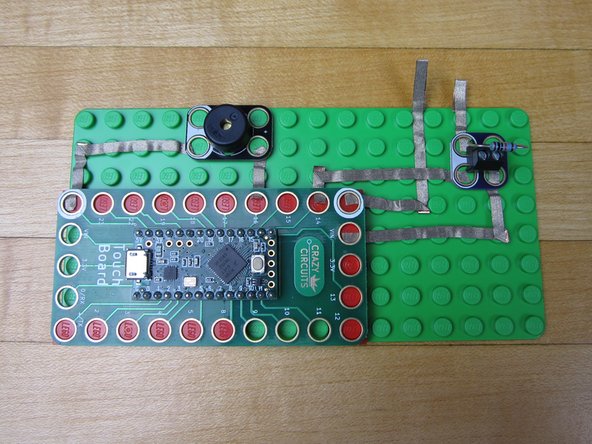
The Invention Board won't lay flat onto our 8x16 base plate, so we'll need to make a platform for it. We're using several thin plates to create the platform.
-
You NEED to have bricks below the pins that you're using, otherwise the tape won't make a connection. We're using both Grounds, Pins 14 and 16, and the VIN on the right side.
-
-
-
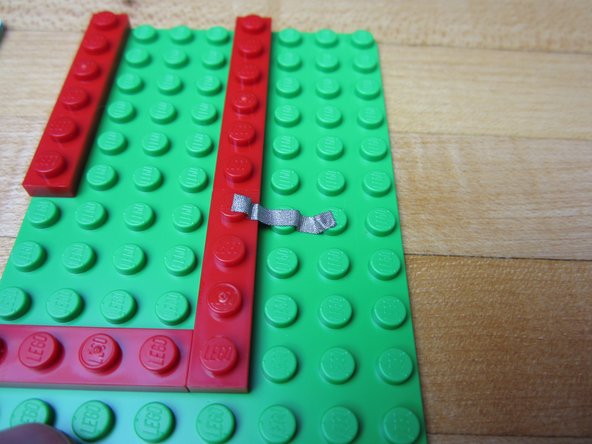
Run Maker Tape from Pin 16 to where you want your Piezo Speaker. Cut excess tape and press down with your fingernail or the Piezo Speaker.
-
Run Maker Tape from the left side Ground Pin (white circle) to the Piezo Speaker.
-
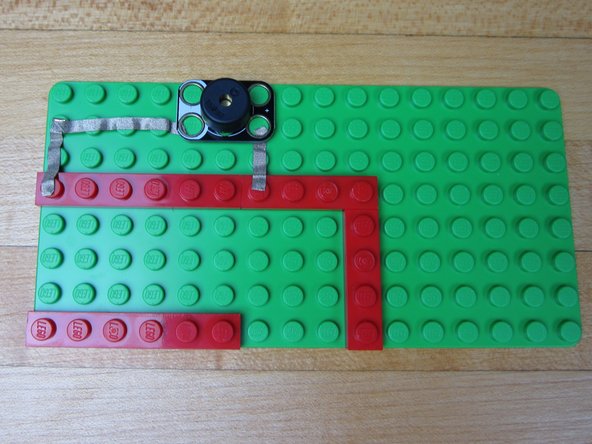
Press your Piezo Speaker into place.
-
-
-
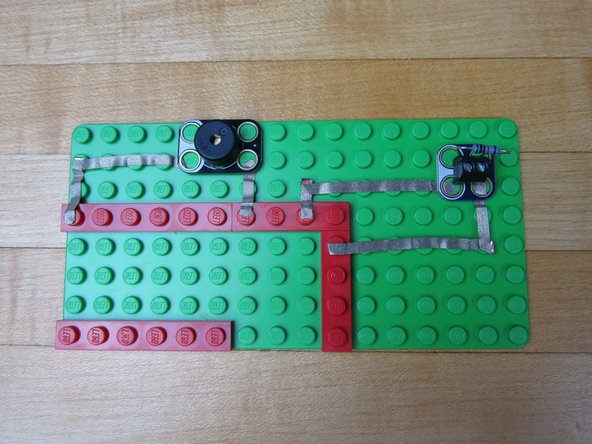
Place your Screw Terminal near the top right corner for placement.
-
Run a line of Maker Tape from Pin 14 to the white side of the Screw terminal.
-
Cut excess tape and press to fit.
-
-
-
Run a line of Maker Tape from the VIN pin to the blue side of the Screw Terminal.
-
Cut excess tape and press to fit.
-
-
-
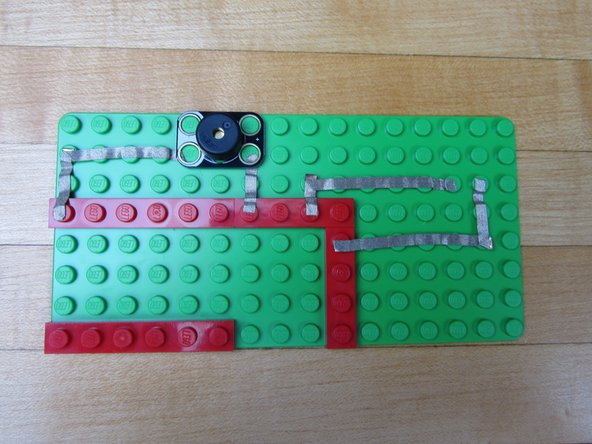
Use a piece of Maker Tape and and go from the second hole on the Screw Terminal off the side of your building surface.
-
Fold over the tape onto itself so it's conductive on both sides. You can also just run it to the bottom side of the base plate as well.
-
-
-
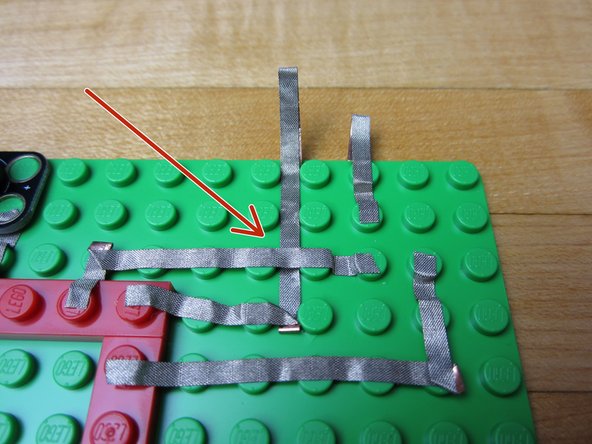
Use a longer line of tape and go from the Ground pin off the side of the board.
-
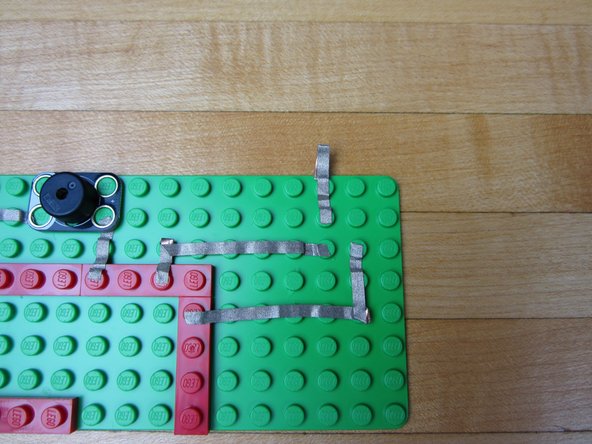
Start by threading a long piece of tape UNDER the pin 14 line of tape.
-
Connect one end to the Ground pin. Let the other end hang off the edge, and fold it over like you did before.
-
Use a pencil, screw driver, or paper clip to push down the tape so that the Ground line isn't touching the Pin 14 line.
-
-
-
If you've never used your Invention Board before, review the Invention Board Setup and Use
-
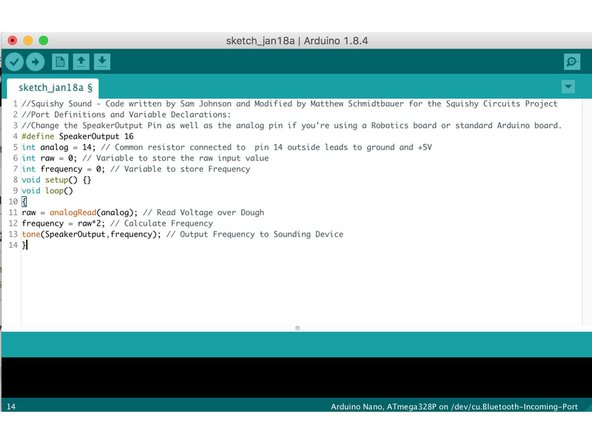
Plug your Invention Board into your computer and open up the Arduino Software.
-
Follow this link and choose either the ConstantTone or StepTone code. Copy and paste the code into a new project window in the Arduino Software.
-
Upload the Code.
-
-
-
If you're using a Robotics board you'll need to change a couple of lines.
-
Change the Speaker Output Pin to 3.
-
Change the Input (Analog Input) to A5.
-
At the end of this write up is a diagram for how we suggest you hook up your Robotics Board, however the pins you use are entirely up to you.
-
-
-
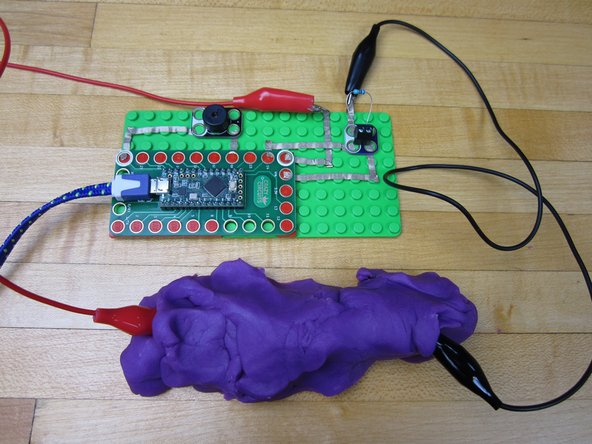
Leave your Invention Board plugged into your computer.
-
Use an Alligator Clip to connect your two Alligator Connection Points together.
-
No matter which code you're using, you should hear something come out of your speaker.
-
-
-
Connect the second Alligator Clip.
-
Plug both Alligator Clips into the dough.
-
Stretch the dough, change shapes, and do all silly manner of things. The sounds coming out of the Piezo Speaker will change.
-
Add a second batch of dough to the mix and make a reaaaaaaalllllllllly lone line.
-


Attached Documents
