Introduction
A step sequencer allows you to play different musical notes (in this case four different notes) and it "steps" through them in sequence. We will use four potentiometers to control the notes played and a fifth potentiometer to change the tempo. We'll also add four LEDs to help visualize the tempo and specific note that is being played.
Video Overview
Featured Document
-
-
Gather your components and plan your layout. We'll need room to connect the Robotics Board and all of the Crazy Circuits components needed using 1/8" Maker Tape™.
-
We're going to use potentiometers to provide analog values to our sequencer. Unlike a switch or a button that can only have two values ("off" or "on", which is really a 0 or a 1) an analog input like a potentiometer provides a range of values from 0 to 1023.
-
-
-
Where the tape might need to cross over another piece of tape, you'll need to run it in the gutter between the studs so it doesn't connect to the tape running on top of the studs.
-
In typical wiring diagrams there's a special symbol that is used for showing where wires cross over but do not connect. In the diagram we've used our own "tape symbol" to show this, but you don't really need to make this shape with the tape.
-
-
-
If you've never used our Robotics Board before you'll need to read the user guide and install the correct software and drivers.
-
Download the Arduino sketch: https://github.com/BrownDogGadgets/Crazy...
-
Plug the Robotics Board into your computer using an USB cable.
-
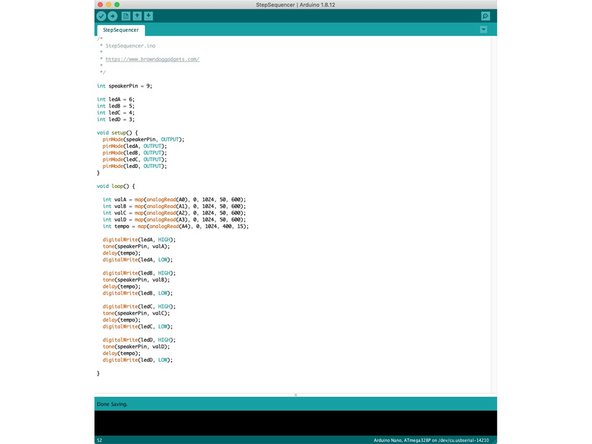
Launch your Arduino software and open the StepSequencer.ino sketch.
-
Upload the code to the Robotics Board.
-
-
-
Plug in a USB cable for power and make some noise! As you turn the first four potentiometer dials you will alter each of the four notes. The LEDs will light up as the note plays. Use the fifth potentiometer to adjust the tempo or speed that the notes play.
-
How fast can you make it go before it sounds terrible? Can you "program" your sequencer to play a high note, a low note, then another high note, and another low note?
-
Cancel: I did not complete this guide.
One other person completed this guide.


