
Introduction
Observe Día de Muertos (Day of the Dead) with four different Sugar Skull templates. Just add two LEDs, a CR2032 battery, and some Maker Tape.
Use colored pencils, crayons, or markers to color the template and then add your circuit.
You can make this project (and many more) with our Paper Circuits Kit.
Featured Document
-
-
Choose one of the skulls found in the attached PDF file as your template and print it out.
-
Use scissors to cut out the skull. Choose one of the templates found at the end of this file.
-
-
-
Use colored pencils, crayons, or markers to color and decorate your skull as you see fit.
-
-
-
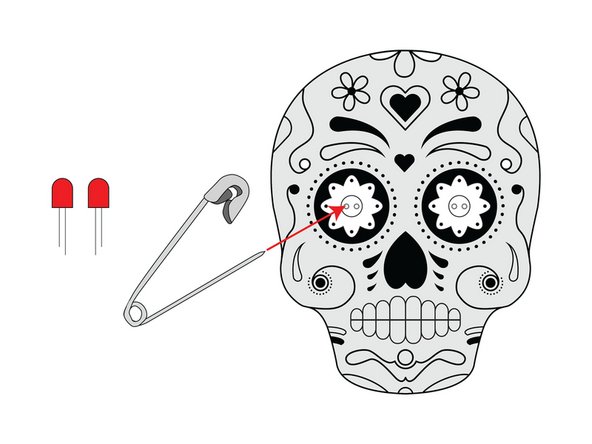
Use a safety pin or a thumbtack to poke holes for the LED legs to go through.
-
-
-
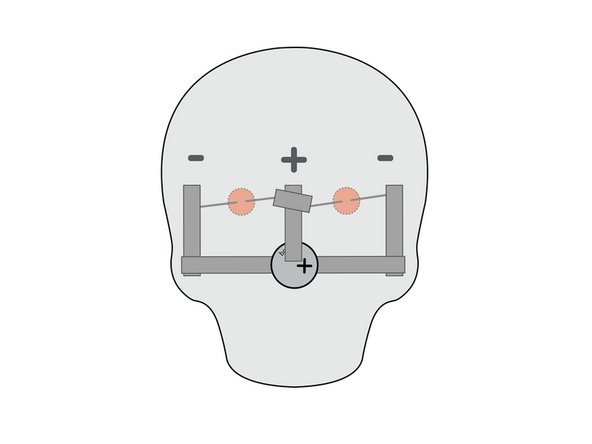
The longer (positive) legs of the LEDs should be on the inside (closer to the center) and the shorter (negative) legs should be on the outside edge.
-
-
-
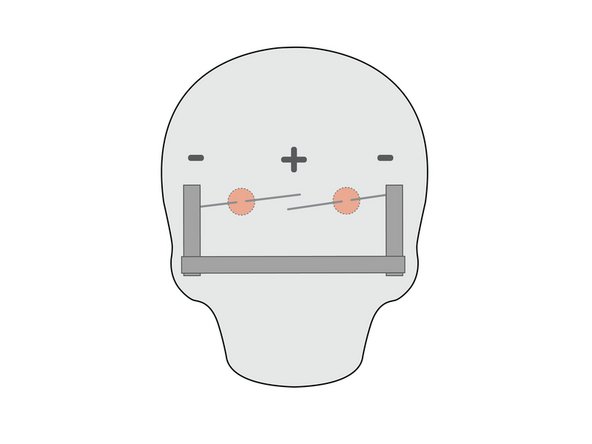
Turn your skull over and bend the LED legs flat against the paper.
-
The two longer (positive) legs in the center should touch. If they don’t touch we’ll need to make sure we connect them with some Maker Tape.
-
-
-
Add Maker Tape so the two shorter (negative) legs on the outside are connected with a third piece of tape forming a wide “U” shape.
-
-
-
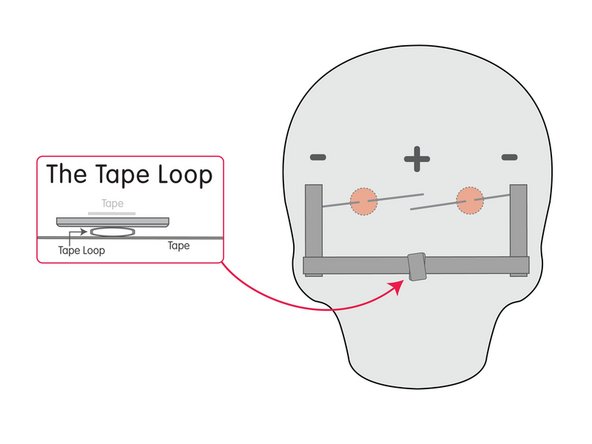
Make a loop of tape and stick it down to the bottom piece of tape. (This is where we’ll stick our battery.)
-
-
-
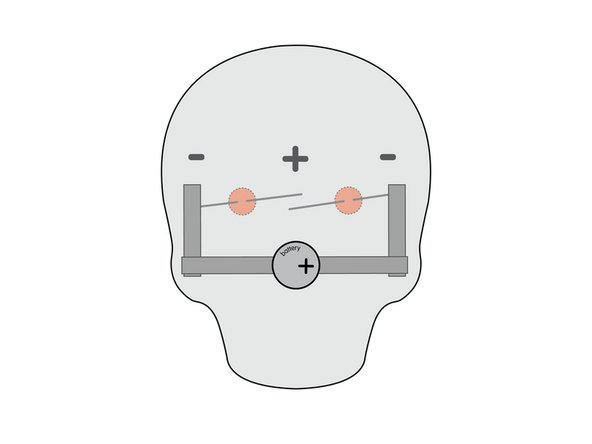
Stick the battery to the Tape Loop with the negative side down to the Tape Loop and the positive side facing up. (Positive is the shiny side with a + sign on it.)
-
-
-
Finally, add one more piece of Maker Tape that connects the two longer (positive) LED legs to the top of the battery.
-
Make sure the positive tape is touching both positive LED legs, and if it is not, just add another piece of tape to connect them.
-
-
-
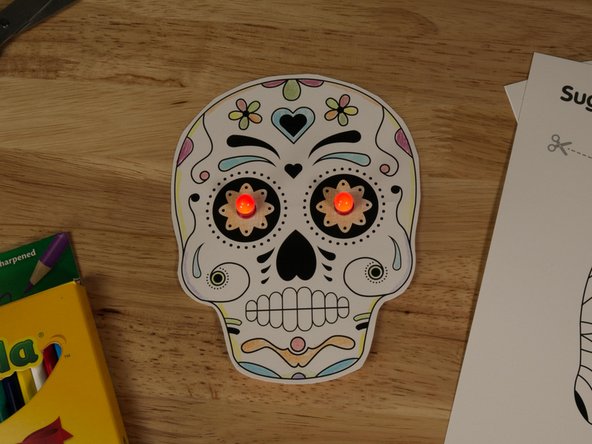
Your skull should light up after you add the last piece of Maker Tape.
-
If it doesn't light up, check all your connections. Make sure to press down on the tape firmly where it connects to the LED legs.
-
If only one LED lights up you may have one of them reversed. Flip the battery upside down and see if it lights up. You may need to remove and rotate an LED 180 degrees for the correct polarity.
-


Attached Documents
