
Introduction
Create a cardboard push button with this template, conductive Maker Tape, and a few rubber bands. You an then use this large cardboard button anywhere you might use a normal push button!
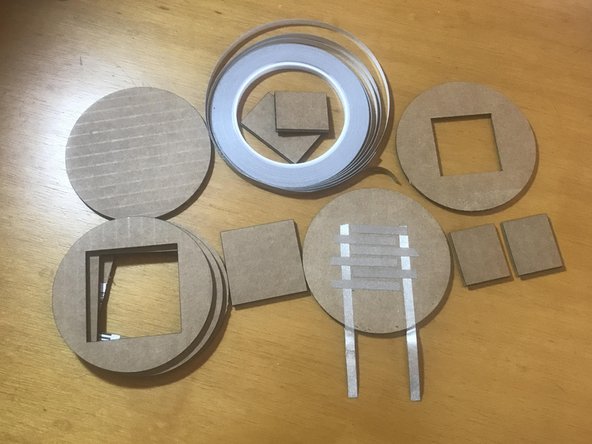
Parts
Video Overview
Featured Document
-
-
Download and print the last two pages of the attached PDF.
-
Use the pages as a guide or glue them to cardboard so you can cut out the 11 pieces needed to assemble the push button.
-
We recommend a steel ruler and X-ACTO knife to cut the pieces. Luckily only straight cuts are needed.
-
If you are not a fan of knives, a pair of scissors can work... or use a laser cutter if you have access to one.
-
-
-
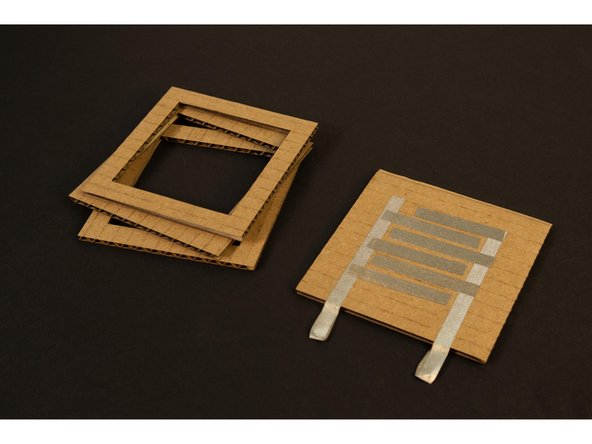
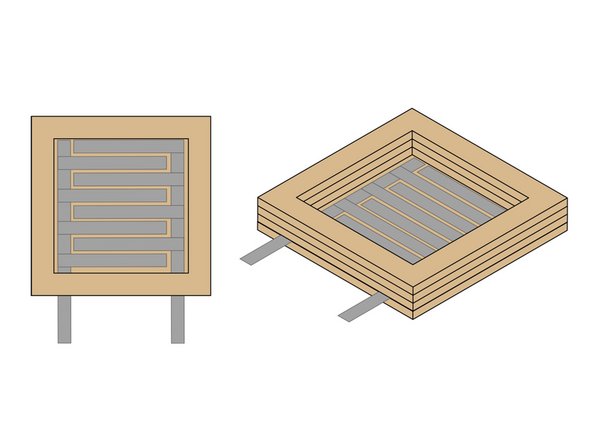
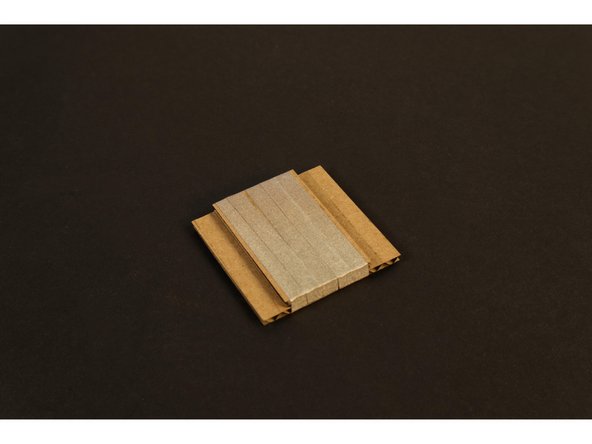
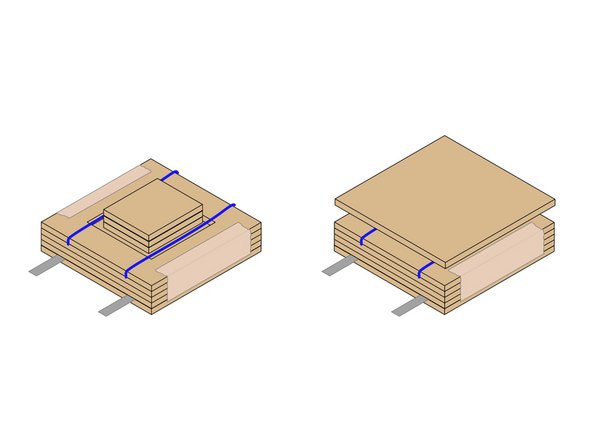
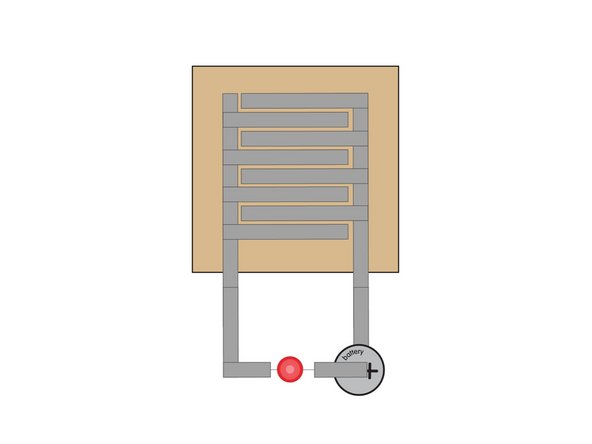
Using 1/4" wide Maker Tape attach two separate "sides" to Piece 11 as shown.
-
Piece 1 is the bottom layer of our switch it will act as the “Stationary Contact” part of the switch.
-
The interleaved pattern of the tape helps ensure that the “Movable Contact” part that is pressed down to complete the circuit has multiple points of contact for a good connection.
-
Make sure you do not overlap any tape between the two sides or you’ll create a “short circuit” in your switch!
-
Have you seen this pattern before? If you've ever taken apart a remote control or calculator with "rubber buttons" you may have seen something similar.
-
-
-
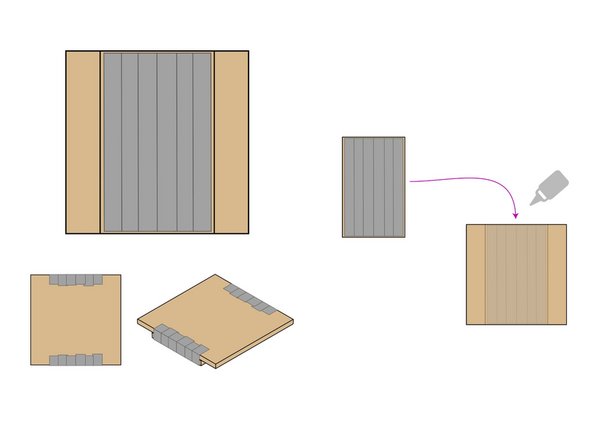
Attach Pieces 2, 3, and 4 to Piece 1 by stacking and gluing them together. (You can also use tape instead of glue if desired.)
-
This will form the bottom half of our button, and the inside cavity that the Movable Contact will be placed in so it can be pressed down to touch the Maker Tape on the bottom that forms the Stationary Contact.
-
Hot glue or standard white glue can be used, or you can choose to use tape. Do your best to align the pieces with each other so things fit together properly.
-
The two pieces of Maker Tape that act as the contacts can be folded over on themselves or wrapped around the bottom of the button as “tails”. As long as we can attach more Maker Tape or alligator clips later, either method will work.
-
-
-
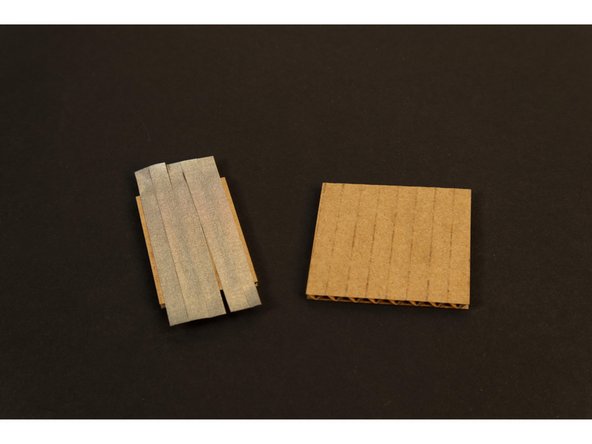
Attach Maker Tape to one side of Piece 5, covering the entire side, then glue the other side (without Maker Tape) to Piece 6, centering it.
-
This will form the Movable Contact which will be pressed down against the interleaved Maker Tape on the bottom layer of the button to complete the electrical circuit.
-
If you are avoiding glue for this button you can easily use the Maker Tape to hold the two pieces together. Just wrap the tape around the edges to secure both pieces of cardboard as a single unit.
-
We do want to leave some cardboard exposed on the top piece so we can glue to it in the next step.
-
-
-
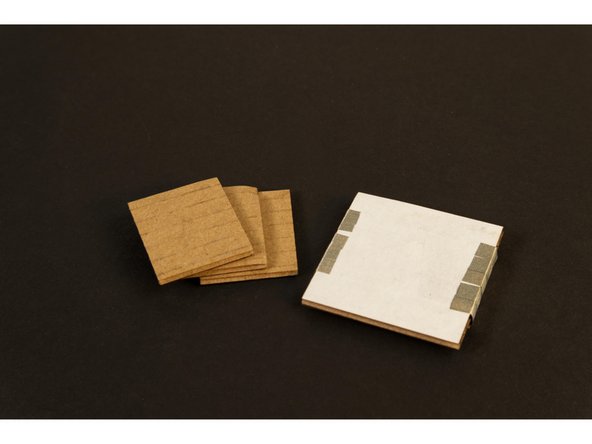
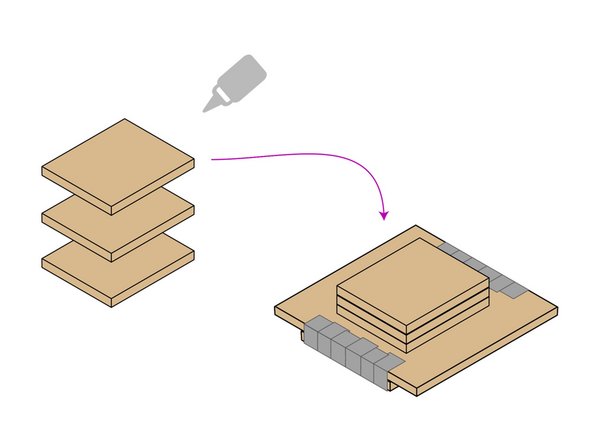
Attach Pieces 8, 9, and 10 to Piece 6 by gluing and stacking them. Make sure the pieces are all centered.
-
The top of the assembly will be the part of the button you press with your hand (or you can optionally add one more large piece (11) to the top for a larger surface area to press. The bottom of the assembly presses down to close the switch.
-
Glue will work best for this step but we do love tape! If you apply tape at this step make sure you are not covering the conducive Maker Tape with some other non-conductive tape on the bottom side. (We need our conductivity!)
-
-
-
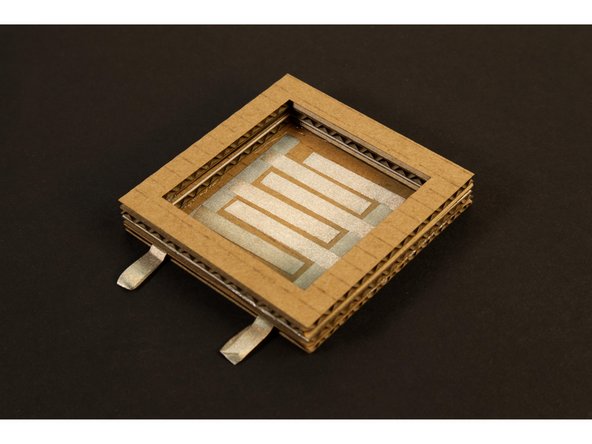
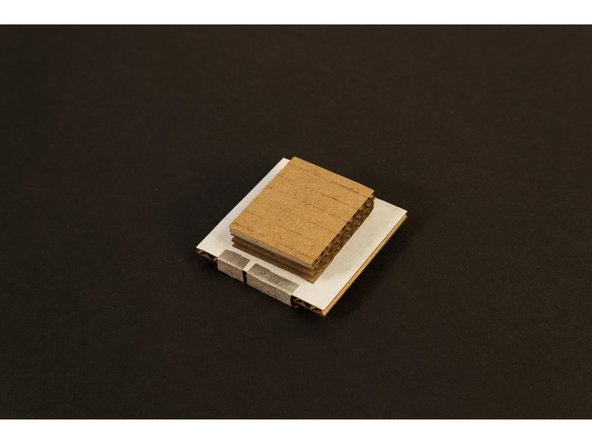
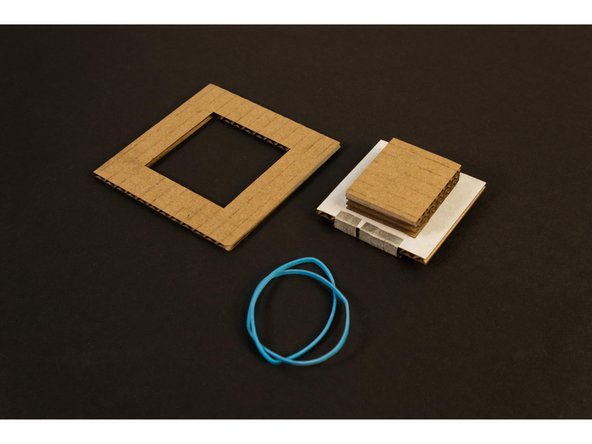
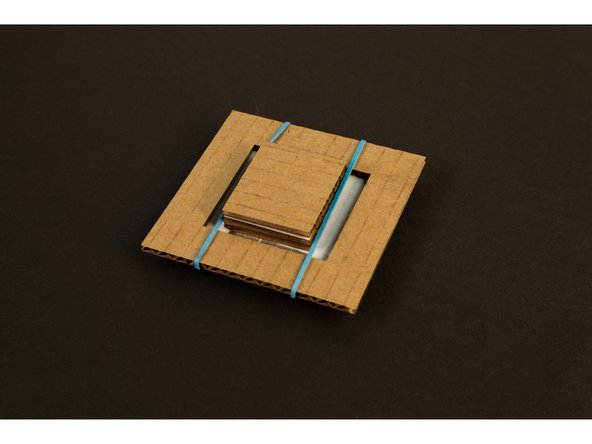
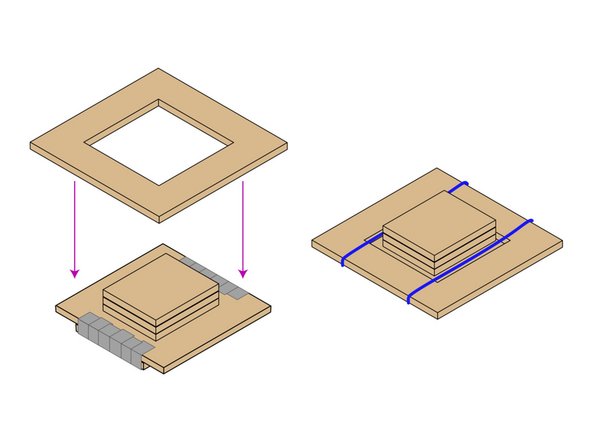
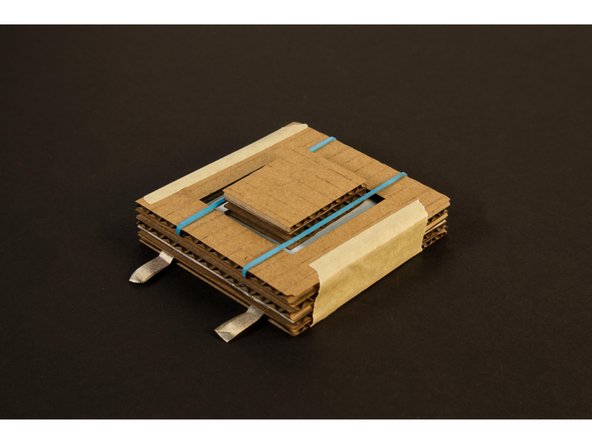
Place Piece 7 on top of the assembly created in the previous steps. The stack of three piece (8, 9, and 10) should stick up through the hole. Hold the pieces together with two thin rubber bands.
-
Push buttons (and many other types of switches) use springs or a flexible metal strip to provide the “action” needed to return the switch to the “off ” position.
-
This style of button is called “Momentary” because it is only on momentarily while you are pressing it. This is different from a standard light switch which clicks into place and remains on (or off ) until you activate (or deactivate) the switch again.
-
The rubber bands are what will allow our button to “bounce back” into the off position after being pressed. Choose rubber bands that are not loose, and not overly tight, but allow for some good springy action. Just enough to pull the Movable Contact piece up and away from the Stationary Contact piece when released.
-
-
-
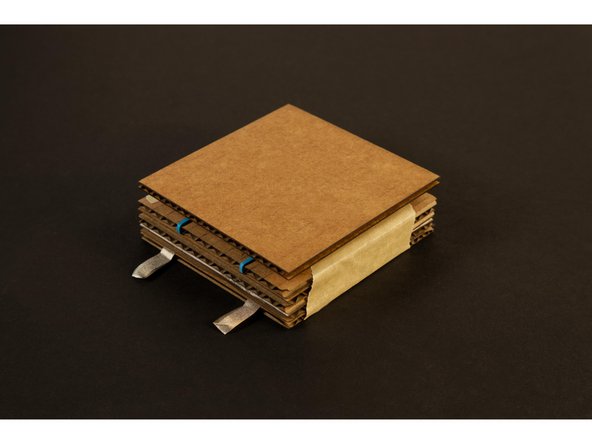
Now that we have the top and bottom parts of our push button we can assemble them together!
-
You can glue the two halves together, and it will be nice and secure, but if you ever want to open it to show how it works you can’t really do so.
-
We decided to use masking tape to hold our button together. This allowed us to easily peel off the tape if we want to show someone what the inside looks like. (You can also make a second button that isn’t fully assembled as a demo unit.)
-
-
-
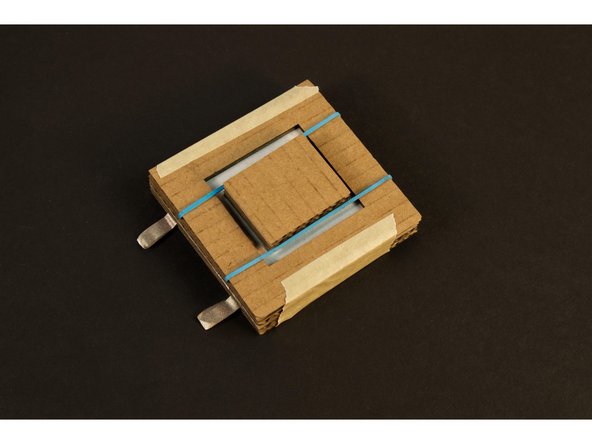
Adding Piece 11 is optional. Your Push Button will work just fine without it, but you can add it on using glue for a nice secure adhesion, or tape for a removable solution.
-
With Piece 11 attached it tends to hide the insides and the mechanics of the push button, so if you want that, it’s an option. Gluing it in place will make it difficult to take things apart, but if you want a permanent button, it’s the best choice.
-
-
-
Let's put our button to work in a circuit!
-
If you wanted to use the push button to turn on an LED with a battery the two connection points would go between the LED on either the positive or negative side of the circuit.
-
-
-
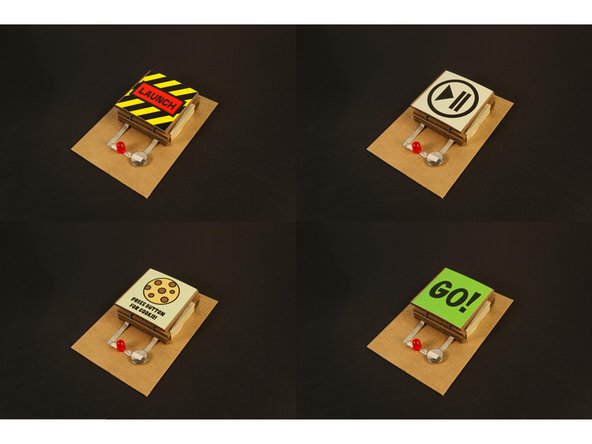
You can also decorate the top! You can color it, attach a photo or drawing, etc. If you have a bunch of buttons you can label them, or color code them, depending on what their functions are. Maybe you want a “Launch” button, or a “Play/Pause” button, or a “Cookie” button... Your imagination is the limit!
-
-
-
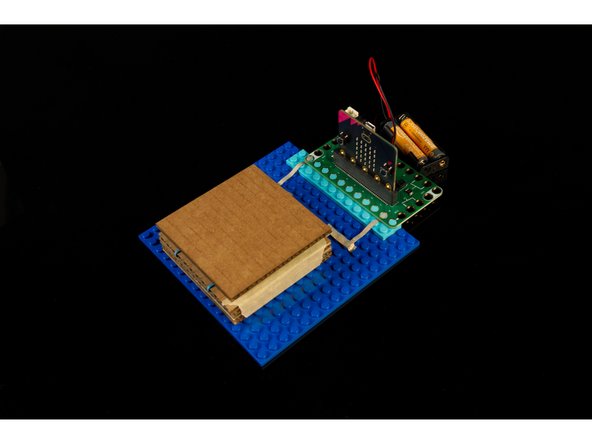
Your push button isn't just limited to simple circuits. You can easily incorporate your button into microcontroller projects that use a micro:bit with our Bit Board. Just add Maker Tape!
-
You can also super-size your button by just increasing the size of the pieces. Since the pieces all stack, there's nothing that needs to fit together that will be affected by increasing the size.
-
-
-
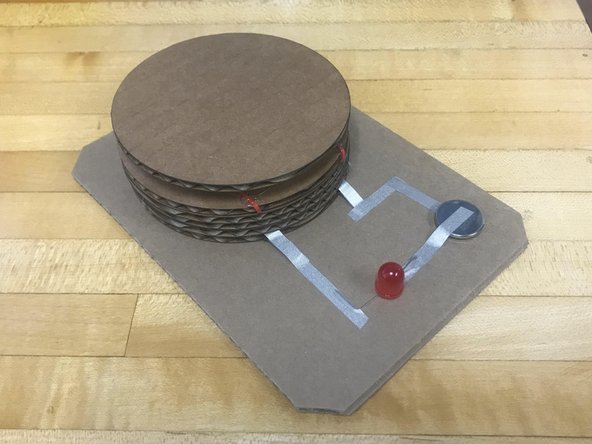
If you're up for a challenge (or if you have a laser cutter) we've also added a second PDF file with a round button template.
-
The interior pieces are all the same, we just rounded the outside pieces to be circular.
-


Cancel: I did not complete this guide.
One other person completed this guide.
Attached Documents
