Introduction
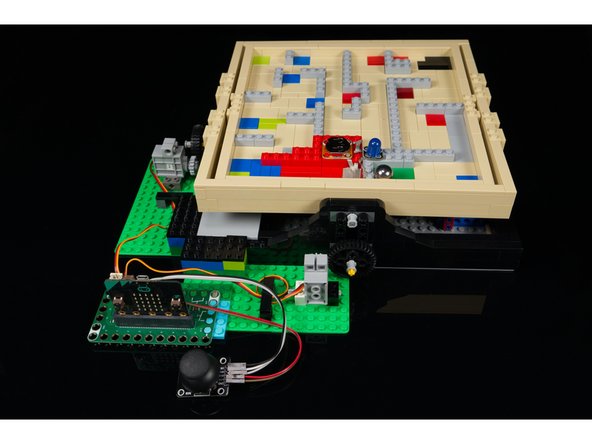
Add a micro:bit, two servos, and a thumbstick to control a tilting maze and maneuver a ball from start to finish.
Video Overview
Featured Document
-
-
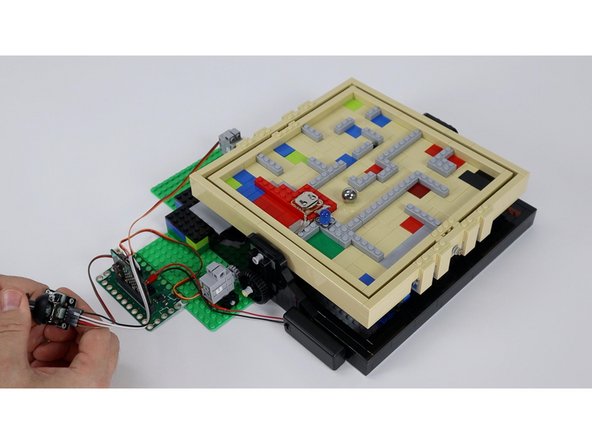
We've got one of the mazes from JK Brickworks and thought it would be fun to motorize the tilting mechanism and make it controllable by a two-axis thumbstick.
-
The kit isn't available from LEGO anymore but you can find used ones, or build your own maze using the concepts from this version.
-
-
-
The stock maze is controlled by hand. You hold and rotate the two wheels on the sides and the maze tilts to move the ball through it.
-
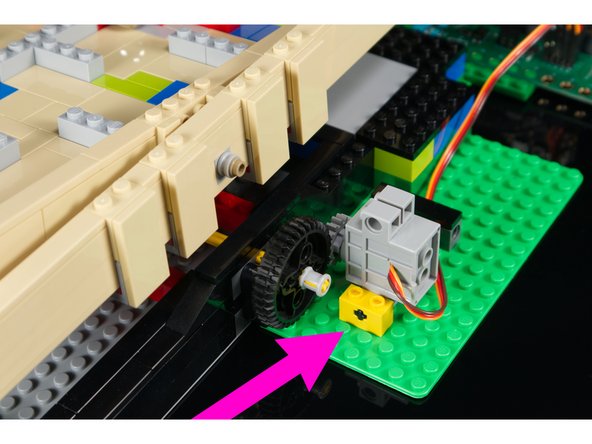
We added a LEGO baseplate to each side where a wheel is located so we could attach our LEGO-compatible servo motors.
-
The servo motor has a LEGO Gear with 16 Teeth attached to it that meshes with the gear teeth on the outside of the wheel. When our servo turns, it turns the wheel and tilts the table.
-
We removed a few of the flat LEGO pieces on the side and added some bricks to connect our baseplate. (Alternately you could attach the maze and baseplates to a larger baseplate on the bottom, or a flat surface with some tape, etc.)
-
-
-
Add the Bit Board to your project. You'll want it positioned between the two servos so the wires can reach to plug in the servo motors.
-
We just stuck ours down to the LEGO baseplate with a few thin LEGO bricks.
-
We're only going to use the pin headers to connect things for this project so we don't need to worry about the LEGO-compatible pin holes on the Bit Board.
-
-
-
Once you have your LEGO baseplate in place you can add your servos.
-
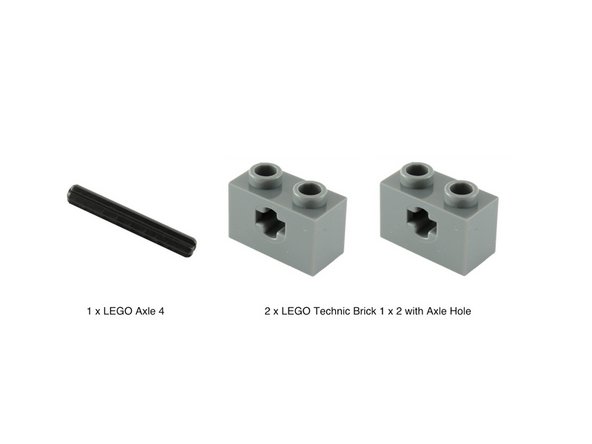
We used the following parts to attach each servo:
-
-
-
You may find that the servos rocks a bit when turning the gear, so it can be helpful to build up more LEGO bricks around the attachment points of the servo to add stability.
-
-
-
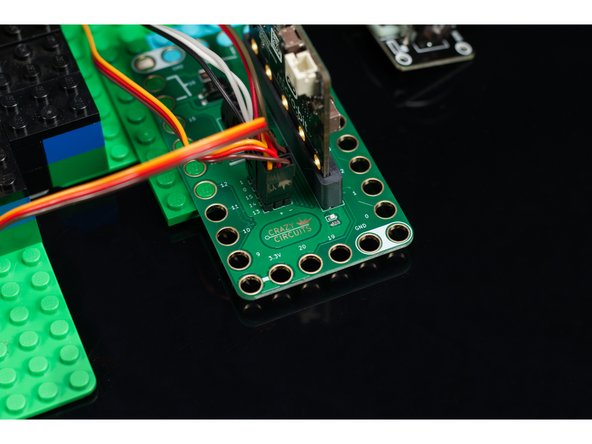
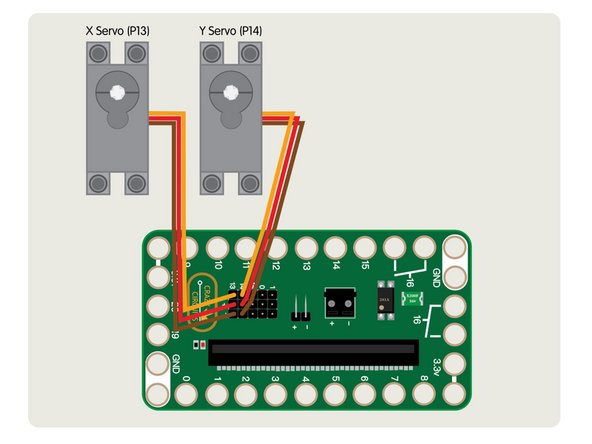
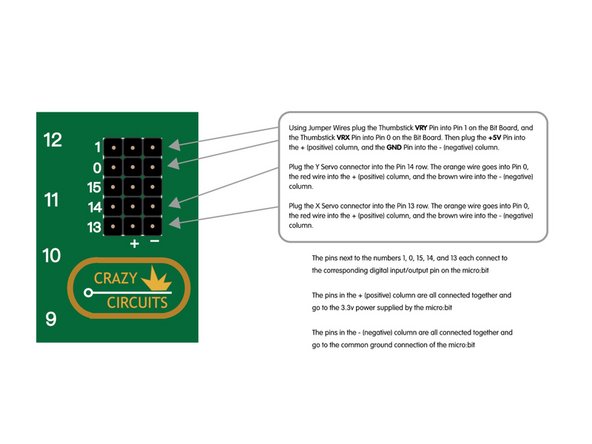
Plug the Y Servo connector into the Pin 14 row. The orange wire goes into Pin 0, the red wire into the + (positive) column, and the brown wire into the - (negative) column.
-
Plug the X Servo connector into the Pin 13 row. The orange wire goes into Pin 0, the red wire into the + (positive) column, and the brown wire into the - (negative) column.
-
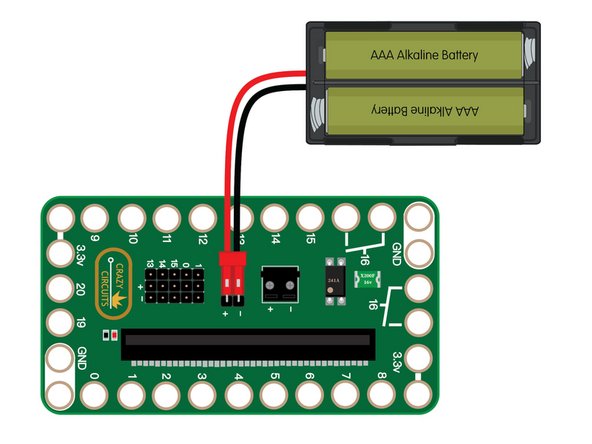
Remember! You will need to add an external battery pack to power the servos. The battery pack can power the servos as well as the micro:bit so once you are done programming the micro:bit you can unplug the USB cable.
-
-
-
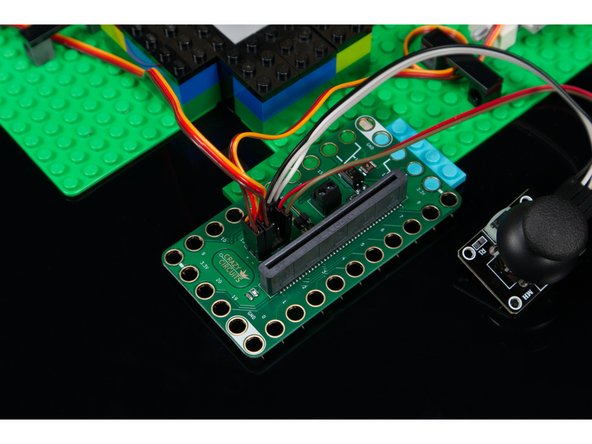
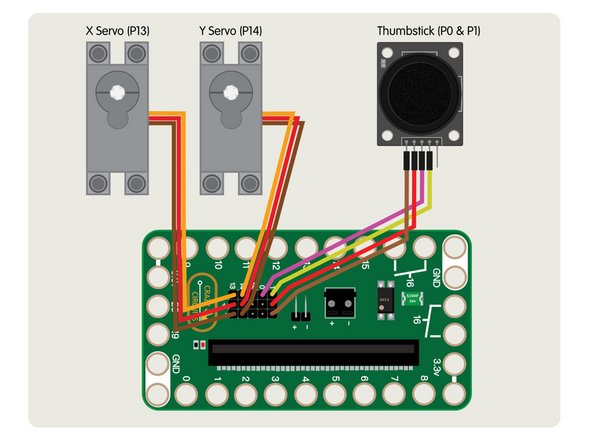
Using Jumper Wires start by plugging the Thumbstick VRY Pin into Pin 1 on the Bit Board.
-
Next, plug the Thumbstick VRX Pin into Pin 0 on the Bit Board.
-
Then plug the Thumbstick +5V Pin into the + (positive) column.
-
And finally, plug the Thumbstick GND Pin into the - (negative) column.
-
-
-
We're going to add a two AAA battery pack to the Bit Board to power the micro:bit and the servos.
-
While the USB cable can be used to program the micro:bit and to provide power for some low-power components (an LED or Piezo Speaker, etc.) it cannot power the servo motors we are using.
-
-
-
Connect a USB cable to the micro:bit and then plug it into your computer.
-
We'll be using makecode.microbit.org to program our board. It uses a simple drag and drop block interface.
-
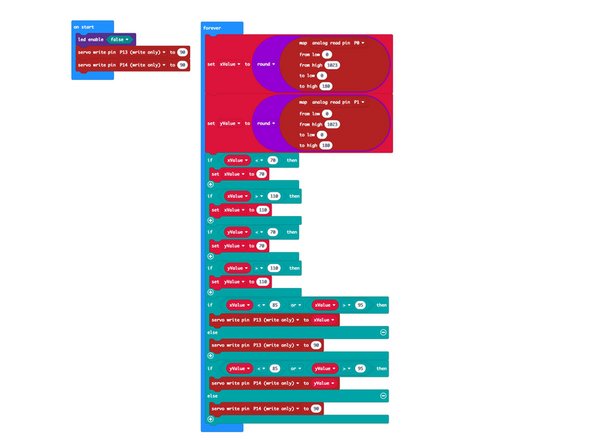
We're going to load the following code for our Maze Tilter program: https://makecode.microbit.org/_DXERvAVU3...
-
Once the code is loaded you can disconnect the USB cable and insert the micro:bit into the Bit Board so it can control the servos.
-
-
-
Now that you have your servos and thumbstick connected, your code loaded, and you've powered your Bit Board with a battery pack, you're ready for testing!
-
One thing you'll need to do is level the maze table and then make sure the servos are in the halfway position before meshing the gears together.
-
The code will set the servos at the halfway point when it starts, so you should always be starting with the table level when you power on the Bit Board.
-
The thumbstick springs back to the middle position when you release it, and we've set the code to allow for a little wiggle room so it won't move on its own.
-
We're ready to go! Can you get the ball from the start to the end of the maze? Can you do it faster than your friend?
-
-
-
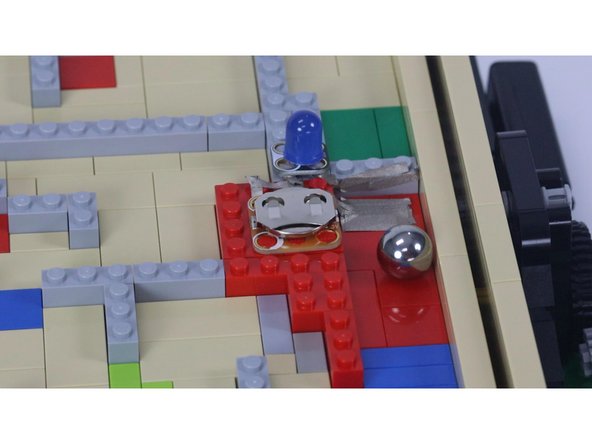
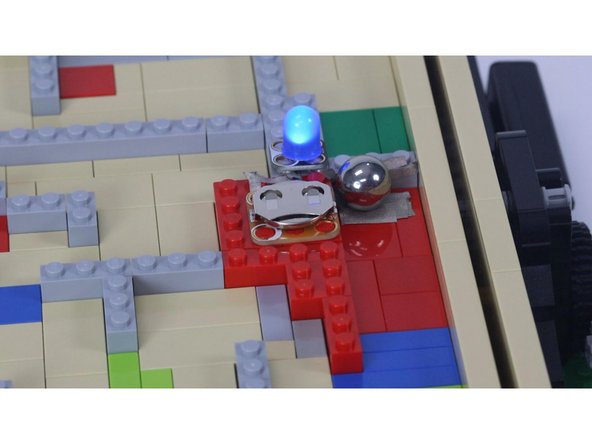
Here's a bonus feature you can add. While the maze came with a little LEGO soccer ball, we replaced it with a steel ball about the same size and then added a circuit we can trigger at the end.
-
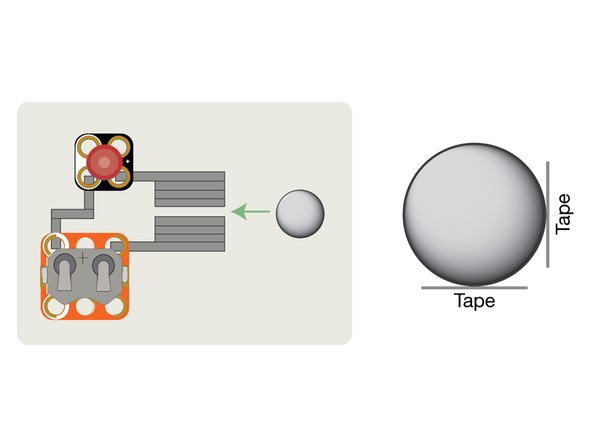
Since the steel ball is conductive we are using it to make contact between two pieces of Maker Tape to complete a simple circuit with an LED and a battery to indicate we've solved the maze.
-
You'll need to place part of the Maker Tape on the floor of the maze and part on the wall at the end of the maze so when the ball comes to rest at the end it can make contact between the two pieces and complete the circuit.
-
Cancel: I did not complete this guide.
One other person completed this guide.


