
Introduction
Wearing an ugly holiday sweater seems to be a new tradition, one we wholehearted embrace. Whole cottage industries have sprung up to sell people ugly apparel. But not forgotten are the sweaters of yester year, ones that were hand made with love. Ones that were never intentionally ugly, but ended up having a certain ugly charm to them.
We celebrate that age old tradition in this guide by showing you how to create your own light up, ugly sweater. All it takes is a few LEDs, some conductive thread, and the willpower to spend a lot of hard work making something purposely look bad.
This project is also a great example of the different effects you can do with our "no programing needed" Blink/Fade Board. Wow event your most Grinch like friends with the joy of a blinking LED.
Video Overview
Featured Document
-
-
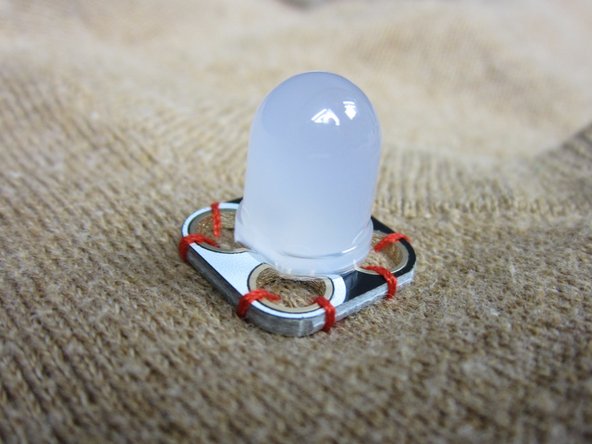
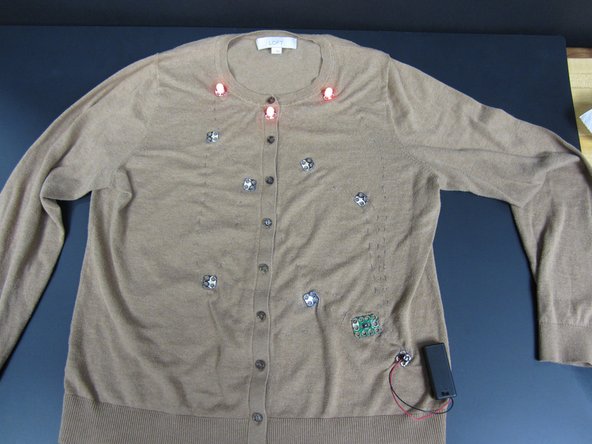
Use part or all of our directions to light up your wearable. We use 9 LEDs, a Blink/ Fade Board, and a Screw Terminal + 2 AAA holder.
-
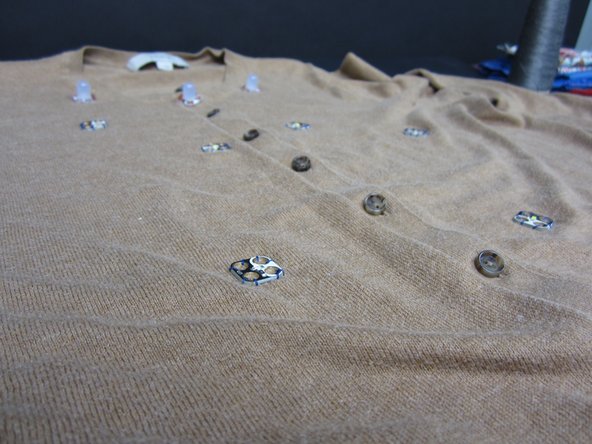
Lay out your sweater and parts.
-
Arrange parts and embellishments that you wish to add.
-
-
-
Now that your parts are laid out on your shirt, create a simple wiring diagram.
-
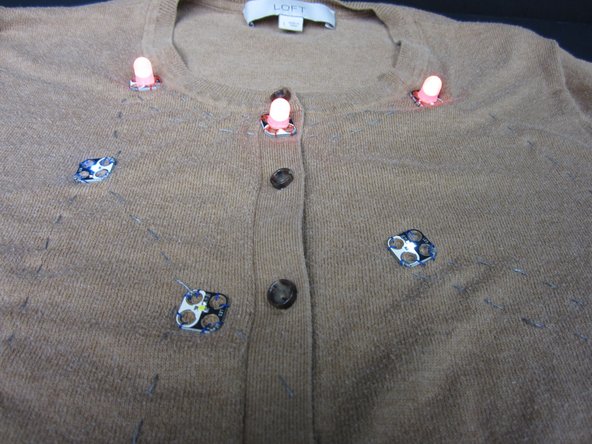
Try not to "cross" any lines of thread. This can cause shorts in your circuit. (Though we had to at a couple of points.)
-
If you're using a Blink/Fade Board this is double important since different output points do different lighting effects.
-
At the start of this guide you'll find a PDF with our wiring diagram nicely drawn out for you.
-
-
-
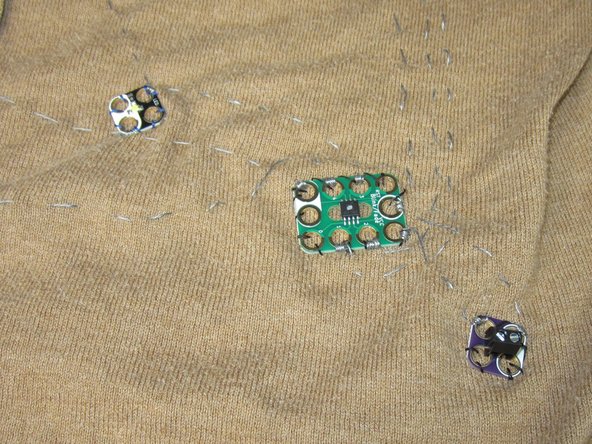
We find it really handy to sew down your electronics using REGULAR thread before using the Conductive Thread.
-
Using regular thread sew down your electronics.
-
Make sure you're lining up the Positive and Negative sides of all your parts to make sewing easy.
-
-
-
If you're only using 2-4 LEDs you can get away with using a CR2032 Coin Cell holder instead of the Screw Terminal + 2 AAA combo. This removes the need to sew a pocket onto your sweater to hide the battery pack in.
-
First, hook up your Screw Terminal to the Positive and Ground pins on the Blink/ Fade Board. Then screw in your battery holder.
-
Use Conductive Thread to connect the Positive Sides of your LEDs to the pins on the Blink/ Fade Board.
-
Remember, you can hook up multiple LEDs to each spot on the Blink/Fade Board. For instance, our three Red LEDs on top are all hooked up to Pin 1. This means they'll all fade in and out in unison.
-
-
-
Ideally you'd first wire in your battery to the Blink/ Fade Board. This way you could test each line of LEDs to make sure your connections are strong.
-
If any of your LEDs are not on, or not doing their effects, check for loose bits of thread.
-
The most common cause of LEDs not working is that your Conductive Thread isn't tight enough around the LED holes. You can always use a bit of thread and do some tight loops around your LED holes, just make sure you're going over your original loops.
-
-
-
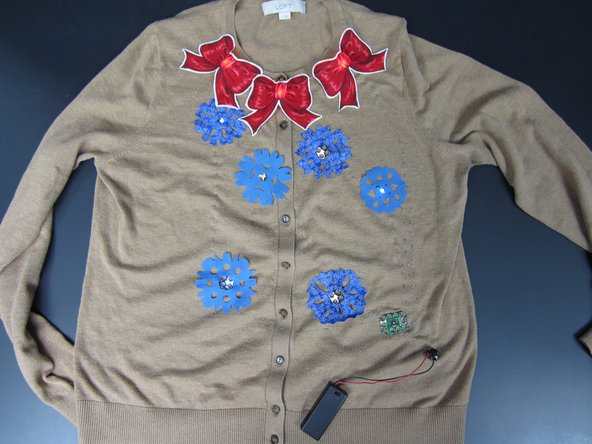
At this point you can just sew on all the fabric embellishments you want as long as your'e using regular thread.
-
If you're using a AAA or AA Battery Holder you should really sew a pocket onto your project, otherwise your battery holder wires may snap.
-


Attached Documents
