Introduction
An overview of the OpenSCAD script used to create our 3D Printed Component Holders, along with a tutorial on how you can customize it for any component.
We've got pre-made holder for our Temperature and Humidity Sensor, Thumbstick, and 7 Segment Display, as well as for an OLED Display and MP3 Player we've used in a few projects.
Tools
Parts
-
-
We originally designed a number of brick-compatible holders for some of the components we use with our kits. Things like a thumbstick, 7 segment display, temperature and humidity sensor, etc.
-
We found that they didn’t always work well over time due to the properties of PLA plastic, so we decided to try again.
-
Our new Component Holder is an adjustable thing which can fit many components as well as a customizable thing you can make for any component on a PCB.
-
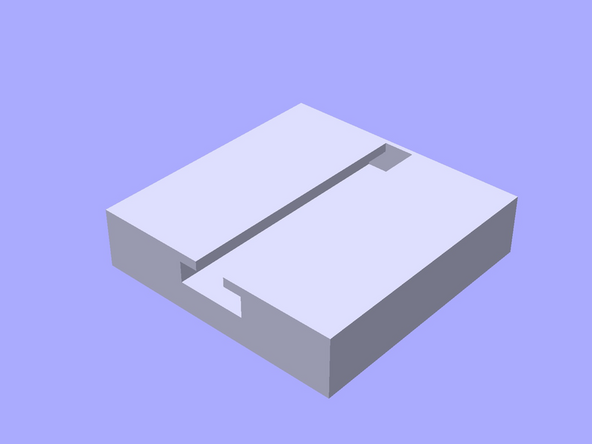
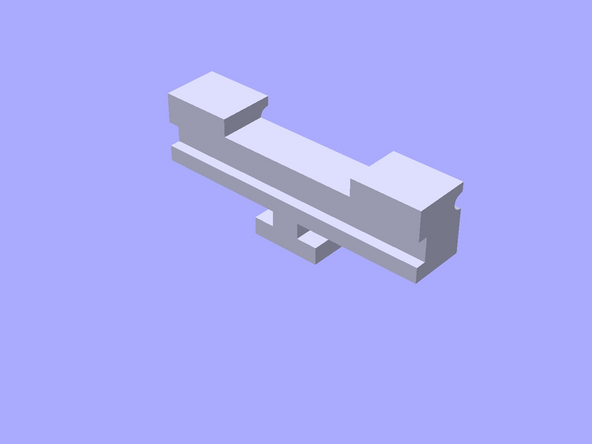
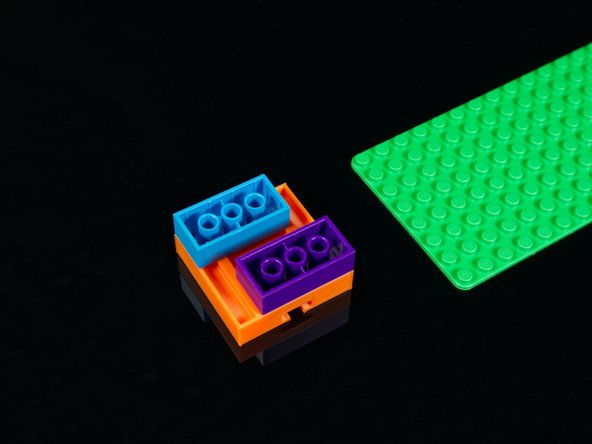
Our Component Holder consists of two parts; a Track and a Jaw. (You’ll need two jaws for each holder.)
-
If you've already printed the parts and just need to assemble them, skip to Step 11.
-
-
-
While we’ve provided a number of different sized holders, you might need something different.
-
We’ll walk through the steps needed to create your own Component Holder.
-
You’ll need OpenSCAD to customize the code that generates the holder, so download OpenSCAD: http://openscad.org/downloads.html
-
You also need the OpenSCAD file, which you can get from GitHub: https://github.com/BrownDogGadgets/3D-Pr...
-
You can also download the files from Printables or Thingiverse.
-
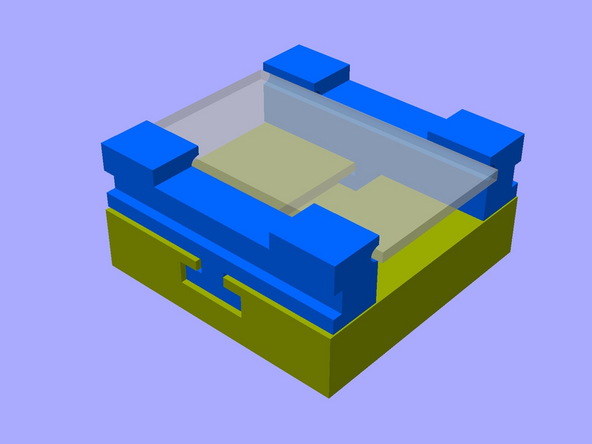
The diagram shows a number of the variables and parts we'll be referencing in this guide.
-
-
-
You’ll need to know the width and length of the component you want to hold.
-
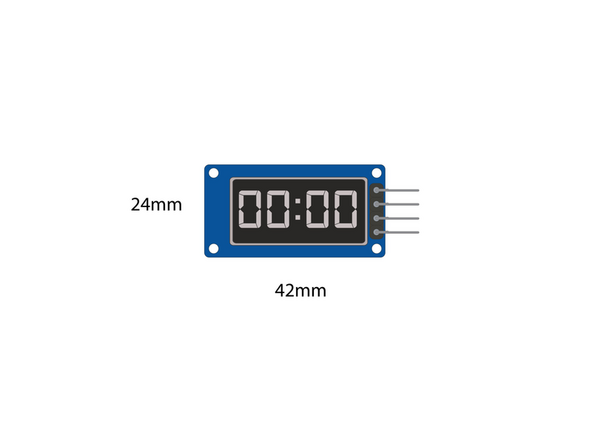
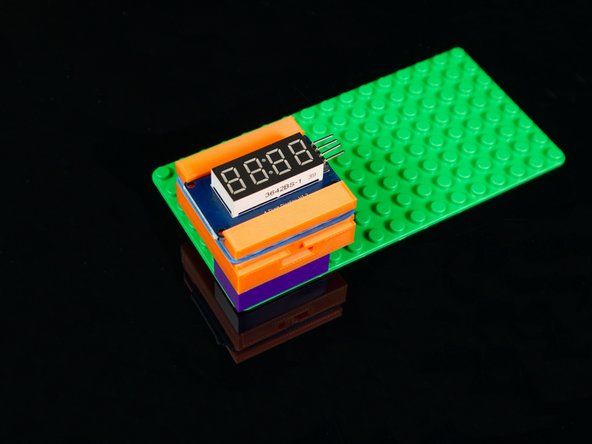
For this example we’ll use the 7 Segment Display.
-
The PCB (the “circuit board” part) is 42mm x 24mm.
-
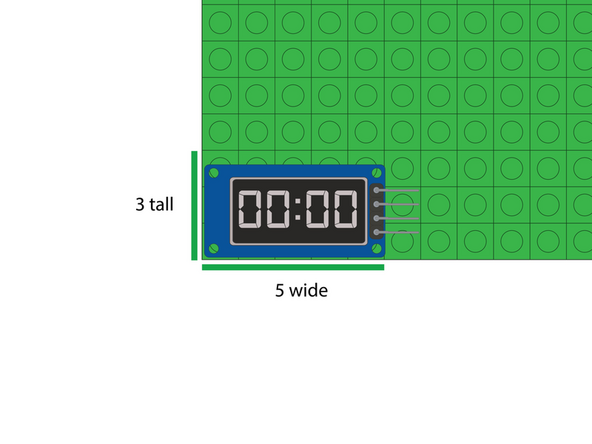
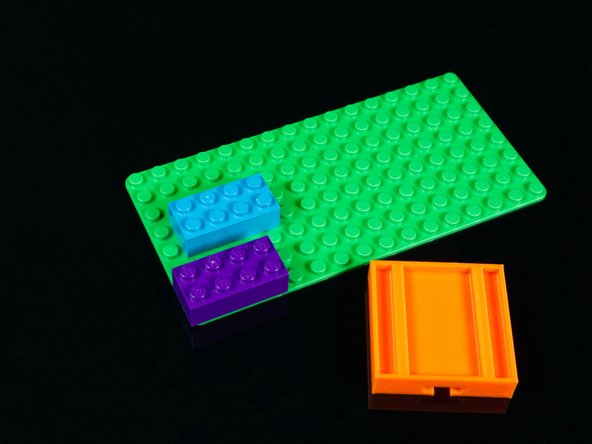
We'll also measure the component in "LEGO units" by putting it on a baseplate.
-
Here you can see the component is 5 LEGO units wide, and 3 LEGO units tall.
-
We'll have to account for the Jaws so the actual height should include 2 additional LEGO units for a total of 5 LEGO units tall.
-
-
-
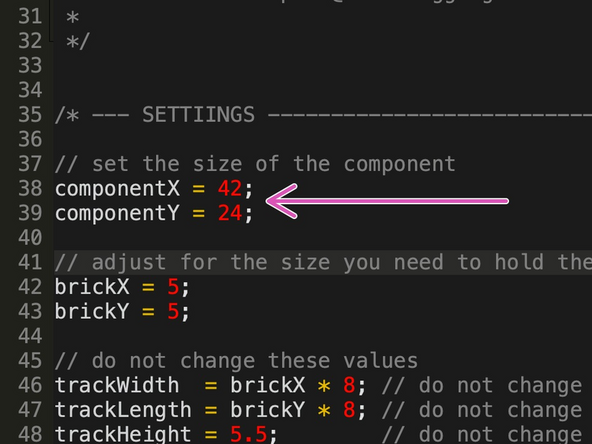
We’ll set the componentX variable in the code to 42 and set the componentY variable to 24.
-
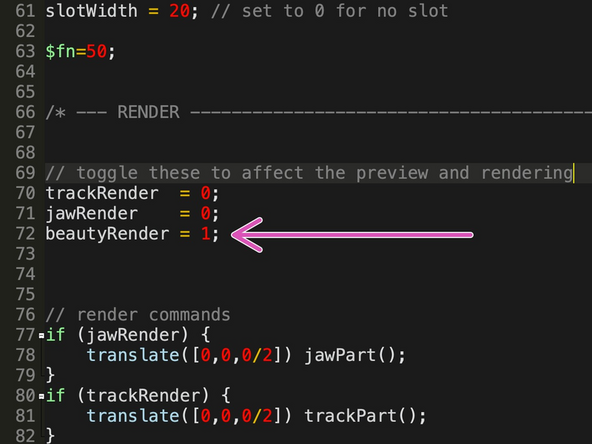
Set beautyRender to 1 and the rest of the render variables to 0.
-
Preview the file. (Press the F5 key or use Preview under the Design menu.
-
Note that you can also just select Save and it will save and preview your changes.
-
-
-
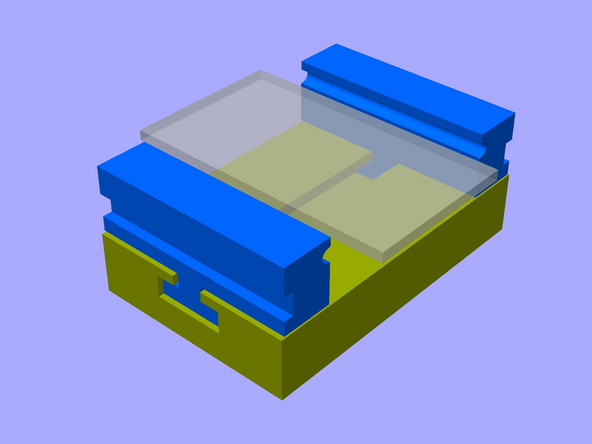
You should see something like this.
-
Now, this might work fine for you, if so… great!
-
But we’ll show you how to make a few more adjustments.
-
-
-
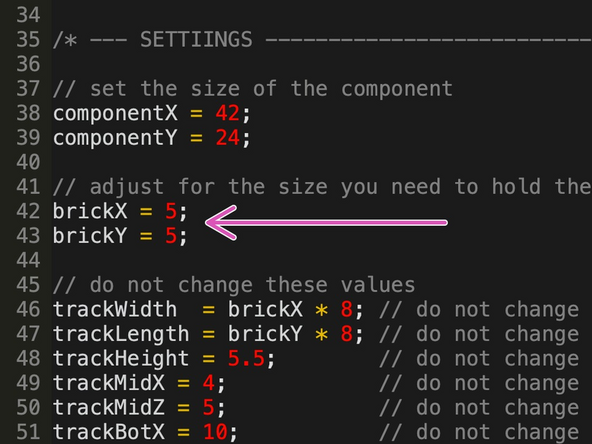
If you want to adjust the Track part (that sits on bricks) we can do that with two more settings.
-
brickX and brickY set the dimensions of the holder.
-
Try changing the values and then use the Preview command to see how the changes affect the model.
-
Of course if you want a smaller holder, you can leave it as-is!
-
-
-
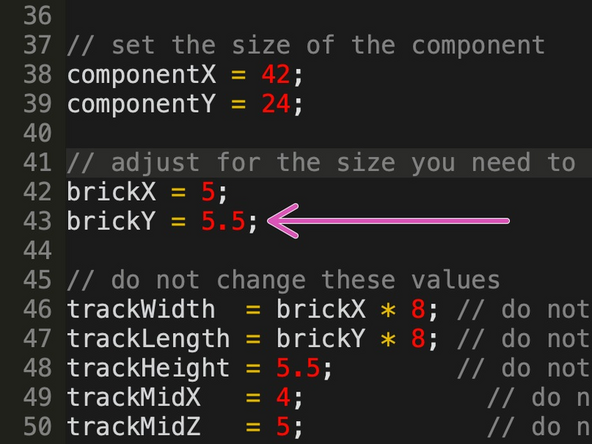
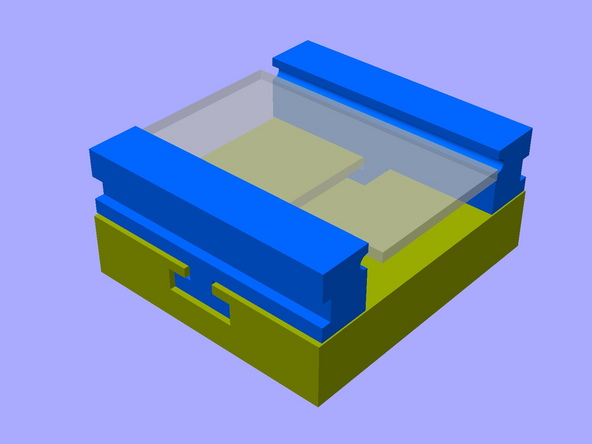
There’s one more trick for the brickY size. You can use half sizes. So if 5 isn’t quite enough try using 5.5
-
Using a half size has one issue, which we’ll cover in Step 11.
-
Note that you’re not just limited to “half” sizes… You can use any decimal. Try 5.1 or 5.8
-
Typically we never make a holder smaller than 4x4 since we want to easily attach standard LEGO bricks to the bottom, and most PCBs we use are not so small that they require a small holder.
-
-
-
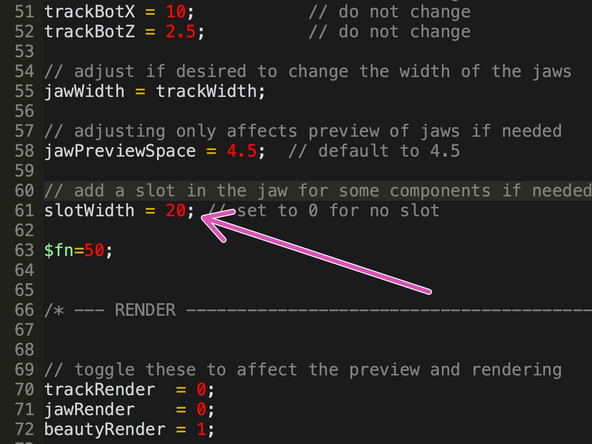
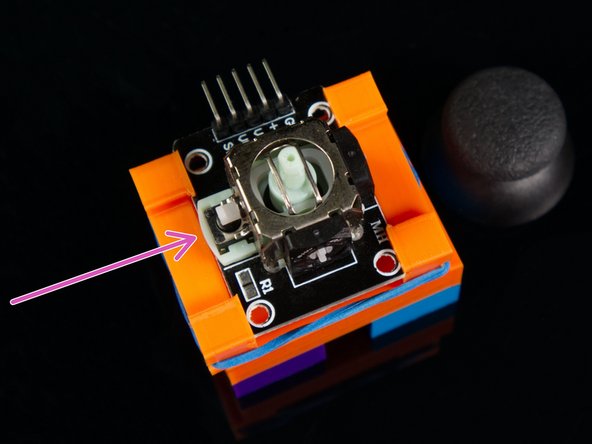
Occasionally a component has parts that extend all the way to the edge of the PCB. If this is the case, it may not fit quite right in the jaws. We can fix that.
-
Find the variable slotWidth and change it from 0 to 20 and select Preview.
-
It should change the jaws to create a slot in the center.
-
The slot will allow a PCB with parts mounted to the edge to fit into the holder properly.
-
Note you may need to adjust the value as 20 was just an example number.
-
-
-
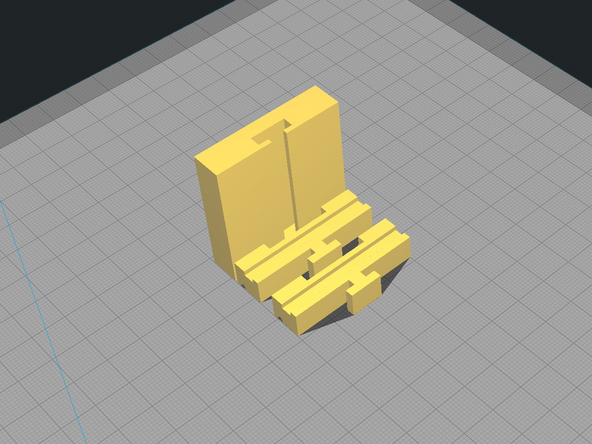
Once you’ve adjust the value for componentX, componentY, brickX, brickY, and slotWidth you can export the Track and the Jaw.
-
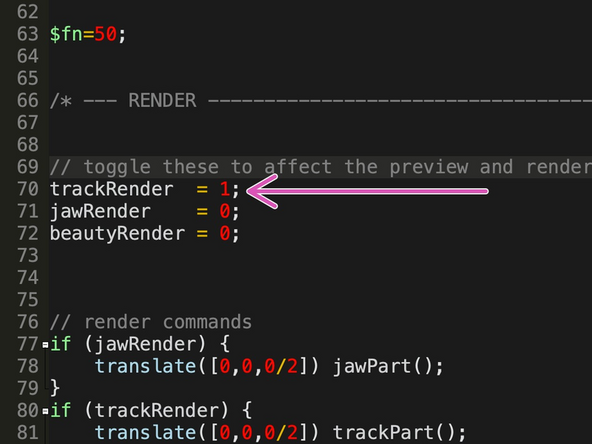
Find the beautyRender variable and set it to 0, and set jawRender to 0.
-
Set the trackRender variable to 1, and then save and preview your file.
-
Under File use the Export menu and export your file as an STL.
-
Now set trackRender to 0 and jawRender to 1 and do the same thing to export your Jaw file.
-
Note that when a part is rendered it will no longer be in color.
-
-
-
You should now have a Track file and a Jaw file. (Make sure you’ve named them appropriately.)
-
You can load them into your slicing software, set the orientation as shown, and print them!
-
-
-
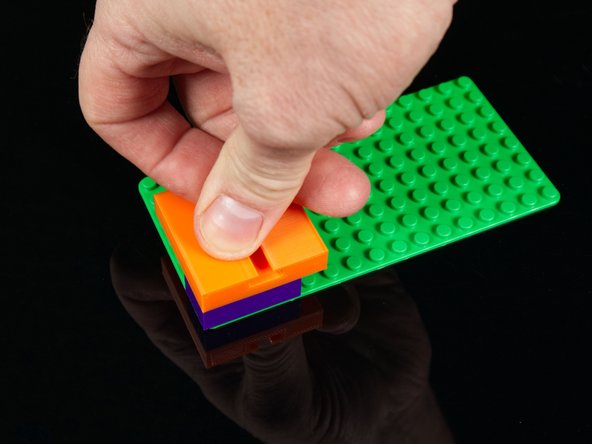
Once your parts are printed you can put it all together.
-
To attach LEGO bricks to the Track we like to place the bricks onto a baseplate and the press down on the Track so it snaps into place.
-
You can then remove the Track (with attached bricks) from the baseplate.
-
Note that if you used a half size in Step 7 you'll need to account for that when attaching the bricks. That's why it's best to attach the bricks to the baseplate and then attach the Track to the bricks.
-
-
-
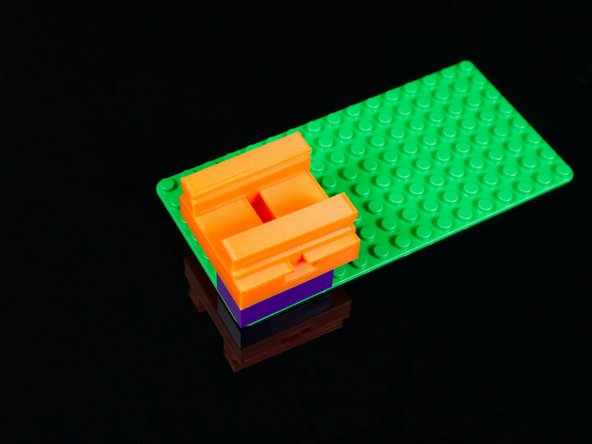
Now you can slide the Jaws into place.
-
Make sure the PCB slots are on the inside, facing each other, and the “rubber band” slots are on the outside.
-
Add an appropriately sized rubber band to hold the jaws together.
-
The rubber band doesn’t need to be super-tight, since you still need to add your component.
-
-
-
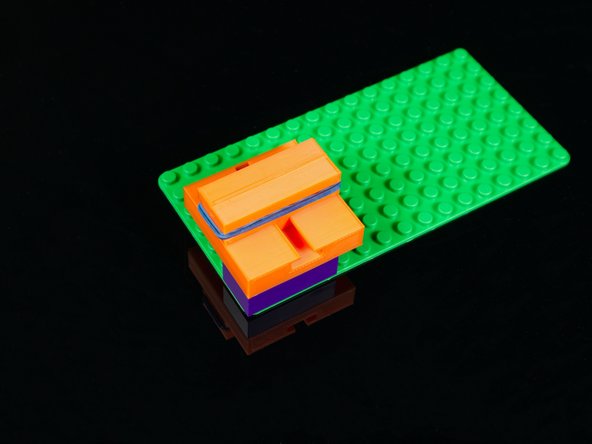
Expand the Jaws to slide the component into place and you’re ready to mount the whole thing to a baseplate along with any other Crazy Circuits components you’re using in your project!
-