
Introduction
A completely DIY Music Reactive Christmas Tree with micro:bit, Crazy Circuits, an Audio Analyzer, and materials from the dollar store.
Video Overview
Featured Document
-
-
Print the templates and cut out the three circles, but leave the star intact.
-
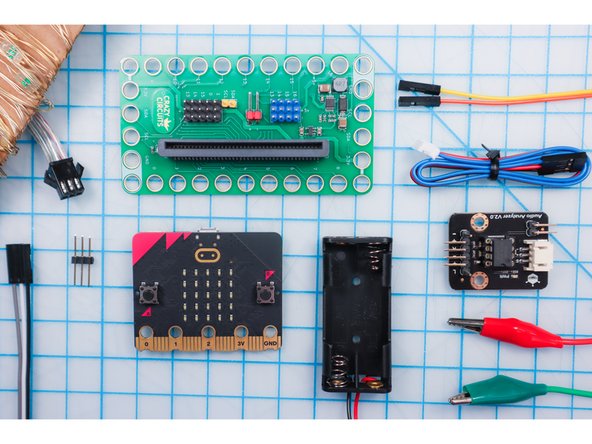
Gather supplies from the list above!
-
Tip: The tree structure can be made with many types of baskets or even just foam core to make a cone shape. The limitation is the approx. 3.5 inch distance between LEDs, so the circumference of the bottom circle should be no greater than (14 LEDs* 3.5 inches) or 49 inches.
-
-
-
Tape the large circle template to the bottom of your basket. If your basket is smaller, you can trim the circle down to size.
-
-
-
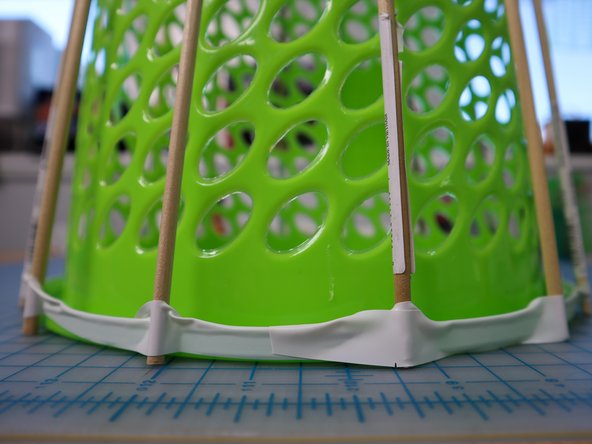
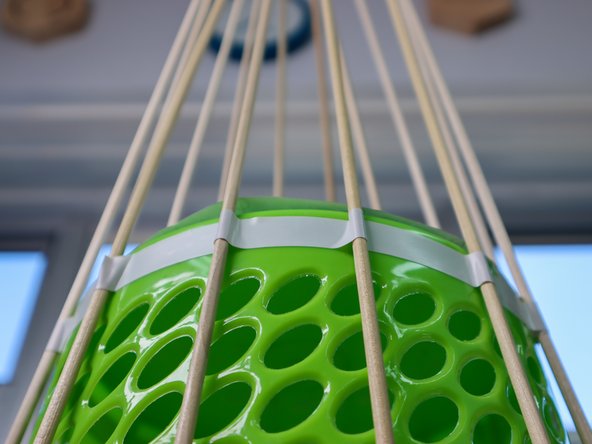
Tape the dowels to the bottom where it meets the table, and the top of the basket using the lines on the template as a guide. There are 14 lines.
-
I used a long piece of electric tape and positioned each dowel as I spun the basket around, but you could also use individual pieces of tape.
-
-
-
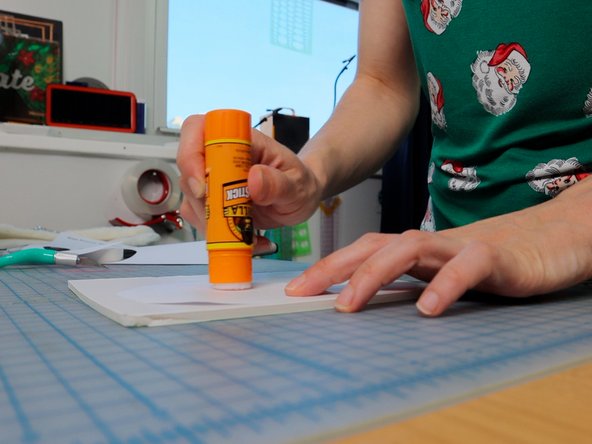
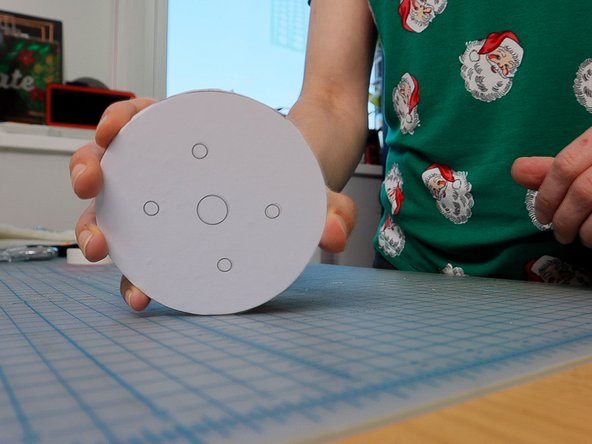
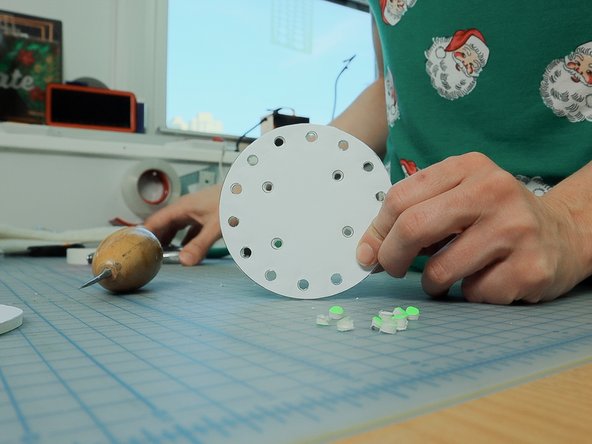
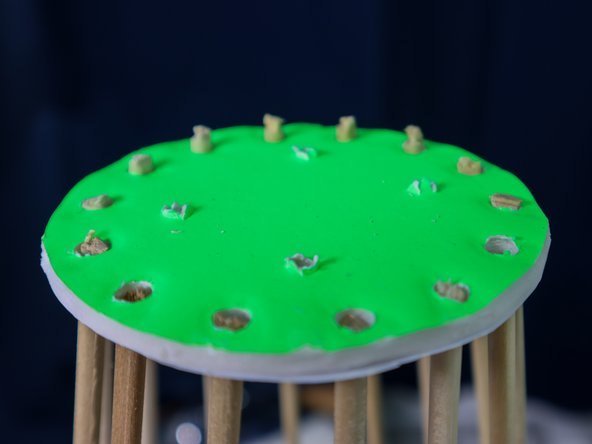
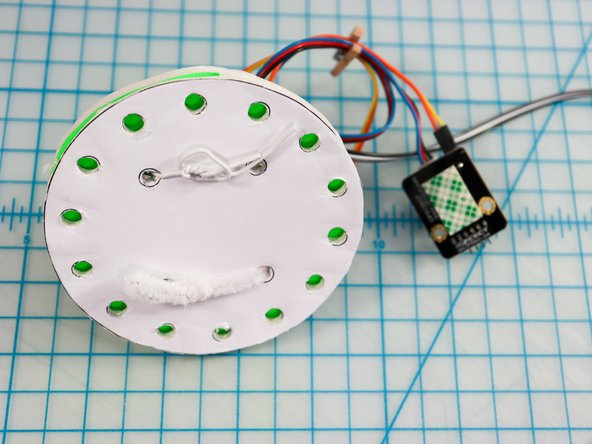
Glue the small circle templates to foam core and cut them out.
-
Use a hole punch to punch out each of the outer holes, and an awl to put a hole thru the inner holes.
-
-
-
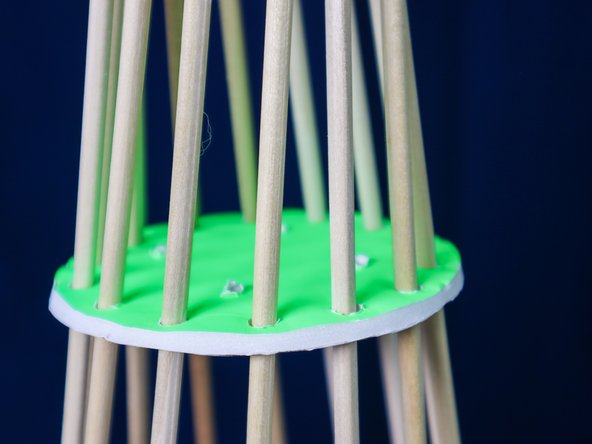
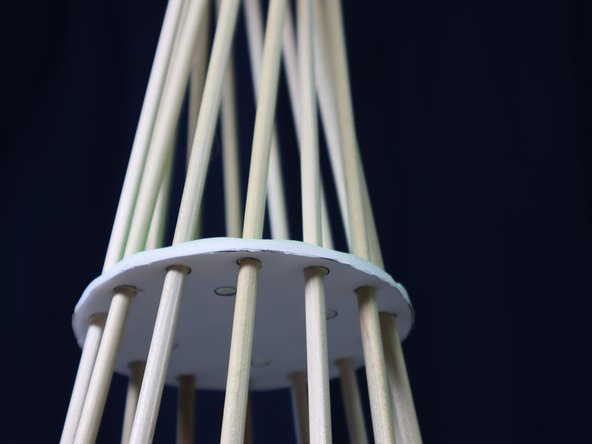
Place the circle over the dowels one at a time. It's ok to bend them a little to get them into place.
-
Push the circle down until the dowels form a point at the top.
-
-
-
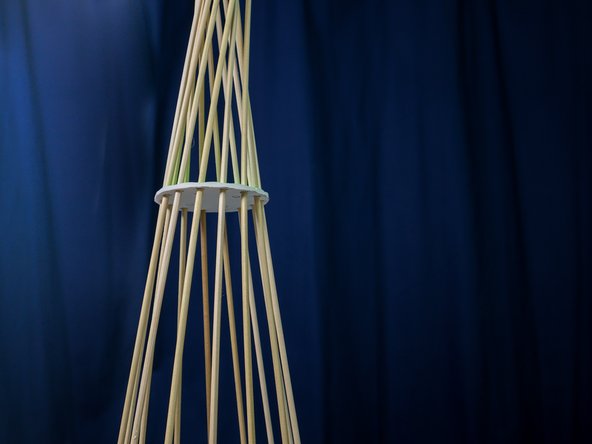
Cut the dowles off above the circle as shown.
-
-
-
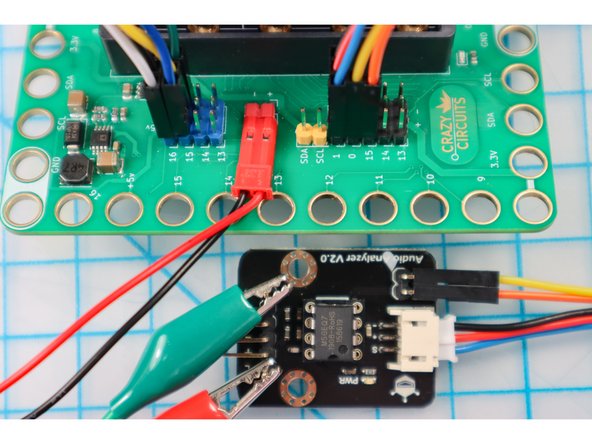
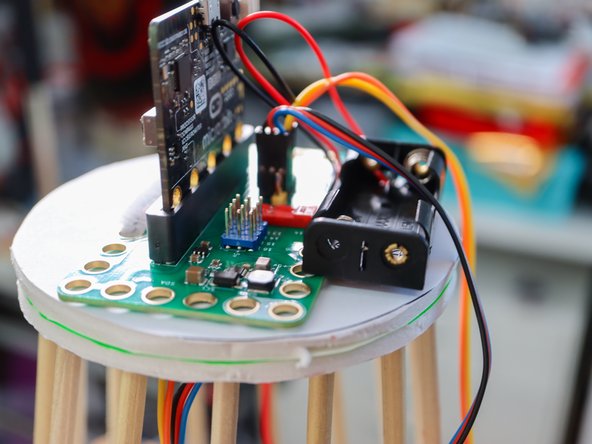
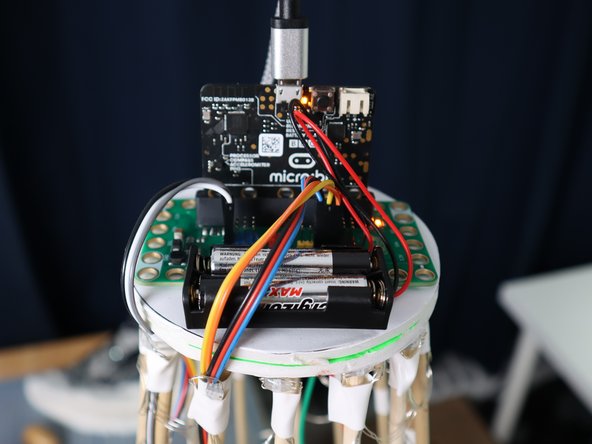
While building, I connected and disconnected the circuit several times as I attached the components, but in the end, the connections need to be like this:
-
Battery Pack to + and -
-
NeoPixel Tree LEDs to Pin 16 (Use 3 Long Headers to connect the NeoPixel connector to Jumper Cables)
-
NeoPixel Star LEDs to Pin 15 (optional)
-
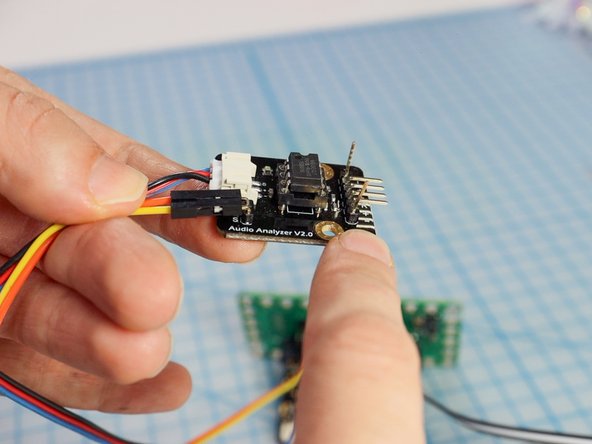
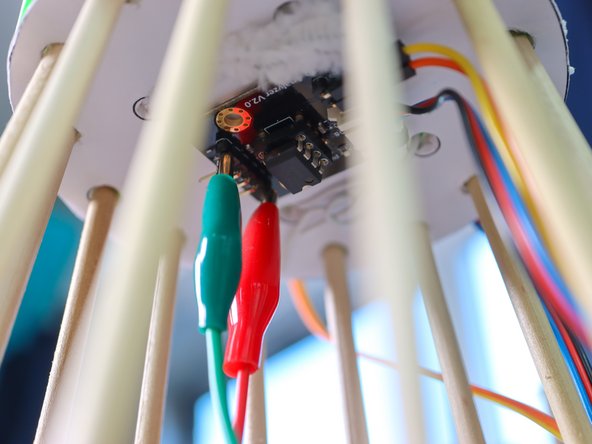
Audio Amplifier 3-Wire Cable to Pin 1
-
Audio Amplifier Pin S to micro:bit Pin 0 and Pin R to micro:bit Pin 15
-
Audio Amplifier Pins L and "-" to Aux cable using Alligator Clips as shown in detail in a later step.
-
-
-
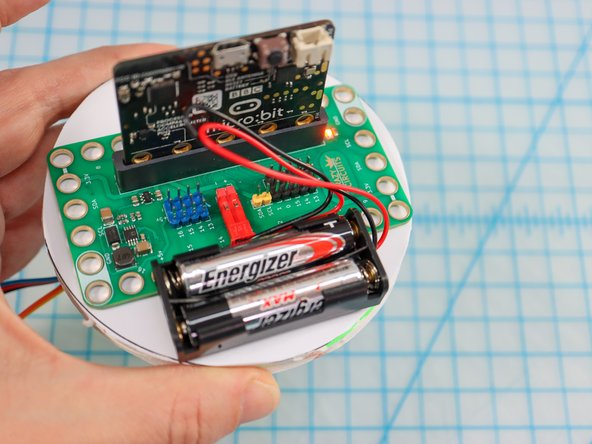
Stack the circles on top of each other, aligning the 4 circles in the center. (There is a right and wrong way, rotate 90 degrees if it doesn't align perfectly).
-
Place the Bit Board over the holes on the opposite side of the 14 holes, so those holes appear on the bottom.
-
Thread a twist tie or pipe cleaner through the holes of both foam circles and twist it on the bottom side to secure it.
-
Use mounting tape to secure the battery pack.
-
-
-
Use a piece of double-sided mounting tape to adhere the Audio Amplifier board to the bottom of the foam circles.
-
Fold the two outer pins on the Audio Amplifier up to make it easier to clamp to.
-
Attach an alligator clip to each of those pins.
-
NOTE: Music reactivity is optional! This project can be created as an animated tree that doesn't react to music, so skipping the Audio Amplifier is a simpler option. :)
-
-
-
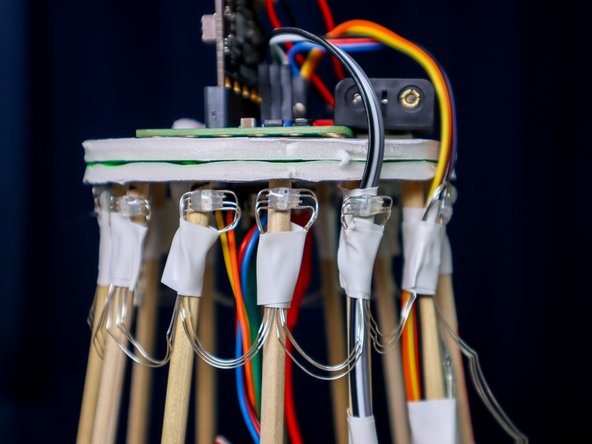
Add a glue dot or a dab of hot glue to the top of each dowel and place each dowel inside the holes on the circle piece as shown.
-
-
-
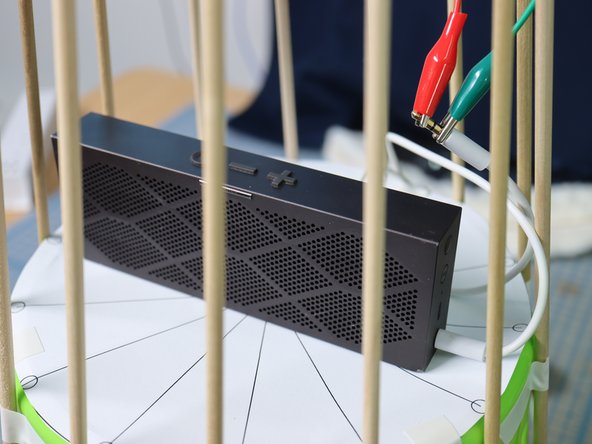
In my case, I had a small speaker that fit inside the tree, so I connected my audio splitter cable to both the speaker and my phone (the music player) via a splitter. It is necessary to make a physical connection via an aux cable (rather than bluetooth) so that the micro:bit can read the audio values to animate the tree.
-
Alternatively to using a splitter, you could use your computer and play the music from the phone's speaker and headphones as a multi-output device.
-
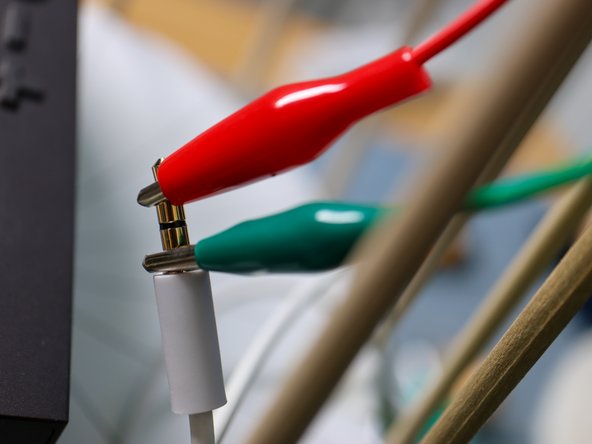
An AUX Cable will typically have two or more connections separated by little black rings. Connect the GND alligator clip to the ring closest to the cable and the other alligator clip to the tip as shown.
-
-
-
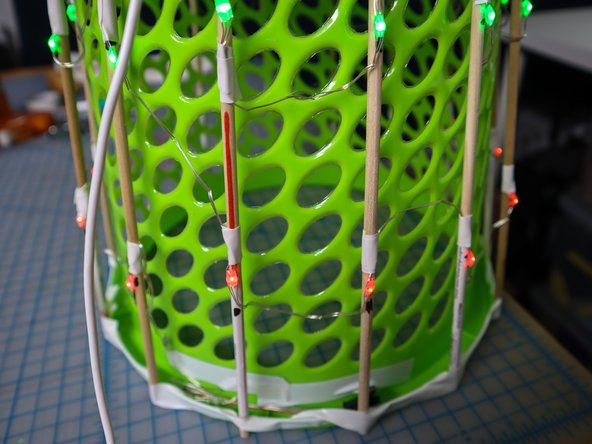
Add two strings of NeoPixel to the tree by measuring the height of the tree and dividing it by seven sections.
-
Tape an LED to each dowel, then move to the next one horizontally to make a full ring, then jump down to the next row and go around again until you've placed all 98 pixels.
-
-
-
Wire the strip to Pin 16 using 3 long header pins and jumper wires as shown.
-
-
-
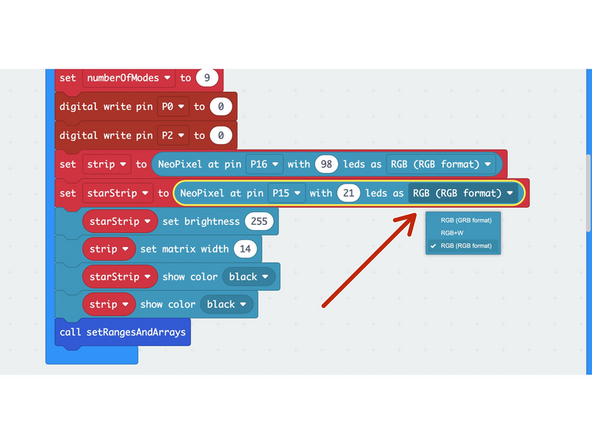
This is one of the most advanced code sequences that we've released, so if you are new to coding, just download it and watch it happen! Click Here.
-
Tip: Do the colors look strange? It could be that your NeoPixel strip uses different RGB colors than mine! To fix it, experiment with changing the RGB color options in the "set" block (photo 2) for your strip.
-
-
-
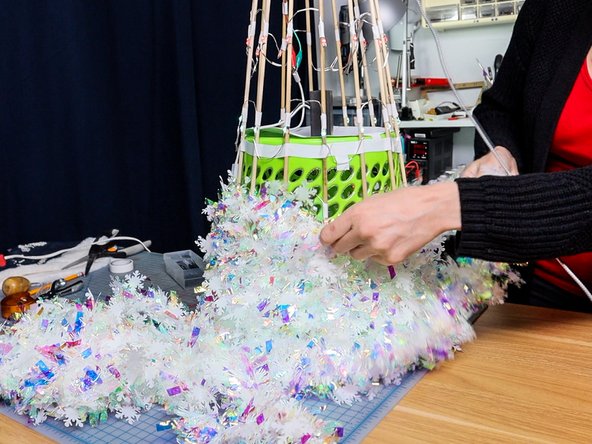
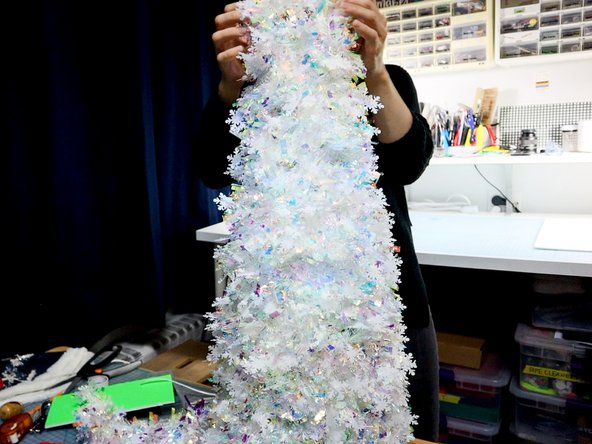
Add garland by wrapping it tightly around the tree. Look for translucent or shiny garland to diffuse and bounce the light throughout the tree.
-
Add ornaments if desired!
-
-
-
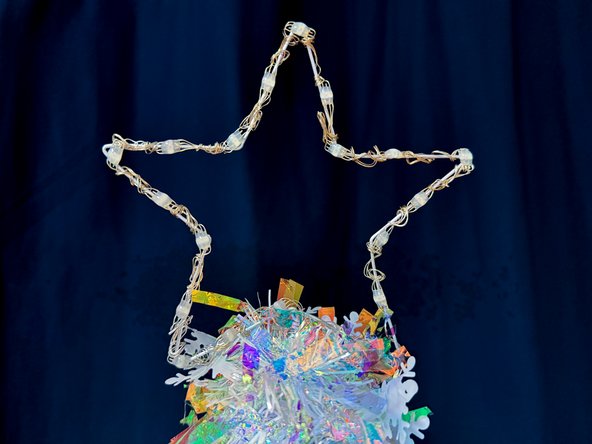
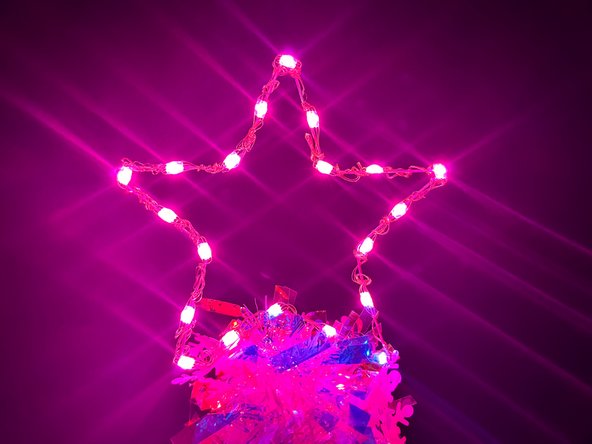
Optional: Follow the NeoPixel Star LED Tree Topper Tutorial to add a star to the tree, or add your own tree topper.
-
Hint: The star is already animated in the code from the last step! Just connect it to Pin 15. If you don't make the star, the code still works for just the tree too!
-
-
-
Plug in your music and watch it go!
-
Press buttons A and B to advance to the next or previous animation.
-
Rock on Holiday Style! We hope you have a festive season! :)
-


Attached Documents
