
Introduction
This advanced paper circuit project uses 3D printed parts, but you could substitute for regular battery holders if you don't have a printer.
Video Overview
Featured Document
-
-
The attached PDF can be used as a template to create a battery tester for AAA (or AA) batteries.
-
If you're like us you may have a whole bunch of AAA batteries around and not know which are new and which are used. This tester will solve that problem.
-
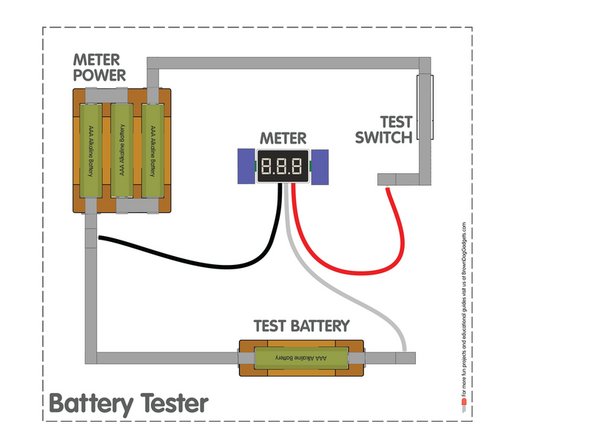
The Meter Power holds 3 AAA batteries to power the device, and the Test Battery holds a single AAA battery.
-
This project uses our 3D Printed Maker Tape Battery Holders but you can always make your own or use standard battery holders.
-
Throughout this guide we'll assume you're using the AAA battery holders, but if you prefer an AA version, make the needed adjustments along the way.
-
-
-
Start by cutting the paper switch from the side of the template.
-
The switch is the same one you'll find in our Switch - Lever Switch guide.
-
After you cut out the switch you'll need to add a fold (along the dotted line) and add Maker Tape that wraps around the switch.
-
You can add the tape to the switch now and set it aside, or finish it later after you've added the tape for the circuit paths.
-
-
-
Add Maker Tape as shown on the template.
-
You only need to add tape within the dotted border, don't add any to the switch on the right side!
-
Remember, Maker Tape can be overlapped and still work just fine since it's conductive on the top and bottom surface, and all the way through!
-
-
-
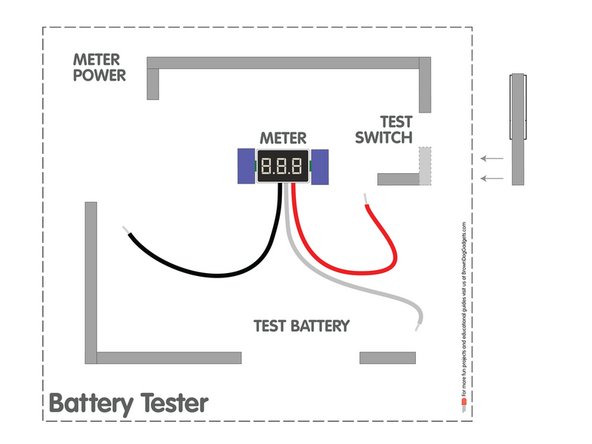
We placed our meter in the center of the circuit and taped it down as shown.
-
-
-
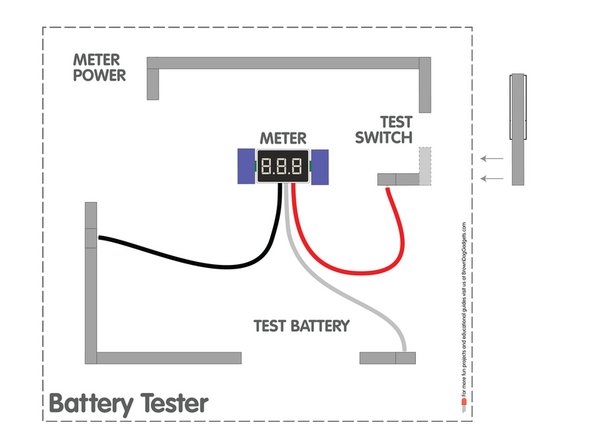
Place the wires on top of the tape paths as shown, and then tape them down.
-
The wires should be long enough to reach where they'll be secure down, but if not just add more Maker Tape to reach them.
-
The way the meter works is like this:
-
The red wire is positive power to the meter. Our switch will make sure it's only on when the switch is pressed.
-
The white wire is used to measure the voltage of our test battery.
-
The black wire is ground and needs to be connected to power the meter and to the test battery.
-
-
-
If you've done any of our Paper Crafts projects you're probably familiar with how we use a "Tape Loop" to hold down and connect a CR2032 Coin Cell battery...
-
We're using the same method here. Make four tape loops and add them as shown on the template.
-
-
-
If you haven't made your battery packs yet, make your Maker Tape Battery Holders before this step!
-
Add in your battery holders, making note of the polarity.
-
-
-
Finally, add the switch we made in Step 2.
-
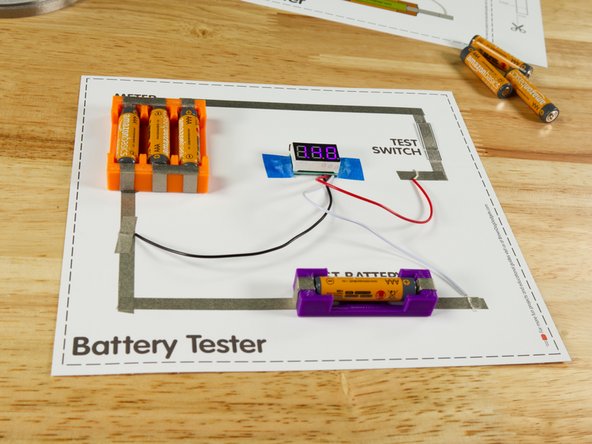
Once you've got all the pieces in place you're ready to try your Battery Tester!
-
-
-
With everything in place all you need to do is press the Test Switch and read the meter.
-
If your battery is 1.50 or higher that's a fresh battery! 1.40 or lower? It's not dead yet, but it's pretty weak!
-


Attached Documents
