
Introduction
Connect a Capacitive Touch Sensor to a Bit Board and control it with code. A "Cap Touch" sensor is a type of switch, but instead of closing a contact it looks for a change in capacitance, which happens when you place your finger near the sensor.
Video Overview
Featured Document
-
-
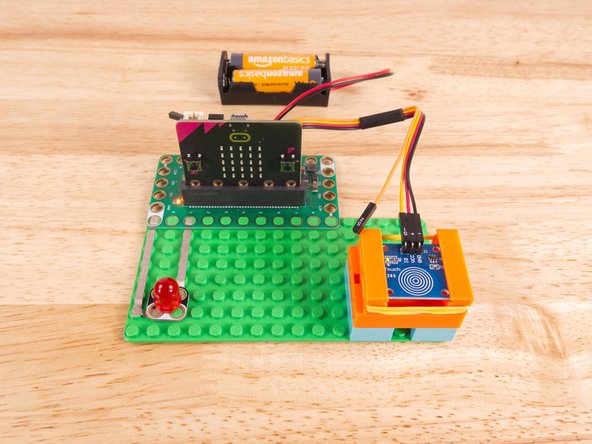
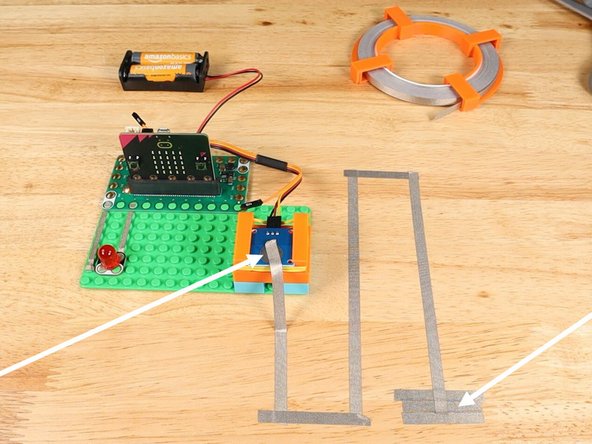
We'll connect the Capacitive Touch Sensor with a Crazy Circuits Ribbon Cable using just three of the wires.
-
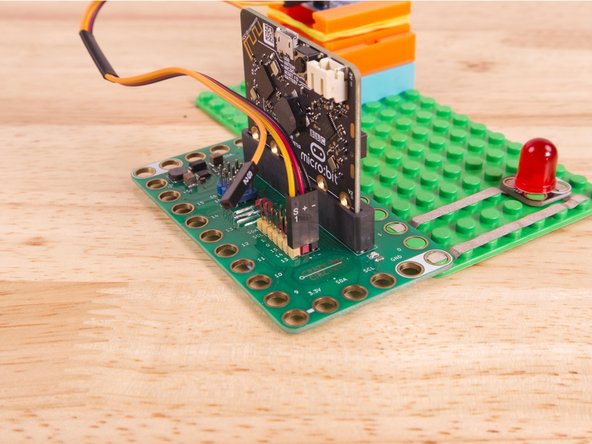
Start by plugging the connector with the three wires in it (Black, Red, Yellow) into the Pin 13 row of the Bit Board. (Make sure the Black wire is in - and the Yellow wire labeled S1 is closest to the number 13 on the Bit Board.) The Orange wire (labeled S2) does not get plugged in and can hang loose.
-
Now we'll connect the other end of the Ribbon Cable to the Capacitive Touch Sensor. S1 (Yellow) goes to IO, and then + (Positive) goes to VCC and - (Ground or Negative) goes to GND.
-
-
-
We used a 3D printed holder we designed to hold the Cap Touch Sensor in place on the LEGO baseplate.
-
(We don't have a specific holder for the Cap Touch Sensor but the 7 Segment Display Holder should work just fine.)
-
Alternately you can use some LEGO bricks and a rubber band or tape to hold the sensor in place. (But don't use anything conductive!)
-
And be sure to check out the 3D Printed Component Holder Guide if you want to design & print your own at any size.
-
-
-
We're going to load the following code for our Cap Touch Toggle Better program: https://makecode.microbit.org/_H337vxCgi...
-
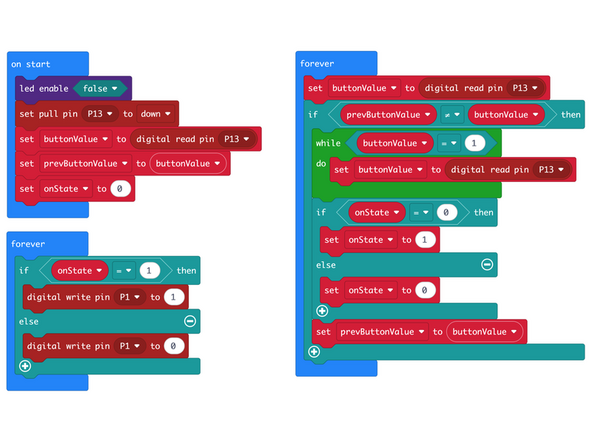
In the on start block we'll set Pin 13 to down for the Capacitive Touch Sensor, which is the opposite of what we usually do with a standard pushbutton.
-
We'll also set a few variables; buttonValue, preButtonValue, and onState. (These will be used to keep track of things in our code.)
-
In the larger forever block we'll read the value of Pin 13 which has the sensor connected to it. We then check if prevButtonValue and buttonValue are not equal to each other. The loop continues on and does nothing until the two variables are not equal to each other.
-
Remember that we set buttonValue in the on start block, and then set prevButtonValue to buttonValue so they would start with the same value. They will be unequal only when the sensor is triggered.
-
Once we enter the while loop (because buttonValue is now 1) we keep checking the sensor and setting it to the variable buttonValue. The while loop continues as long as it is true, which means when the buttonValue becomes 0 (when the sensor is no longer triggered) we break out of the while loop.
-
After we exit the while loop we check the onState value and flip it to the opposite value. If it's 0 we set it to 1, and if it's 1 we set it to 0.
-
In our second forever loop we will test the buttonValue to see if it is 1 or not so we can turn on the LED. (If it is not, we do the else part of our if/else statement and turn off the LED.)
-
-
-
Once the code is loaded it should start running immediately.
-
You can power the micro:bit via the USB cable you used to load the code or you can use a battery pack plugged into the Bit Board.
-
Touch the sensor with your finger and then remove your finger and the LED should light up. Press it again and then remove your finger and the LED will turn off.
-
Note this this time the action of pulling your finger away from the sensor is what triggers the action. This is because our code is looking for the change of state from 1 to 0 (or from on to off.)
-
If you try to tap the sensor rapidly it works fine, and you can press and release as fast as you want.
-
-
-
As mentioned the Capacitive Touch Sensor can detect when a finger (or other conductive object being held) touches or comes close to the pad of the sensor.
-
In this video you can see how the sensor gets triggered by just putting a finger close to (but not touching) it, and that you can even put an object (in this case, a piece of paper) in front of the sensor.
-
Here's an excerpt from a post about capacitive sensors:
-
"The sensor works by measuring changes in an electrical property called capacitance. Capacitance describes how two conductive objects with a space between them respond to a voltage difference applied to them. When your finger, a conductive object, touches the device (screen), it changes the capacitance of the sensor."
-
For a more in-depth study read the full post about capacitive touch sensors.
-
-
-
We've got one more trick with the Capacitive Touch Sensor. If you flip it over you'll see a silver pad on the PCB (Printed Circuit Board) and we can use that to extend our reach.
-
Connect a piece of Maker Tape to the silver pad and run it far from the sensor. You can see in the video we made a little zig-zag pattern, but we've also successfully ran a piece of Maker Tape across a room!
-
In the video you'll see that we were able to trigger the sensor by just waving a hand above the Maker Tape. The tape sort of acts like an antenna to amplify the sensors reach.
-
One thing worth noting is that not everyone is the same! You might be able to trigger the sensor from afar while someone else needs to reach closer.
-
Capacitive Touch Sensors can be affected by then environment, and things like humidity, as well as from the differences between people's bodies.
-
-
-
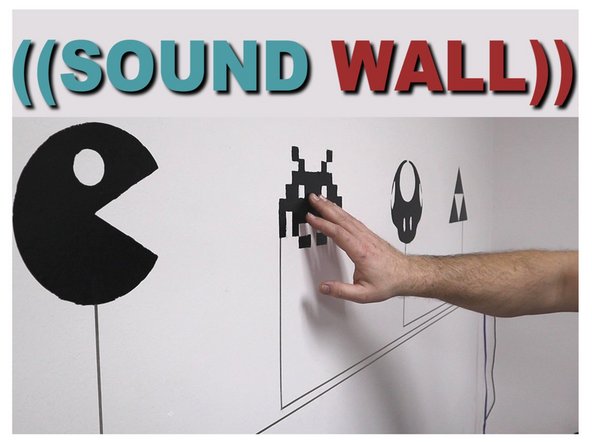
Our Sound Wall project (from 2020) used a different microcontroller but could be built using a micro:bit along with a few of the Capacitive Touch Sensors and an MP3 Player.
-
We have a guide on using the MP3 Player with the micro:bit so it would mainly be a matter of replacing the buttons with Cap Touch sensors.
-
By connecting Maker Tape to the back side of the Cap Touch Sensor we can build touch points far from the micro:bit and build bigger projects with unique touch trigger capabilities.
-
-
-
Follow along with our recorded Live Stream!
-
You can watch the full video of us walking through this project, along with explaining and exploring the code: https://www.youtube.com/live/tgQ9Y5K9t2I
-


Attached Documents
