Introduction
Our Crazy Circuits Ribbon Cable (featuring color coding and labels) makes connecting components even easier!
Tools
No tools specified.
-
-
If you've built any project using our Crazy Circuits system there's a good chance you've used ribbon cables to connect components.
-
These are often called “Dupont wires” to refer to the 0.1″ pitch connector at the end of the wires.
-
They work great for sliding onto the pins found on many electronics components such as sensors, thumbsticks, or RGB LED strips.
-
They typically come in a rainbow of colors and the connectors are not labeled, so we wanted something a little better.
-
-
-
The Crazy Circuits Ribbon Cable will start going into our kits in January 2024, and they have a few features we think will help make building circuits even easier.
-
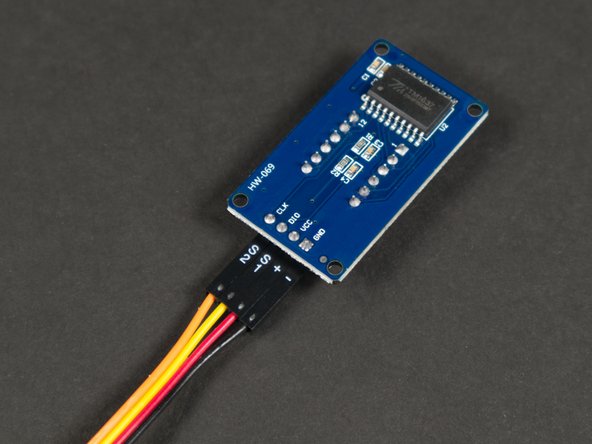
Most of our projects use components that have 3 or 4 connections. For instance, the Distance Sensor has four pins you need to connect. Our 7 Segment Display also has four, while an RGB LED Strip has just three.
-
So our Crazy Circuits Ribbon Cable has four wires, with three bundled together into a single connector...
-
... and an extra wire we sometimes call "The Dangler".
-
-
-
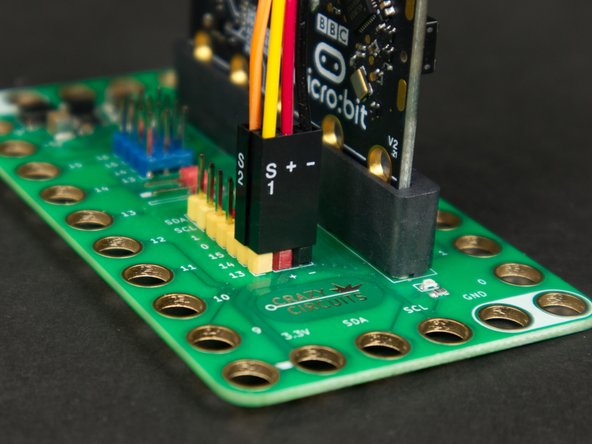
The wires are black, red, yellow, and orange, and correspond to - (Negative or Ground), + (Positive), S1 (Signal 1) and S2 (Signal 2, if required).
-
The wires are held together in the center with a black band. You can peel the wires apart a bit but the band will ensure they stay together as a bundle of four wires.
-
-
-
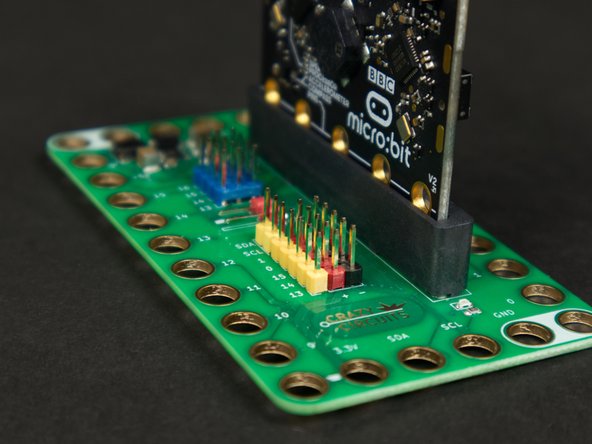
When using the Crazy Circuits Ribbon Cable with the Bit Board you'll notice the wire color match the pin headers on the board.
-
The colored pin headers are a new update to Bit Boards manufactured in 2024.
-
This should make plugging in wires (and troubleshooting connections) much easier for beginners.
-
For the large connector end with the black, red, and yellow wires you just need to make sure black is into black and yellow is into yellow and you'll know it's plugged in properly.
-
-
-
When connecting to components you'll just need to make sure that:
-
Black (-) goes to Negative, Ground, or GND.
-
Red (+) goes to Positive, VCC, 5V or 3V.
-
Yellow (S1) goes to the Signal (in this case DIO).
-
Orange (S2) goes to the second Signal (in this case CLK).
-
The 7 Segment Display is just one example. Not every component will have DIO and CLK pins.
-
Each of our guides will call out the pins used on a component and how to connect them.
-
-
-
Here's an Addressable RGB LED Strip. Notice the pin labels GND, VCC, IN and how the correspond to -, +, and S1.
-
-
-
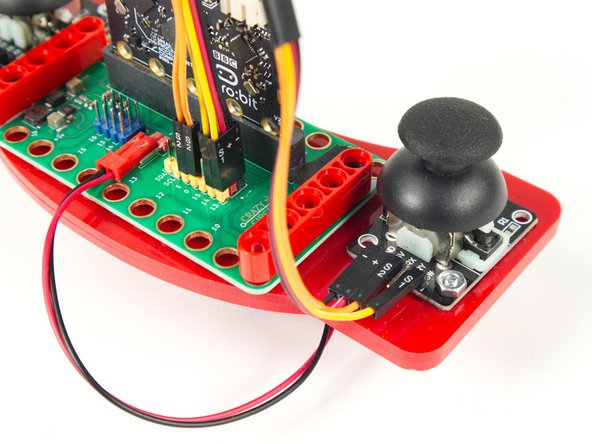
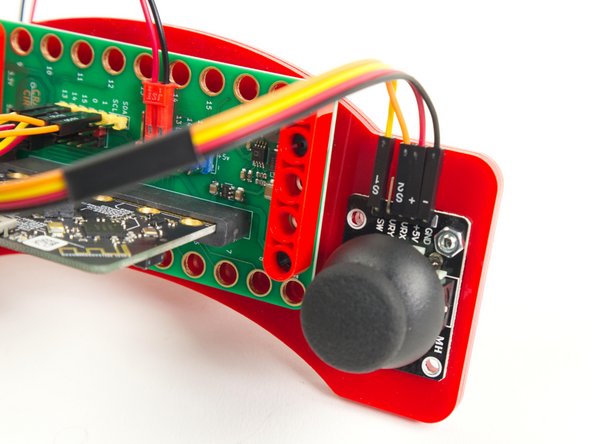
If you're building the Rover Thumbstick Remote the new ribbon cable makes it much easier to get everything plugged into the correct position.
-