Introduction
Learn how to connect an Ultrasonic Distance Sensor to the Bit Board and display its output with a micro:bit.
Video Overview
Featured Document
-
-
Add the Ultrasonic Distance Sensor by connecting it to the header pins on the back of the Bit Board using jumper wires.
-
You can use any color jumper wires for your connections, just make sure they are connected to the correct pin.
-
It can be easier to plug in all the jumper wires before plugging your micro:bit into the Bit Board.
-
After you've added the sensor you can plug the micro:bit into the Bit Board. (Make sure it is facing the right way!)
-
-
-
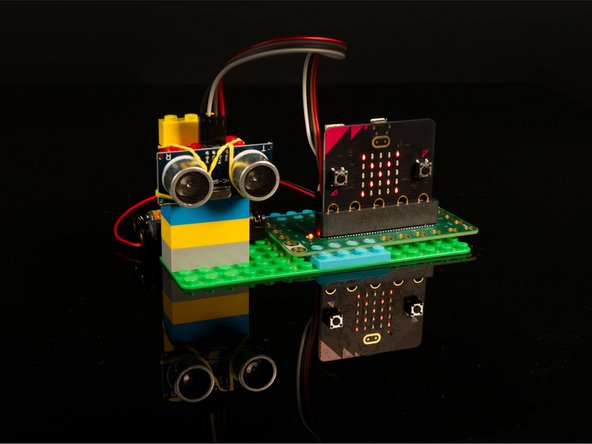
You'll want to place the Ultrasonic Distance Sensor in such a way that you've got clear space in front of it.
-
We mounted ours to a few LEGO bricks with a rubber band so it can "see" straight ahead.
-
If you've got it laying on a table make sure it's pointing in a direction (perhaps up) where there is nothing in front of it for at least 15 centimeters.
-
-
-
Connect a USB cable to the micro:bit and then plug it into your computer.
-
We'll be using makecode.microbit.org to program our board. It uses a simple drag and drop block interface.
-
We're going to load the following code for our Ultrasonic Distance Sensor program: https://makecode.microbit.org/_9LWFUX67u...
-
Once the code is loaded you should start to see something appear on the LED matrix on the front of the micro:bit
-
The included PDF has more information about the code if you want to dig deeper.
-
-
-
Place your hand about 15 centimeters in front of the distance sensor and move your hand slowly towards the sensor.
-
You should see the LED display an 'X' to start with and then change to a number once you get closer than 10 centimeters from the sensor.
-
You can use a distance sensor to trigger the micro:bit to do something just like you would with a button or a switch. You just need to check for specific distances.
-
If you look at our code you’ll see we check that the distance is greater than 0 (zero). This is because we found that on occasion the distance sensor would return a value of 0 even with no object in front of it, and if we only check for a value less than 10 we occasionally received a 0 which would mistakenly trigger our if/then statement.
-
-
-
This step is meant to be informational. If you use the code we provide it will all automagically work.
-
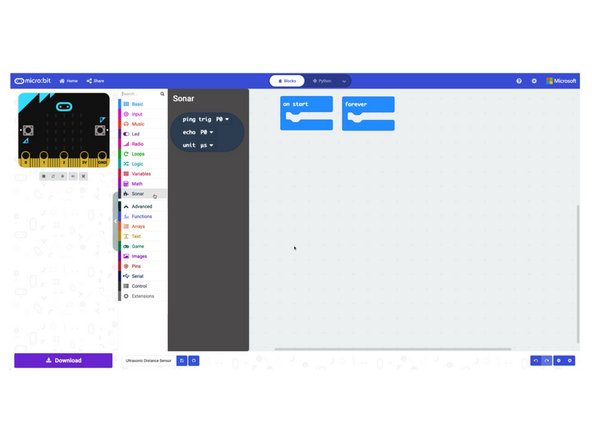
Our program uses the Sonar extension to allow the Ultrasonic Distance Sensor to work with the micro:bit
-
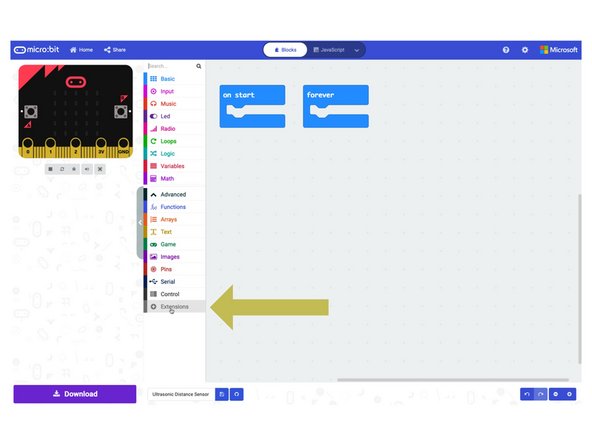
When you add an extension it provides a new set of capabilities to your program.
-
If you follow this guide and use the code we provide via the link to makecode.microbit.org the extension will be loaded already.
-
If you start your own program from scratch you'll need to add the Sonar extension on your own.
-


