
Introduction
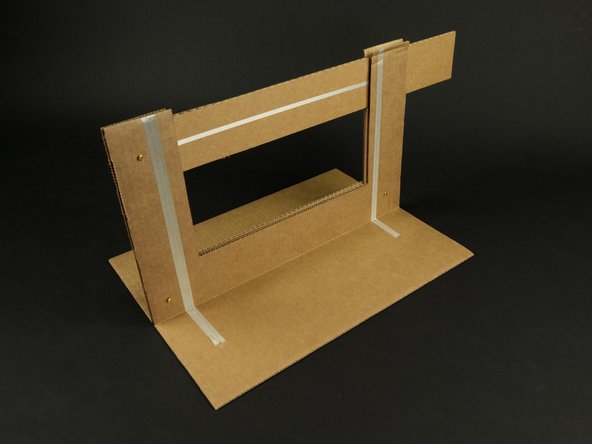
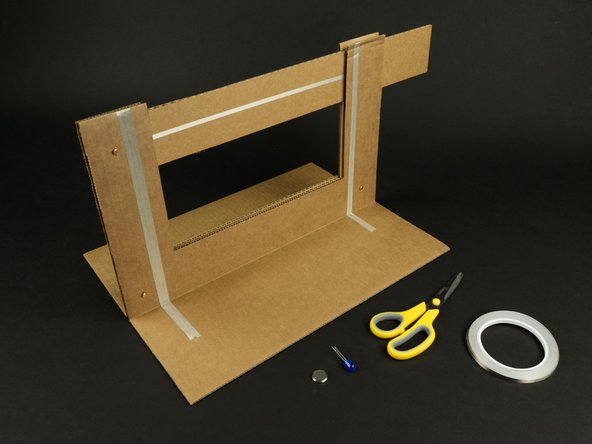
Here's a simple (and large) project you can make! All you need is some cardboard, Maker Tape, a few brass fasteners, and an LED and CR2032 battery.
This is the embiggened version of our original Cardboard Knife Switch. Sometimes bigger is better!
You can make this project (and many more!) with our Paper Circuits Kit.
Video Overview
Featured Document
-
-
Grab your materials!
-
We found a few sheets of cardboard that were 18" x 18" but you can use whatever you have around
-
Note that the cardboard should all be the same thickness.
-
If you get all of your cardboard from the same box it should be the same thickness.
-
We also have a 10mm LED and a CR2032 Coin Cell Battery so we can put our switch to use.
-
Want to know more about cardboard? Check out Step 1 from our Robotic Hand project!
-
-
-
When cutting cardboard you can use scissors, an X-ACTO knife, or a box cutter/razor knife.
-
If you're doing this project with kids you may wish to pre-cut all the pieces so they can do the tape application and assembly. (This is the safe "no cutting" route that is great for the classroom or as a camp activity.)
-
You can also use a laser cutter to cut the pieces! We've included a vector PDF file (Cardboard Knife Switch Laser.pdf) at the bottom of this guide. Just scale it to the size you want.
-
-
-
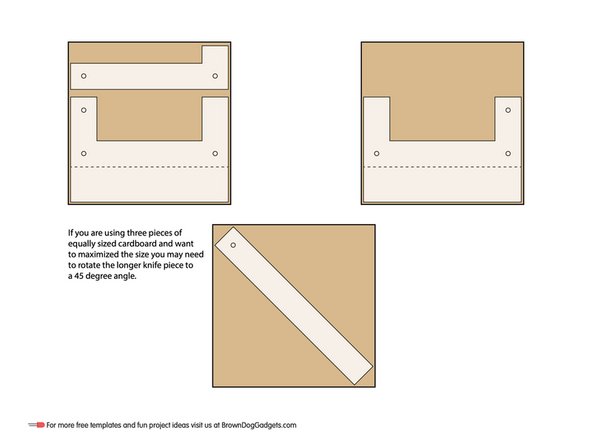
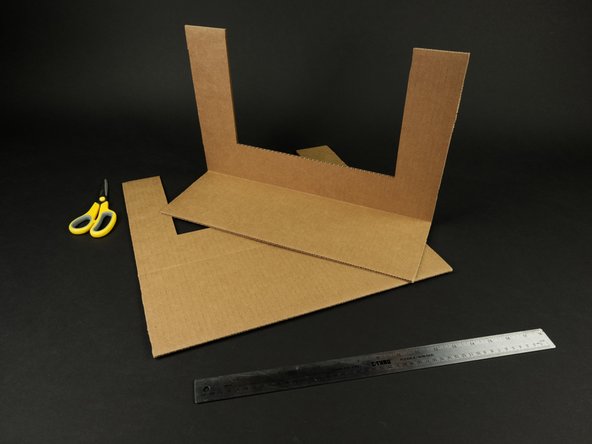
Before you start cutting you should plan out your pieces.
-
If you want to turn this into a math lesson, you can do that! Have students determine the size of the pieces, how wide things should be, and then mark them to be cut. (And as always, measure twice so you only need to cut once!)
-
We wanted to make our switch as large as we could using three pieces of 18" x 18" cardboard, so we planned out the sizes of the pieces to fit that. Note that we angled the longer "knife piece" at a 45 degree angle.
-
Remember, if you're using different pieces of cardboard that they should all be the same thickness.
-
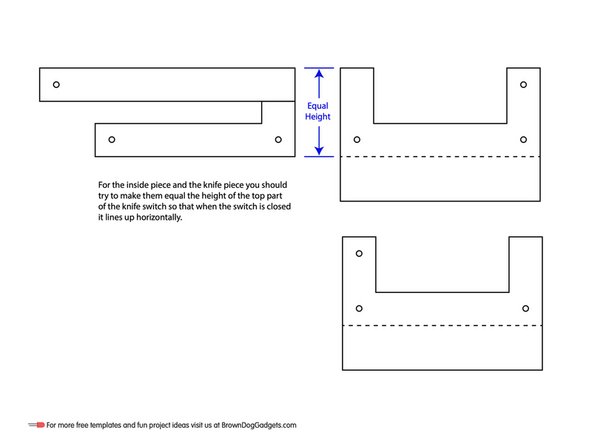
Make note of the height of the middle piece in relation to the knife piece so the switch closes properly.
-
-
-
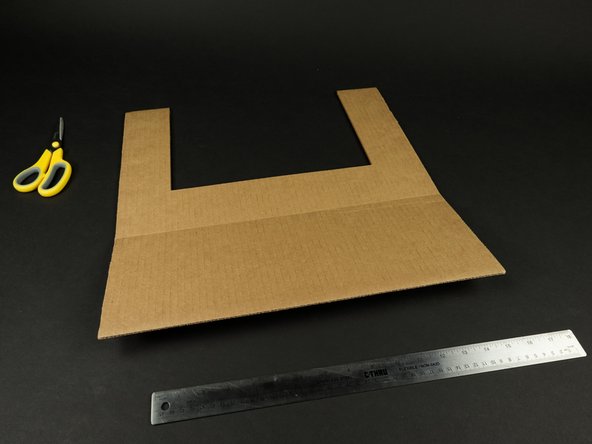
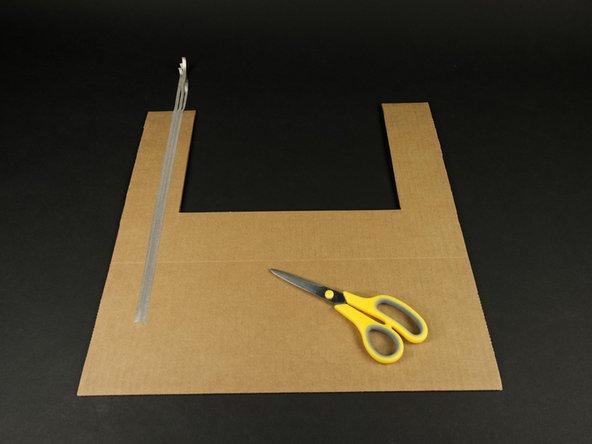
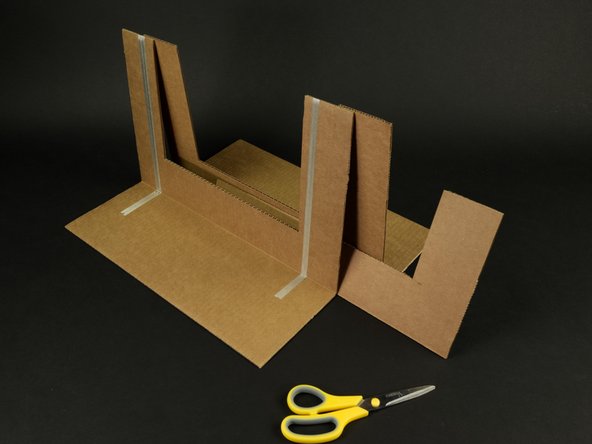
Cut the front and back pieces of the switch.
-
You'll also need to score and bend these pieces to form the base of the switch.
-
The two pieces are identical, as they mirror each other.
-
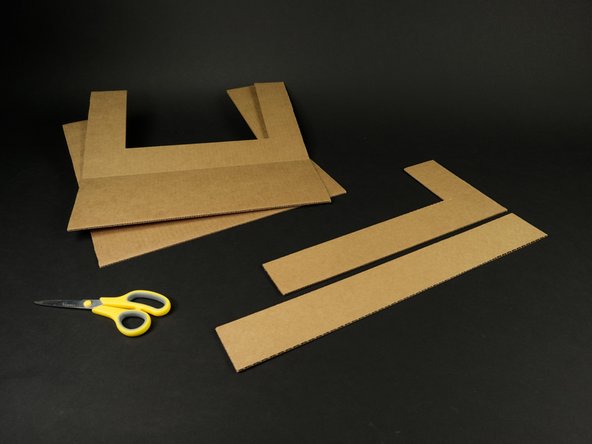
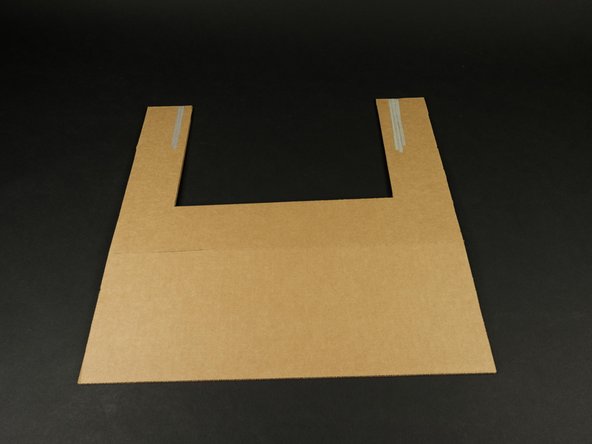
Cut the middle piece (the "L" shaped piece) and the knife piece (the longer piece).
-
Once you've got all four pieces that's all the cardboard cutting you need to do!
-
-
-
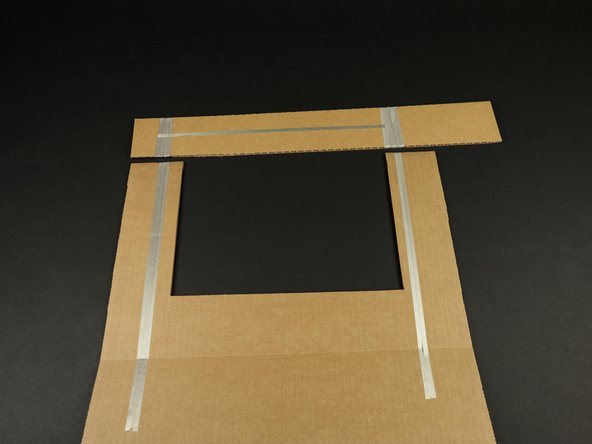
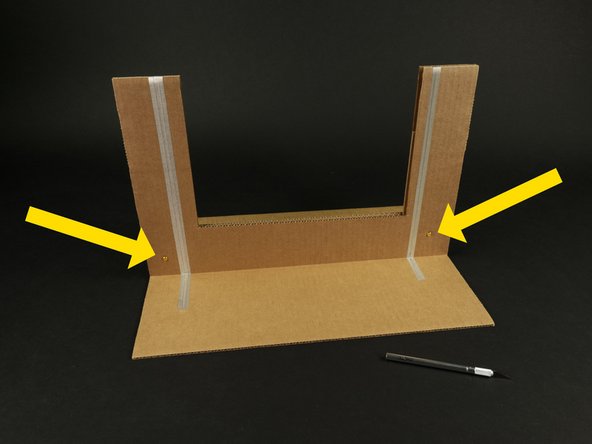
Run the tape up each side of the front piece as shown.
-
We're using Maker Tape, which is 1/4" wide nylon conductive tape. It's flexible and does not easily tear (you actually need scissors to cut it!)
-
Maker Tape is conductive on both sides and all the way through, so you can easily overlap it as needed.
-
Wrap the tape up and over to the other side a few inches. This is where the knife piece will come into contact with the tape to complete the circuit.
-
Do this on the left and right sides of the front piece as shown.
-
-
-
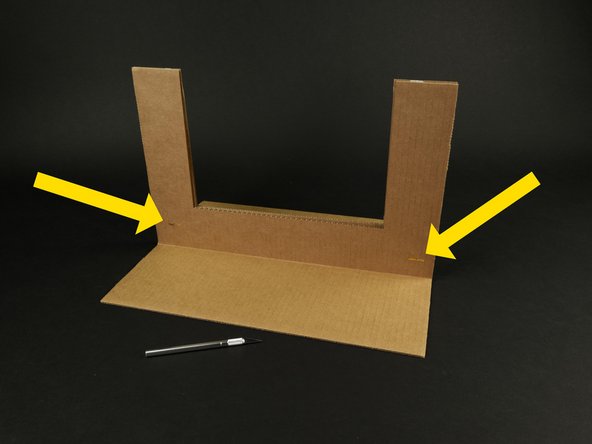
Line up the knife piece with the front piece so you can see where you need to apply more Maker Tape.
-
The tape for the knife needs to align with the tape on the left and right side of the front piece.
-
You also need to connect the left and right side with a piece of Maker Tape.
-
When the knife closes it will make contact with the two sides of the switch and complete the circuit!
-
-
-
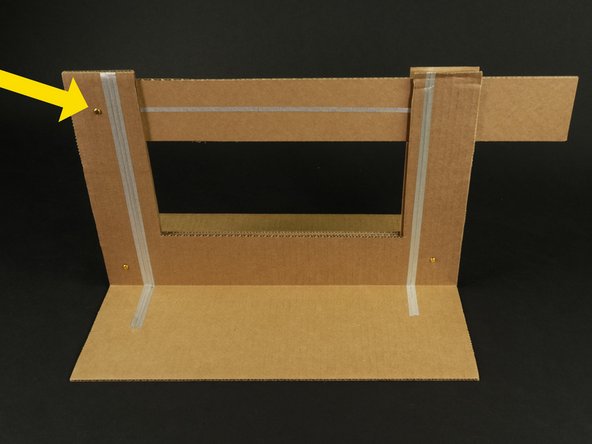
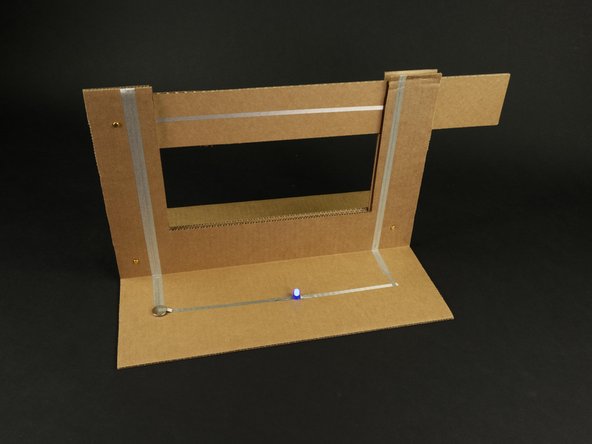
Slide the middle piece between the front and back piece. (Make sure you've folded the base on the front and back out 90 degrees so it can stand on its own.)
-
Note the "L" side of the middle piece should be on the right side.
-
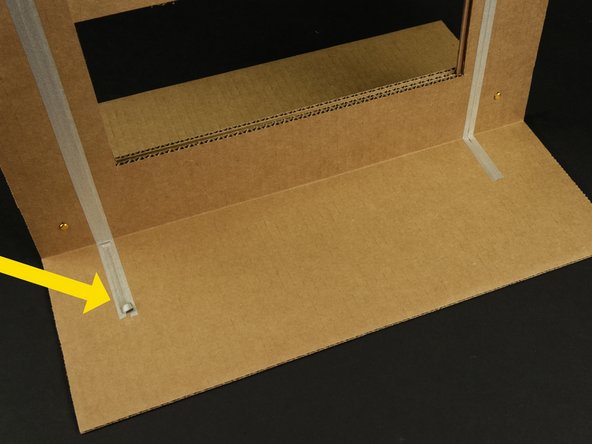
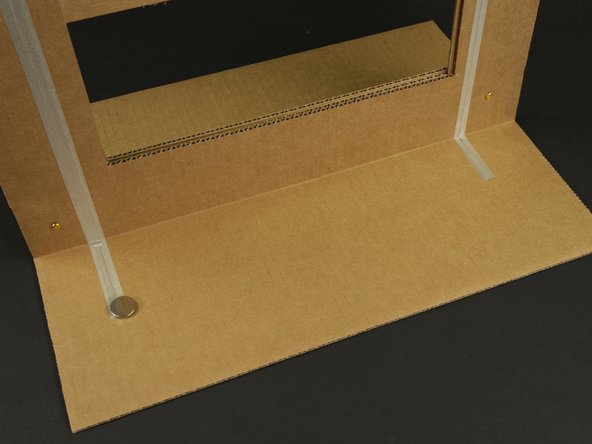
Poke holes through the three layers of cardboard as shown, and insert two of the brass fasteners to hold them all together.
-
-
-
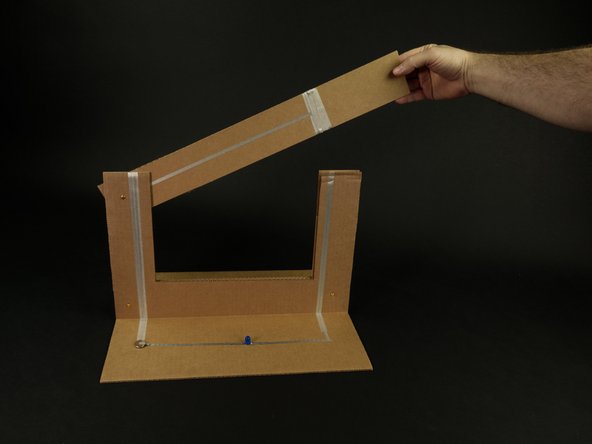
Slide the knife piece between the front and back pieces, then poke another hole for the final brass fastener.
-
Add the fastener and your knife piece should now be in place!
-
Raise and lower the knife piece to make sure it works.
-
-
-
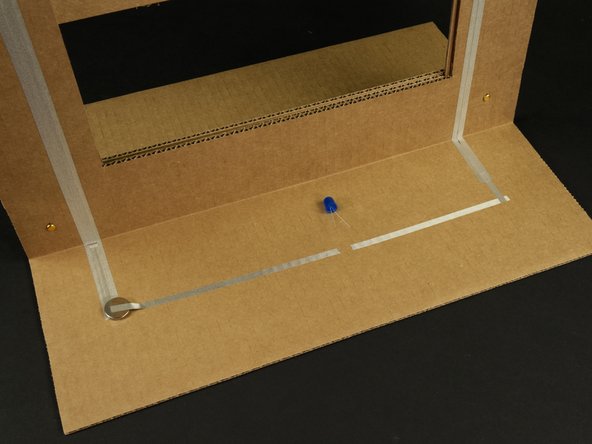
We're going to add a simple circuit consisting of our switch, a 10mm LED, and a CR2032 battery. We'll connect it all using conductive Maker Tape.
-
We'll start by making a small loop of tape, then sticking the battery down to it (positive side facing up).
-
-
-
Then tape down the LED legs (after spreading them apart).
-
Note that the longer (positive) leg needs to connect on the left side, since the tape on the left connects to the positive side of the battery.
-
If you've never built a circuit before check out our Getting Started With Paper Circuits eBook and you'll be taping together circuits with LEDs and batteries in no time!
-
-
-
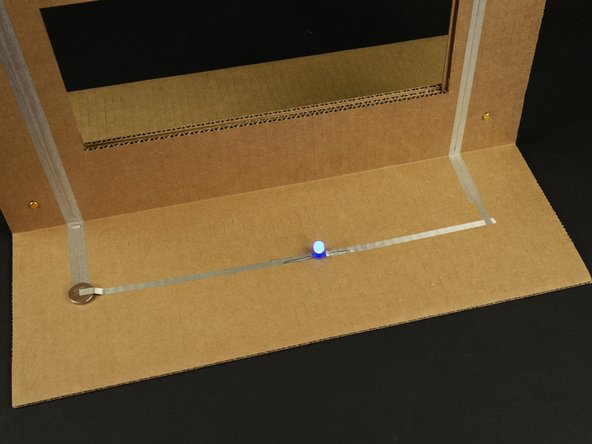
It's time to flip the switch!
-
Raise and lower the knife / lever and see if your circuit lights up.
-
If it does not, check to make sure you've got the polarity of your LED and battery correct. (Positive going to positive, etc.)
-
If the LED and battery are okay, check that the tape is making good contact when you close the switch. You may need to add a bit more tape if the knife piece doesn't fit snugly into the gap between the front and back pieces.
-
You may also need to tighten the brass fastener that the knife pivots on. It should hold the pieces tight so the tape makes good contact.
-
Enjoy your Giant Cardboard Knife Switch!
-


Attached Documents
