
Introduction
We assembled the iconic sci-fi computer HAL 9000 using LEGO but wanted to add lights and sound. Our Bit Board combined with the drag and drop programming of the micro:bit made it pretty straightforward.
Video Overview
Featured Document
-
-
We found a great tutorial on creating a LEGO version of HAL 9000 by JK Brickworks, and used it as the basis for our build. Check out 2017: A LEGO Odyssey. (The detailed build guide PDF is excellent!)
-
Like with all LEGO projects part of the fun/challenge is how you build it and make it your own. We deviated from the original instructions just a bit to add in our own parts and functionality.
-
-
-
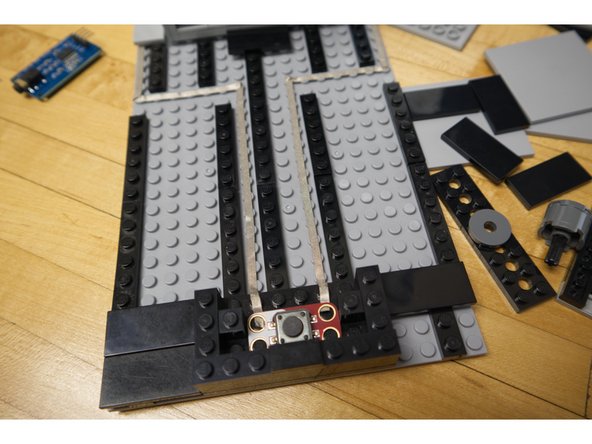
We added a large LEGO baseplate to hold our HAL upright and to add our Maker Tape circuit with an LED and a button. We’ve also hidden our micro:bit and audio player behind HAL.
-
We also added flat topped LEGO pieces to our baseplate to give it a smooth, clean surface. (Even though we love LEGO bricks, sometimes we want a different look.)
-
-
-
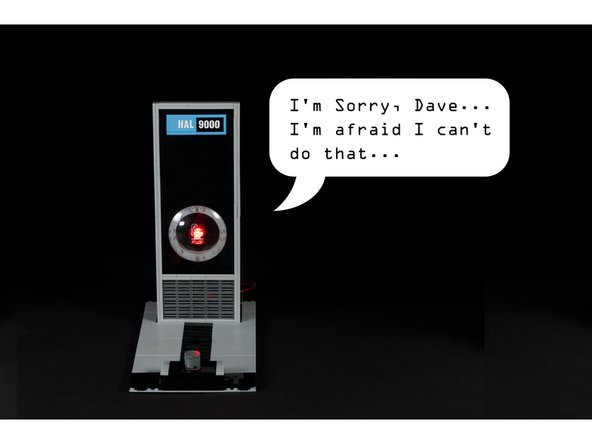
Our base let us easily add a button we can press to get HAL to respond with a line from the film. (“I’m sorry, Dave. I’m afraid I can’t do that.”)
-
Check out our guide LEGO to Jumbo Pushbutton for details on how we combine LEGO parts with our Crazy Circuits jumbo pushbuttons.
-
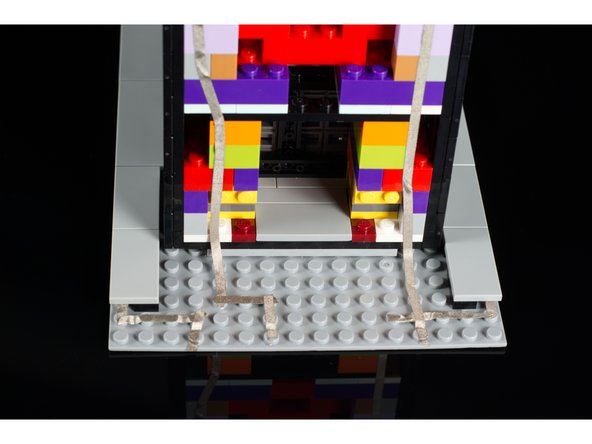
The Maker Tape that connects to the button should run all the way to the back of the baseplate where the micro:bit will attach.
-
-
-
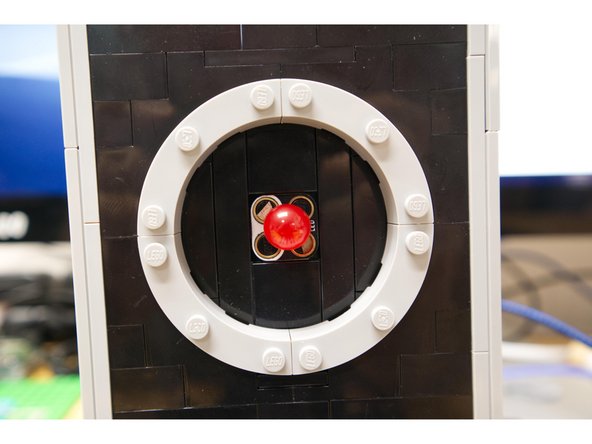
What would HAL be without that red “eye” staring at you? We added a red 10mm Crazy Circuits LED for that ominous glow.
-
The LED connects to the micro:bit with Maker Tape running through to the back of HAL.
-
Remember that positive and negative orientation matters when connecting an LED. The nice part here is that if you connect your LED incorrectly you can just take it out, rotate it to the correct orientation and then put it back in place.
-
-
-
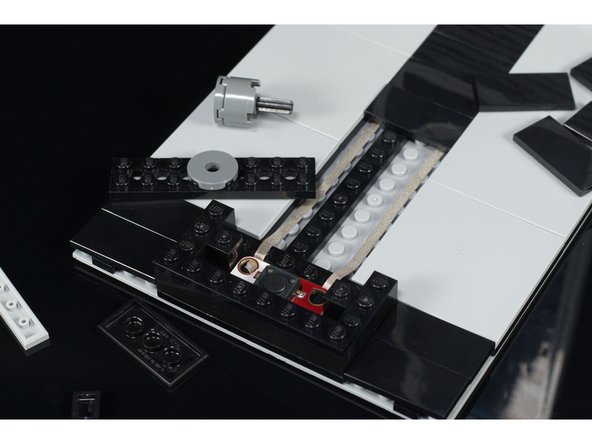
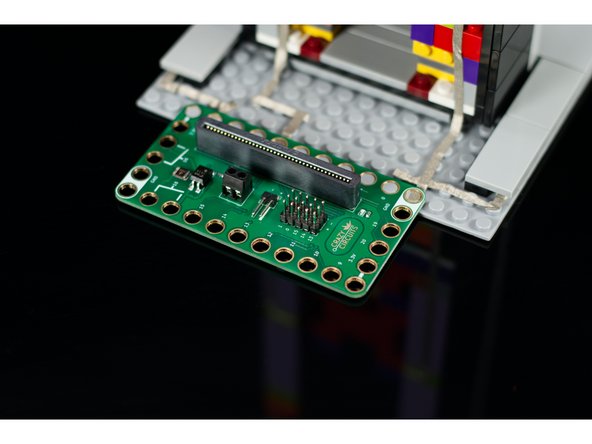
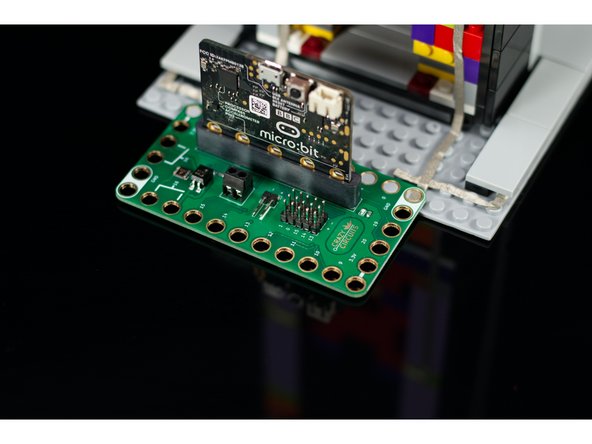
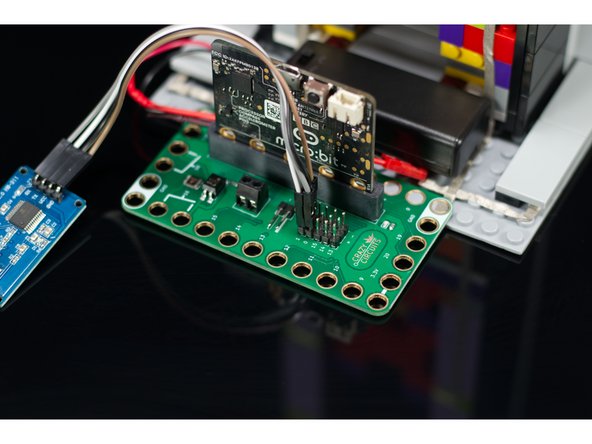
The Crazy Circuits Bit Board is the magical connection between the micro:bit and the world of LEGO.
-
We're going to place our Bit Board onto the back of the baseplate, behind HAL, so we can run the Maker Tape to Pins 5, 8, and Ground for the button and LED.
-
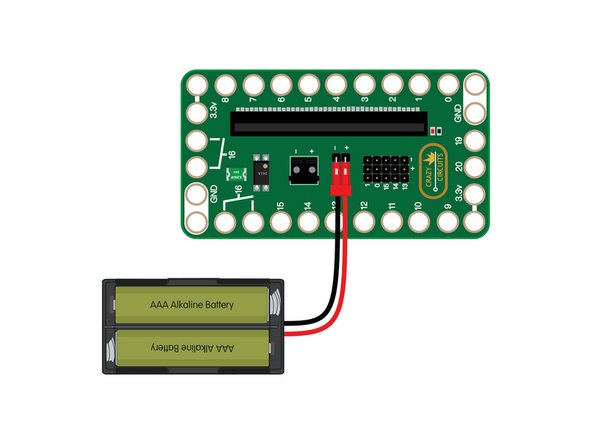
We're also going to use the header pins on the Bit Board to connect our Audio Player, and then we can power it all with a two AAA battery pack or a USB cable.
-
-
-
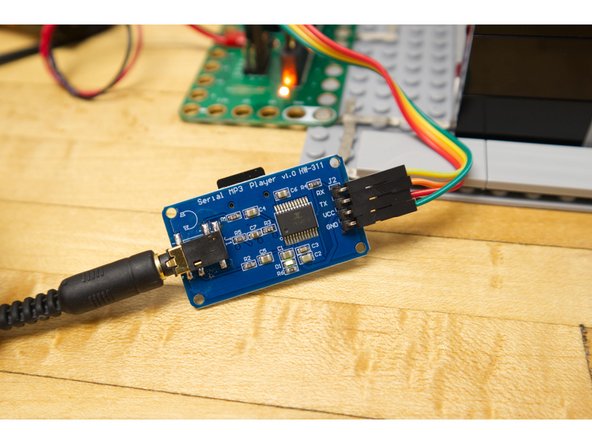
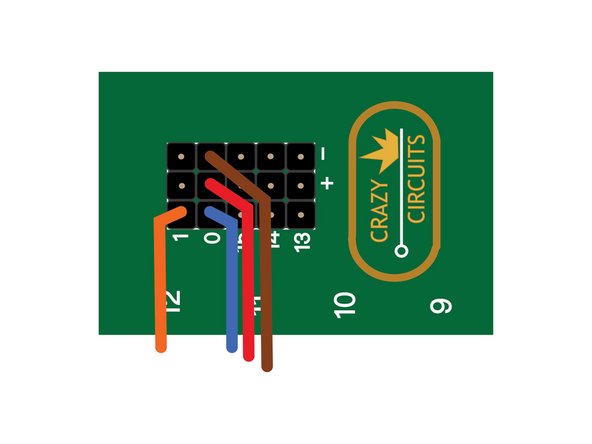
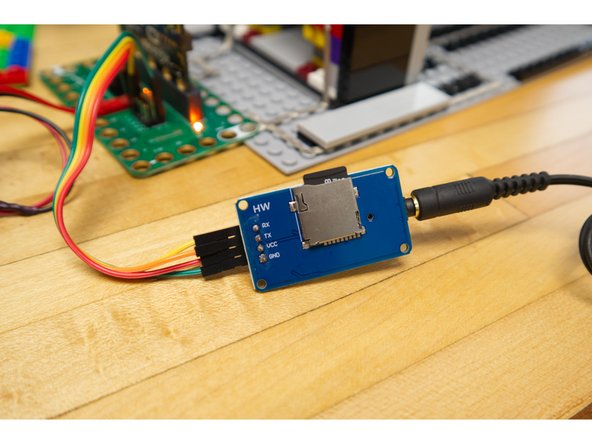
The "YX5300 UART Control Serial MP3 Music Player" is a common audio module that can be found on Amazon and other web sites. It has four pins we'll need to connect to our micro:bit
-
RX goes to Pin 0
-
TX goes to Pin 1
-
VCC goes to any pin in the + (positive) row
-
GND goes to any pin in the - (negative) row
-
-
-
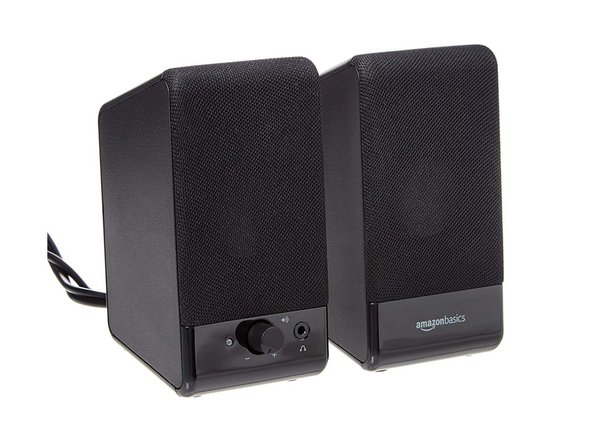
The audio player has a 1/8" stereo jack suitable for headphones or computer speakers. Any powered computer speakers with a 1/8" stereo plug should work fine.
-
We do recommend monolithic speakers, which work best if they are black in color and very tall in size.
-
-
-
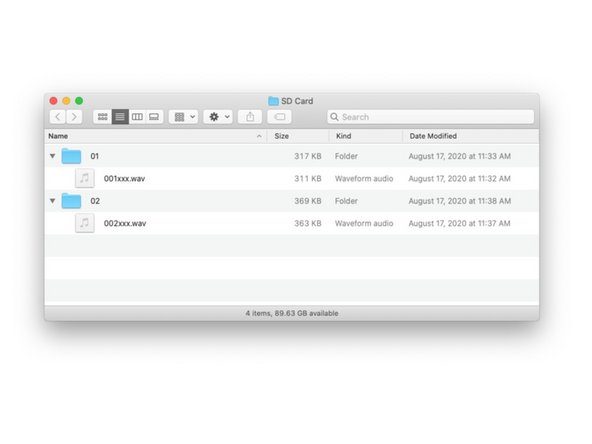
The SD card that is inserted into the audio player will hold the audio files. You'll need to use a computer and an SD card reader to copy over the audio files.
-
The file in folder 01 is played when the button is pressed. We also have a bonus sound in folder 02 that plays when the micro:bit starts up.
-
The SD card will need to be formatted as a DOS FAT format for the audio player to recognize it.
-
Note: macOS creates small invisible files that confuse the MP3 module so we created a work around. Download this script we wrote (called DotClean) and copy it to your Applications folder.
-
Highlight all the folders on the SD card (with the audio files in them) and drag them onto the application icon. This will remove the invisible files.
-
If you get stuck or have problems check out our guide on the MP3 Audio Player
-
-
-
Connect a USB cable to the micro:bit and then plug it into your computer.
-
We'll be using makecode.microbit.org to program our board. It uses a simple drag and drop block interface.
-
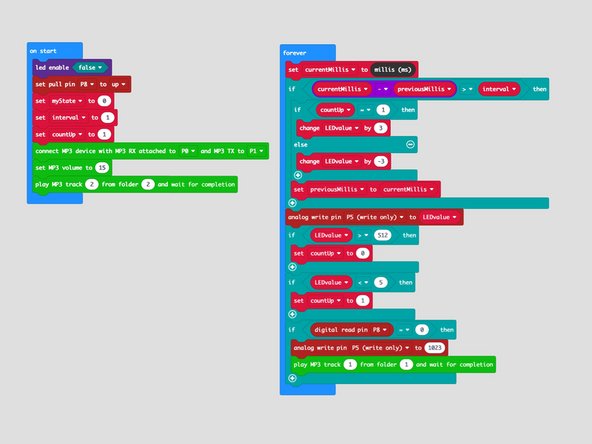
We're going to load the following code for our HAL 9000 program: https://makecode.microbit.org/_5Ce2i5CYg...
-
Once the code is loaded you can disconnect the USB cable and insert the micro:bit into the Bit Board so it can function as a "brain" for HAL.
-
-
-
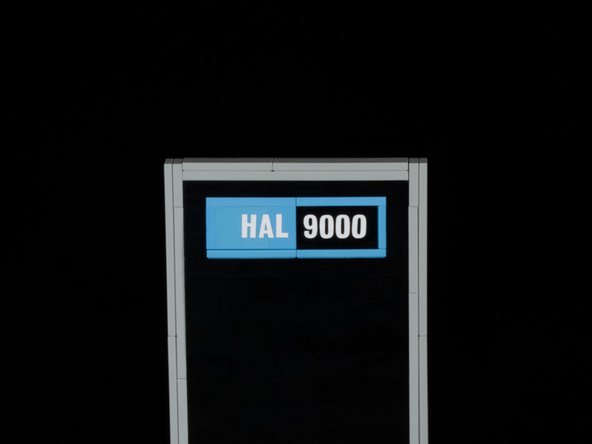
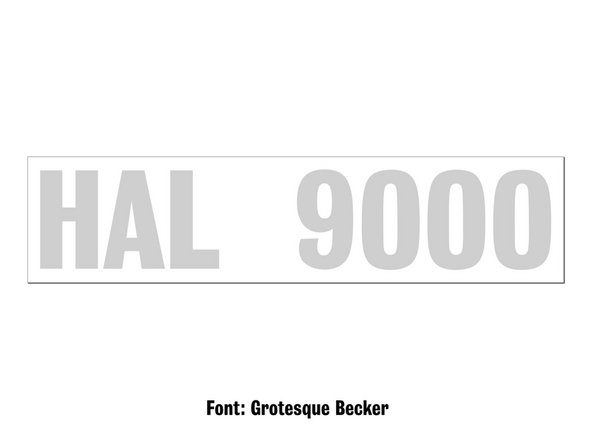
We added a little detail with our vinyl cutter. Using white vinyl we cut out "HAL 9000" small enough to attach to the blue LEGO plates on the top of HAL.
-
The font we used is Grotesque Becker, which is a font you can find from a variety of sources for free and is a close match to the font used for the original HAL 9000 nameplate.
-
If you don't have a vinyl cutter you could print a nameplate using a nice color printer.
-
-
-
Once you've got the code loaded, the Audio Player connected, the Bit Board in place with the Maker Tape connected, and your micro:bit plugged in and powered... you can test it out!
-
Try asking HAL if he can open the pod bay doors! Though if HAL says there's a fault in the AE-35 unit, don't believe him!
-


Cancel: I did not complete this guide.
One other person completed this guide.
Attached Documents
