Introduction
We'll build a simple LEGO-based winch mechanism using a 360 degree continuous rotation servo that can be used with any microcontroller.
Tools
No tools specified.
Parts
- Brick Compatible 360 Degree Servo
- LEGO Wheel 43.2mm D. x 26mm Technic Racing Small with 3 Pinholes (41896)
- LEGO Axle 6 (3706)
- LEGO Axle Connector (Smooth with 'x' Hole) (59443)
- LEGO Axle 4 with End Stop (87083)
- LEGO Technic Brick 1 x 2 with Hole (3700)
- LEGO Technic Brick 1 x 4 with Holes (3701) × 3
- LEGO Technic Bush 1/2 with Teeth Type 1 (4265)
- String
Video Overview
-
-
As with all LEGO projects a variety of parts can be used. We've listed all the parts we chose but you should use what works, or what you already have on hand when possible.
-
For instance, here are two alternative wheels/rims that could work.
-
-
-
Any wheel/rim with an "H" or "V" shaped groove should work. Avoid the ones with raised ribbing in the groove part.
-
Besides the specified LEGO parts you'll need a LEGO baseplate, a few standard LEGO bricks, a 360 degree continuous rotation servo, and some string.
-
-
-
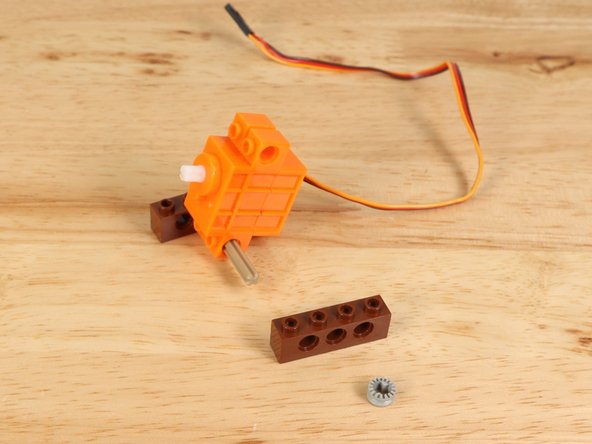
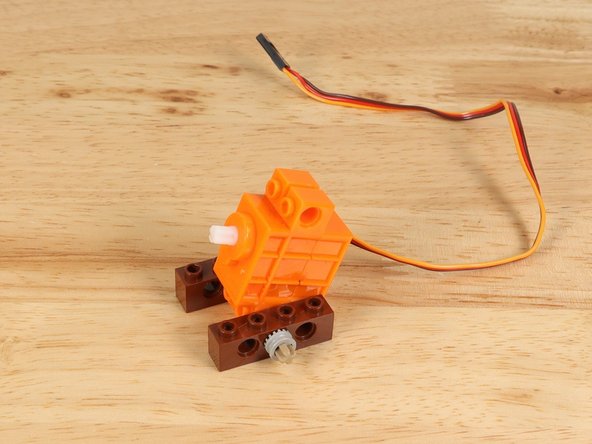
We'll start by adding some "feet" to the servo so we can attach it to the baseplate.
-
Use the following parts:
-
LEGO Technic Brick 1 x 4 with Holes (3701) You'll need two of them.
-
LEGO Axle 4 with End Stop (87083)
-
LEGO Technic Bush 1/2 with Teeth Type 1 (4265)
-
-
-
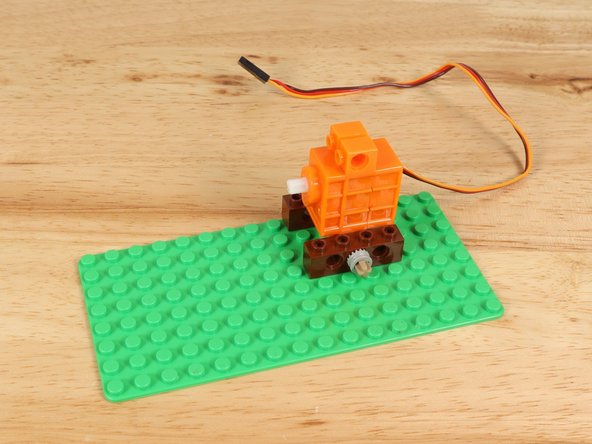
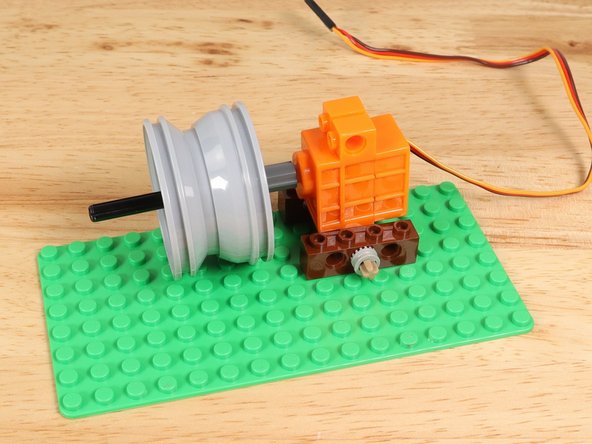
Once you have the "feet" for your servo you can attach it to a LEGO baseplate.
-
Make note of the orientation of the servo. Since the shaft is not centered you want it higher up in the assembly.
-
-
-
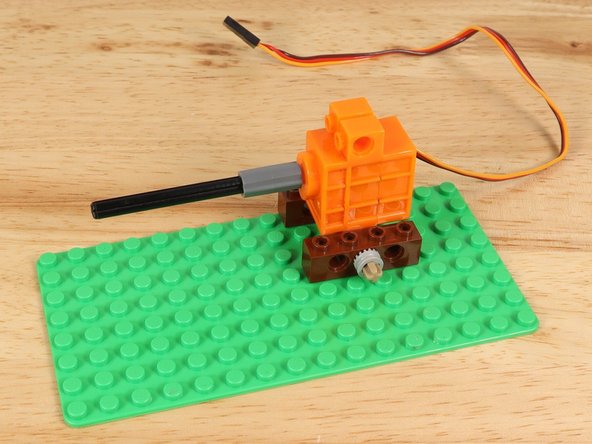
Next we'll attach the shaft and wheel/rim to the servo. You'll need an axle connector added to the servo shaft to start.
-
Use the following parts:
-
LEGO Axle Connector (Smooth with 'x' Hole) (59443)
-
LEGO Axle 6 (3706)
-
LEGO Wheel 43.2mm D. x 26mm Technic Racing Small with 3 Pinholes (41896)
-
Don't worry about the position of the wheel/rim on the shaft, since we can slide it into the correct position later.
-
-
-
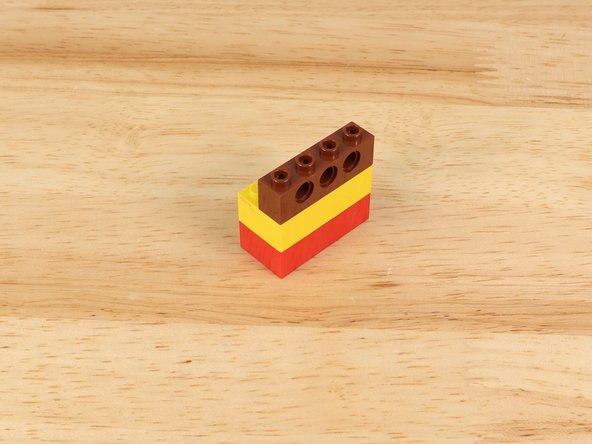
Next we'll add the parts to hold up the other side of the axle.
-
Grab two standard LEGO bricks and another LEGO Technic Brick 1 x 4 with Holes (3701).
-
Once assembled place it on the baseplate to hold the axle in place.
-
-
-
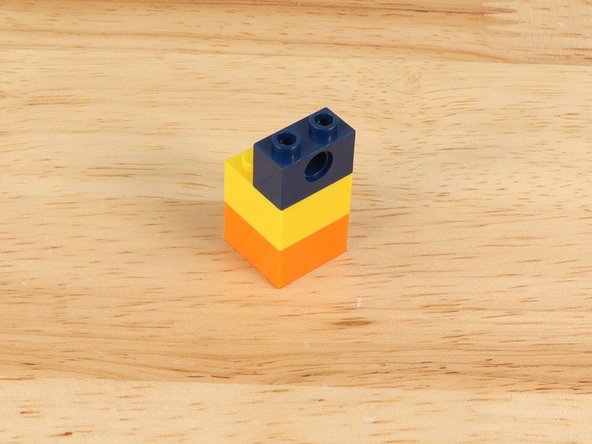
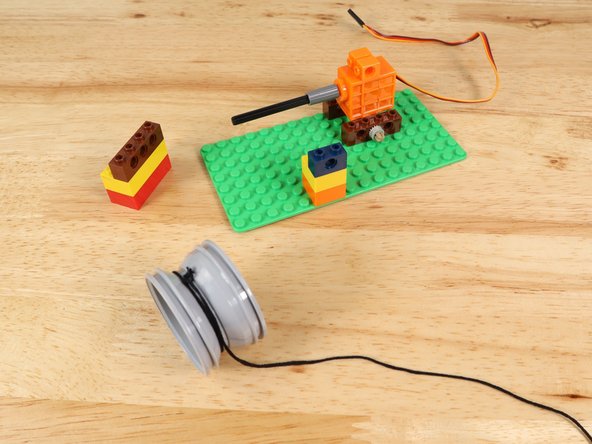
Next we'll add a simple guide for the string to feed through so it doesn't get tangled.
-
We used two small LEGO bricks and a LEGO Technic Brick 1 x 4 with Holes (3701).
-
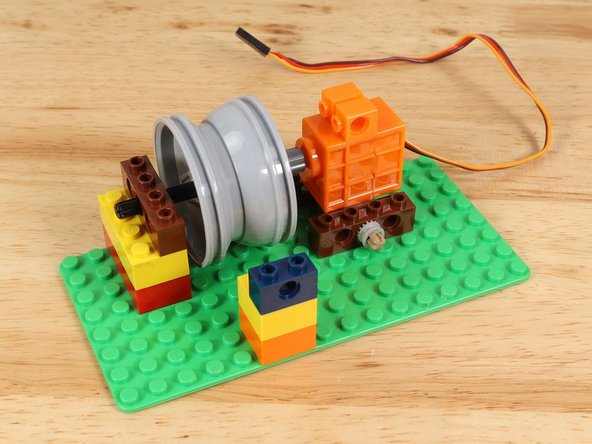
Line it up with the wheel/rim as close as you can, then slide the wheel/rim so it is centered to match the guide hole.
-
-
-
If everything looks right you can pull the wheel/rim off to add on some string.
-
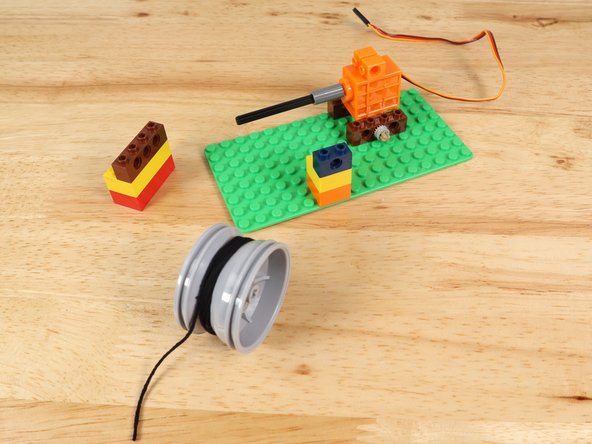
Tie the string tight onto the wheel/rim and wind it around a few times.
-
If your string isn't wound enough times it may not wind up properly if you let too much of it out. You can also add a small piece of tape to hold the string in place if your knot is not tight enough.
-
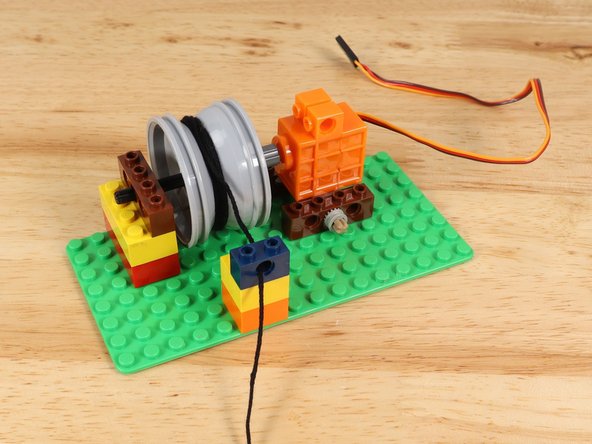
Place the wheel/rim back onto the axle and feed the string through the guide hole.
-
Your winch is ready to go!
-