Introduction
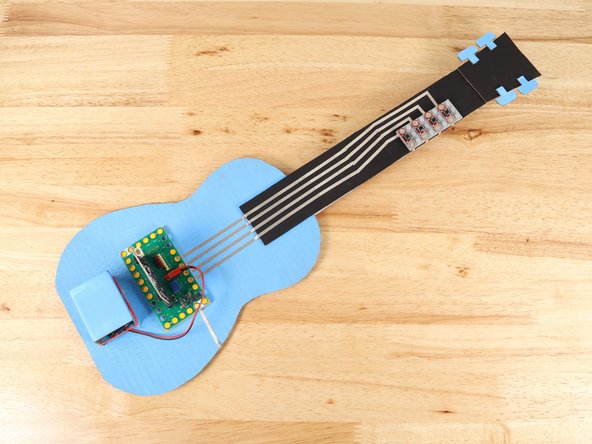
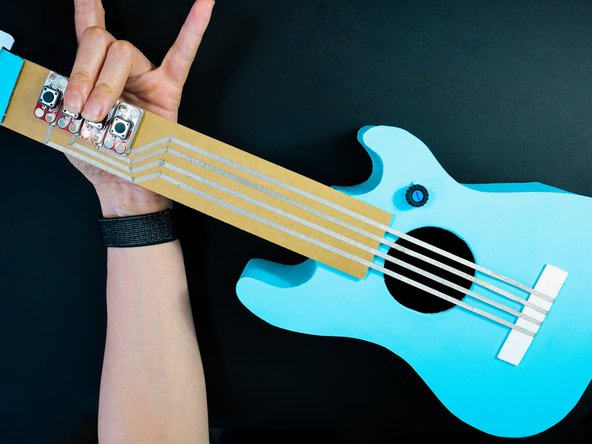
Create a playable guitar using cardboard, a MicroBit, Bit Board, and some Maker Tape.
This project and others can be built using the Crazy Circuits Bit Board Classroom Set.
Video Overview
Featured Document
-
-
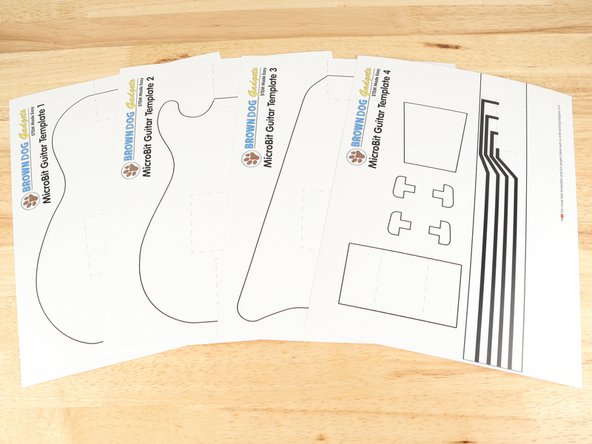
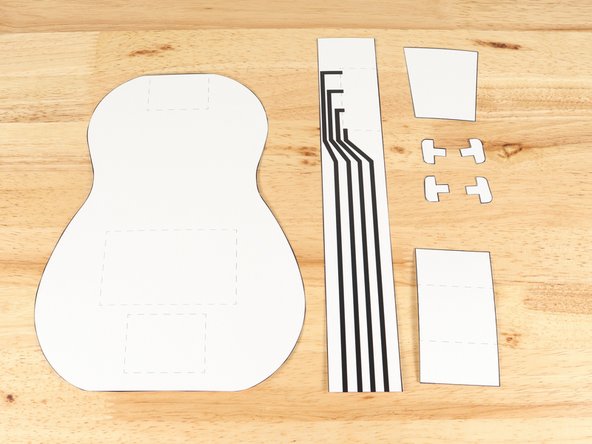
There are three different guitar templates to choose from. Pick your favorite template and print it out. You will also need to print Template 4 which has the templates for the neck and battery holder.
-
-
-
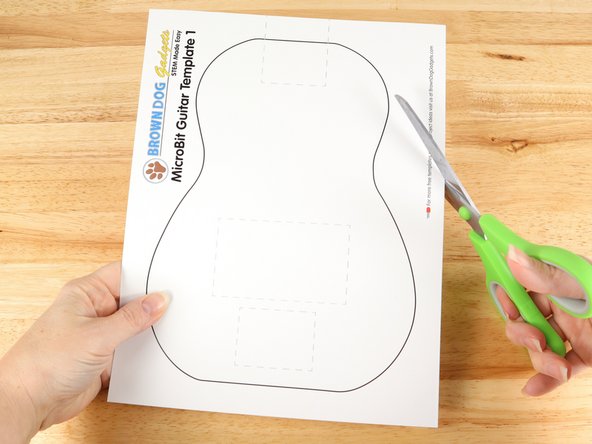
Cut out Template 1, 2, or 3.
-
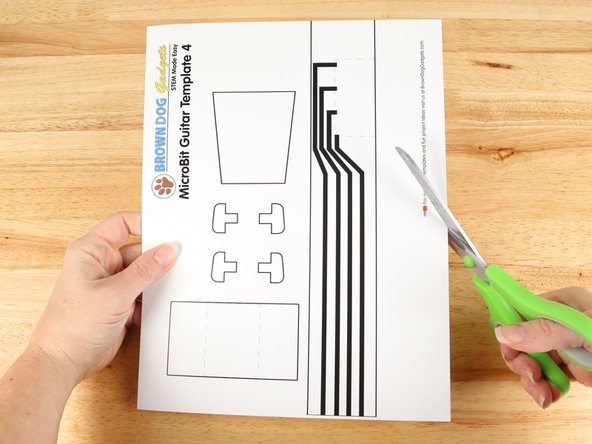
Cut out all the parts on Template 4.
-
-
-
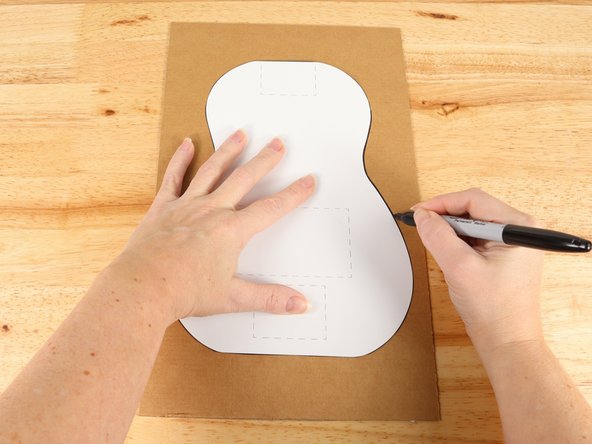
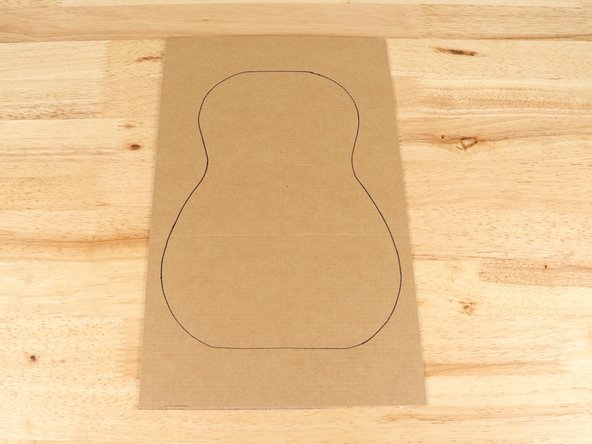
Use the cut template parts to trace the parts onto cardboard.
-
You can use broken down cardboard boxes or cereal boxes. If you use thinner boxes (chipboard) you should cut out 2-3 of the body and neck and glue them together to make a more sturdy build.
-
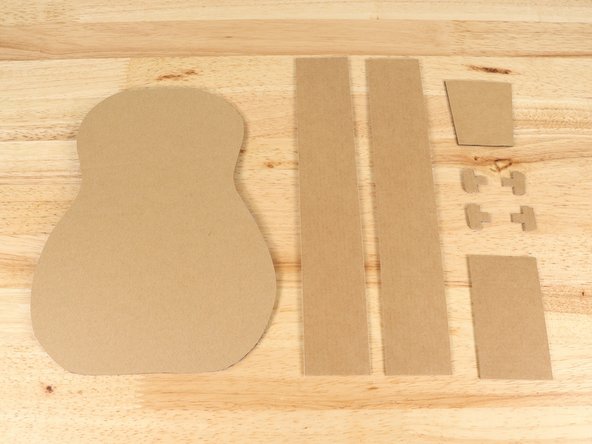
Cut out all the parts.
-
It is important to note that you should cut out two neck pieces. This will be doubled up to ensure the neck is sturdy. If you are using chipboard you should cut 3-4 neck pieces.
-
-
-
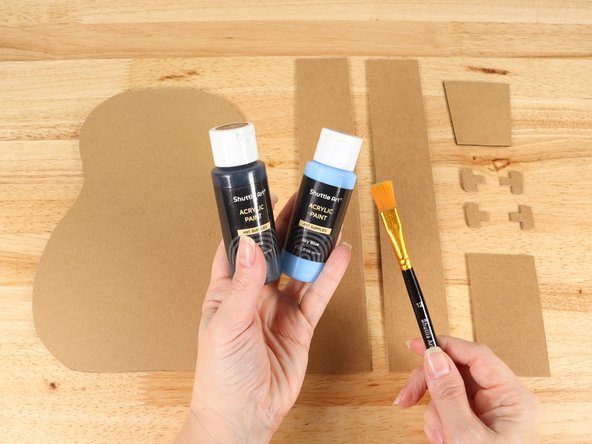
Painting or decorating your guitar is optional.
-
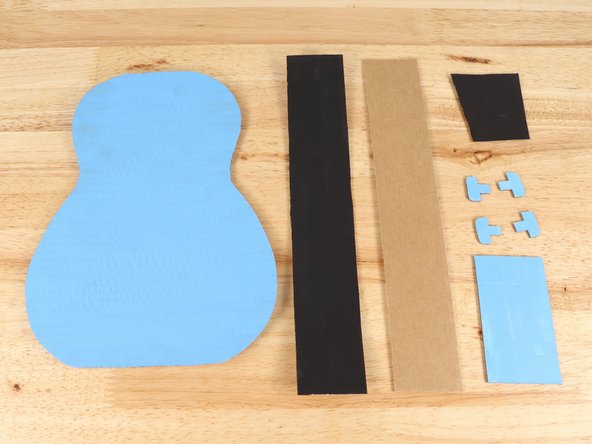
Paint or decorate the parts of the guitar. You can use acrylic paint, markers, or even stickers!
-
You'll notice that only one of the two necks is painted. The second neck will be glued behind the first one so it does not need to be painted.
-
-
-
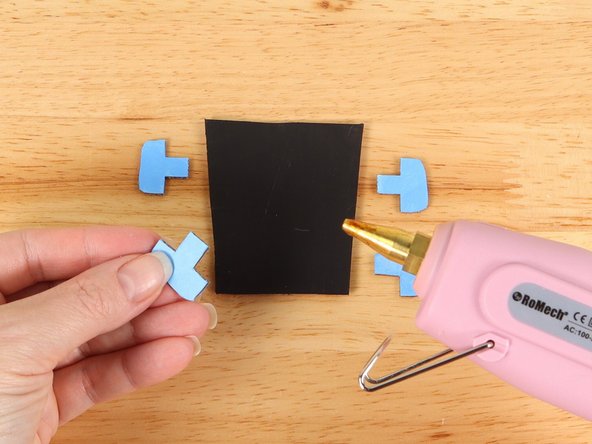
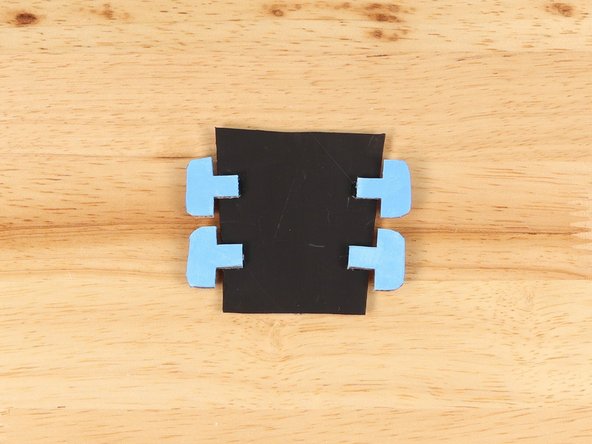
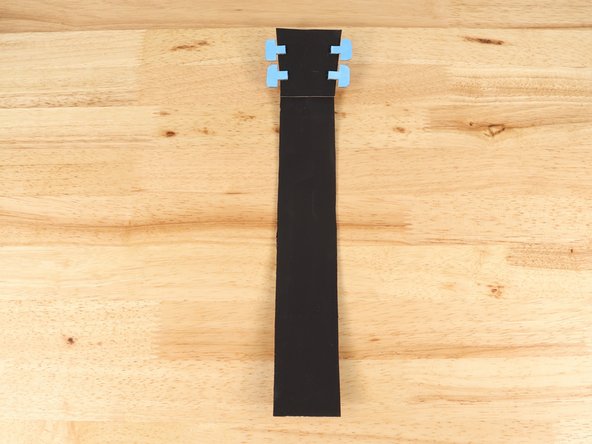
Using hot glue or another strong glue, attach the tuning pins to the head.
-
-
-
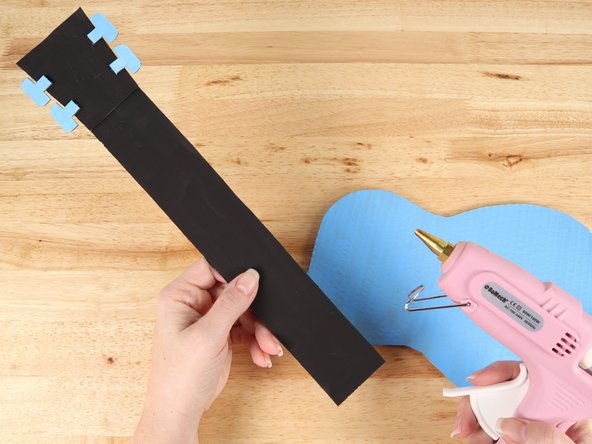
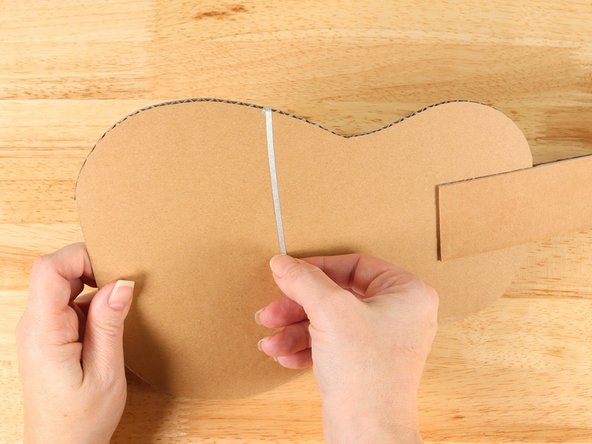
Using hot glue or another strong glue, attach the head to one end of the neck.
-
-
-
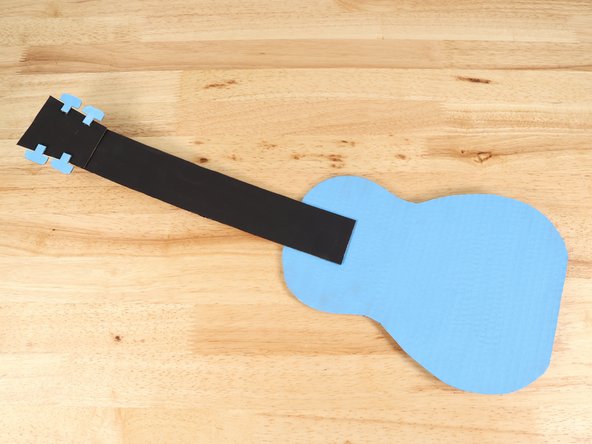
Using hot glue or another strong glue, attach the neck to the body of the guitar.
-
-
-
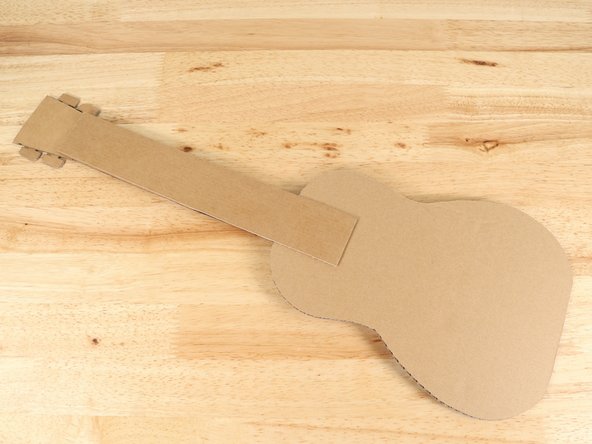
Flip the guitar over and glue the second neck to the back of the first neck. This will make the guitar stronger and more sturdy.
-
-
-
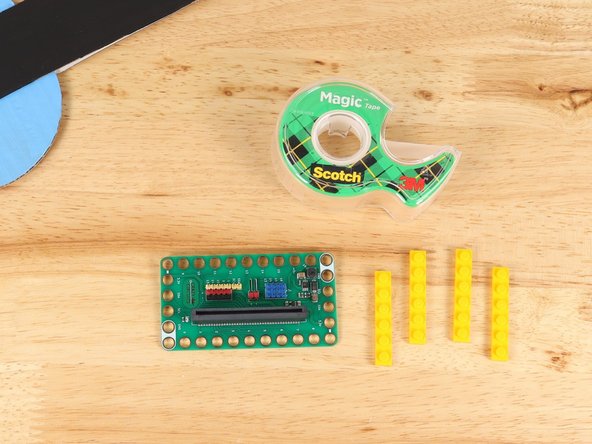
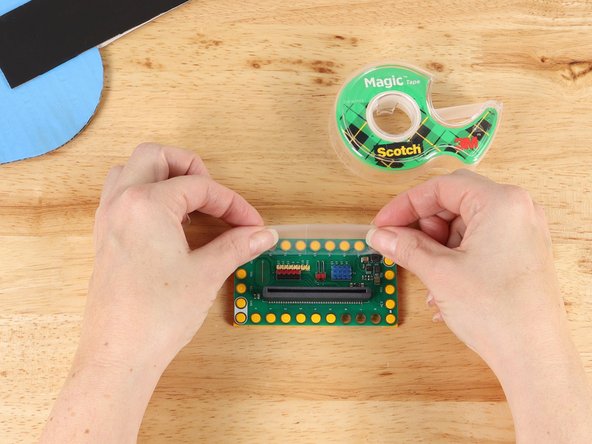
Place 1x6 LEGO plates into the holes of the Bit Board. Use tape to temporarily secure them in place.
-
When adding LEGO plates, make sure that pins 12, 13, 14, and 15 have a LEGO stud in those holes. You also want to make sure at least one ground hole also has a stud in it.
-
You do not need to have LEGO studs in all the holes. Just make sure that any holes you need to connect Maker Tape to have a LEGO stud in them.
-
If you plan to add a potentiometer as an optional addition later in this guide, you also need to ensure that there is a LEGO stud in pin 0 and 3.3v holes.
-
If you have different size LEGO plates you can definitely still make it work. Just make sure to pay attention to the holes that need to be used.
-
-
-
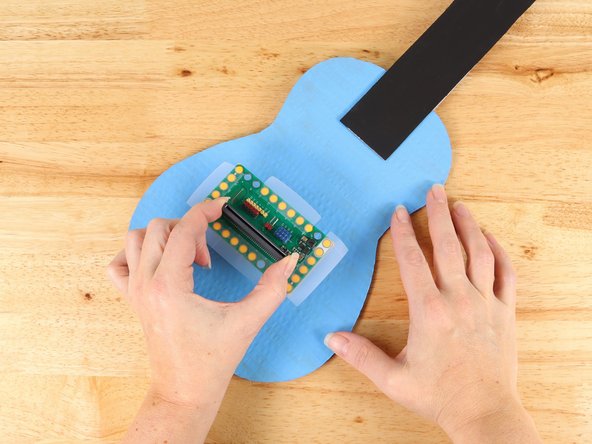
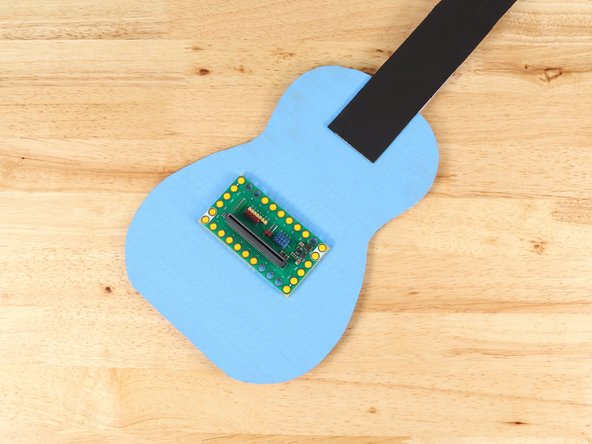
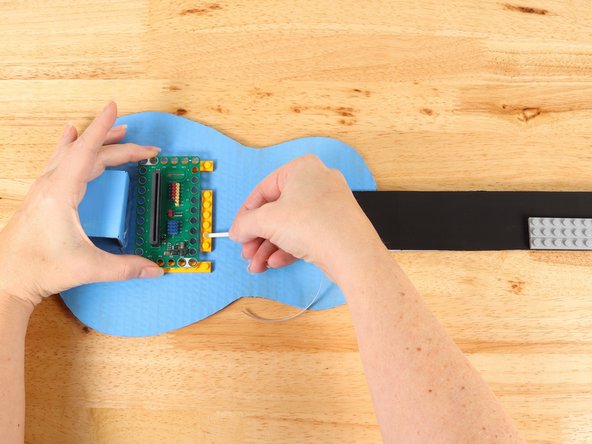
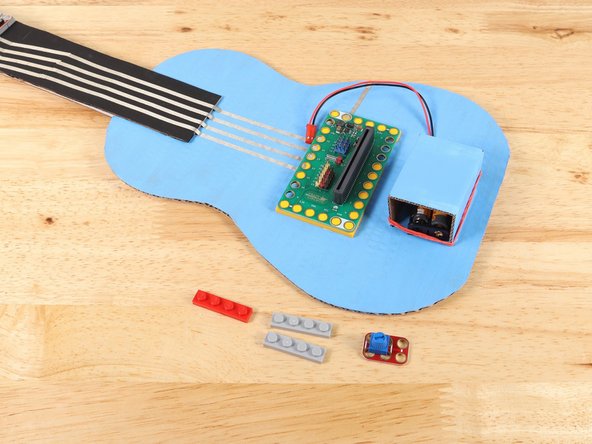
Plan out the placement of your Bit Board. Ideally you should have Pins 12, 13, 14, and 15 facing the neck of the guitar. These pins will connect with Maker Tape up to the buttons and the less turns in the tape paths the better.
-
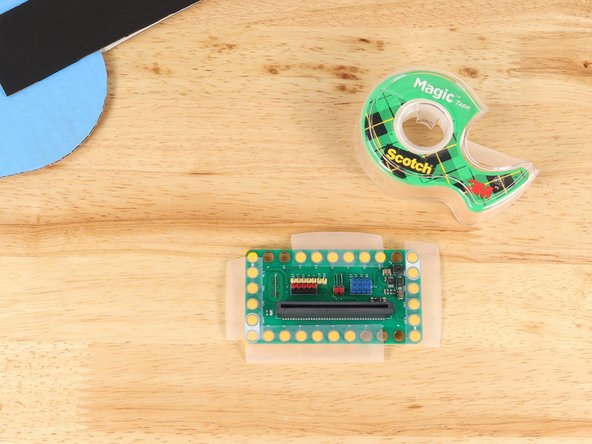
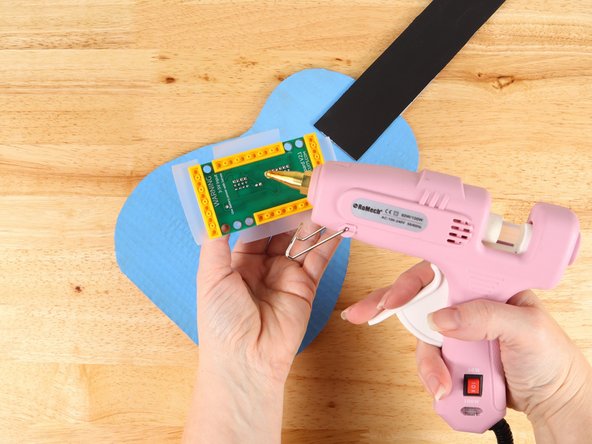
Using hot glue or another strong glue, attach the LEGO plates to the body of the guitar.
-
Do NOT get glue on the Bit Board.The LEGO plates are taped in temporarily to help ensure good placement once they are attached, but the Bit Board should be easily removed as needed.
-
Remove the tape from the Bit Board. You should now be able to remove and reconnect the Bit Board to the LEGO plates as needed.
-
-
-
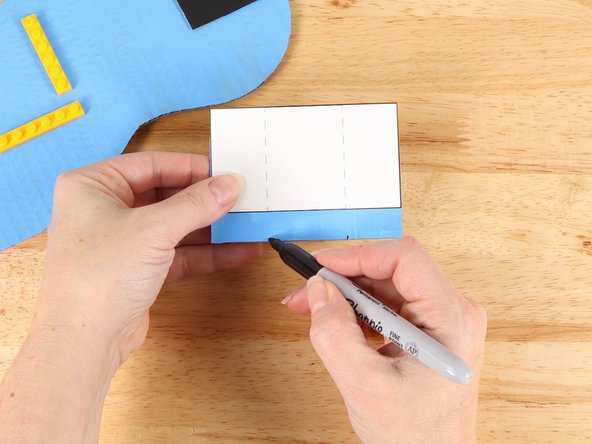
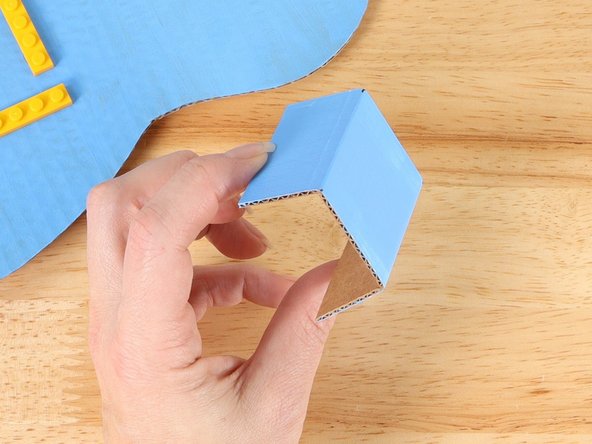
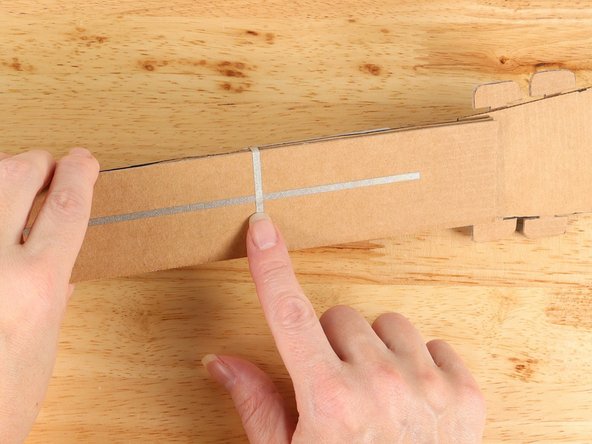
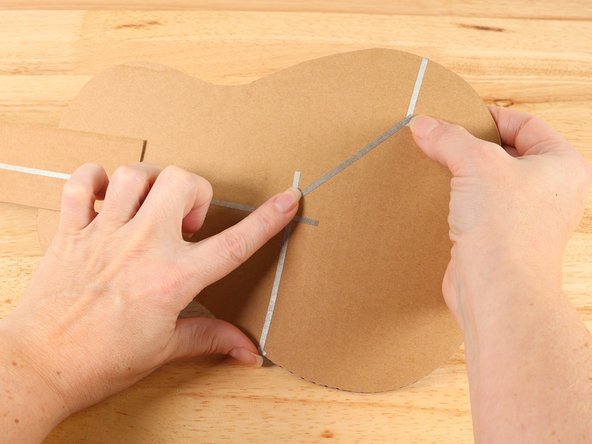
Use the dotted lines on the battery compartment template to mark where you need to fold.
-
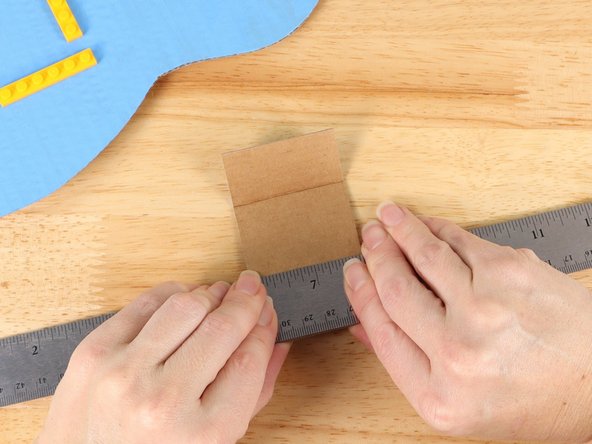
Using a straight edge like a ruler, fold the battery compartment along the lines to form a u-shape.
-
-
-
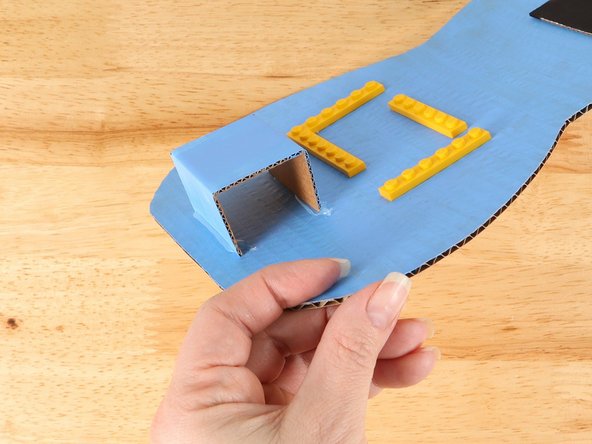
Glue the battery compartment into place below the LEGO plates. Make sure it is not too close to the LEGO plates.
-
-
-
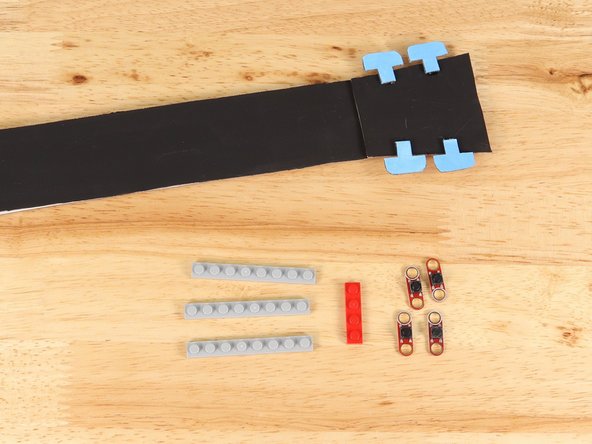
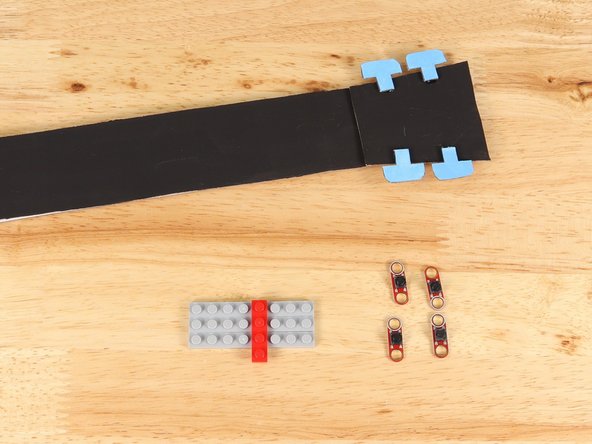
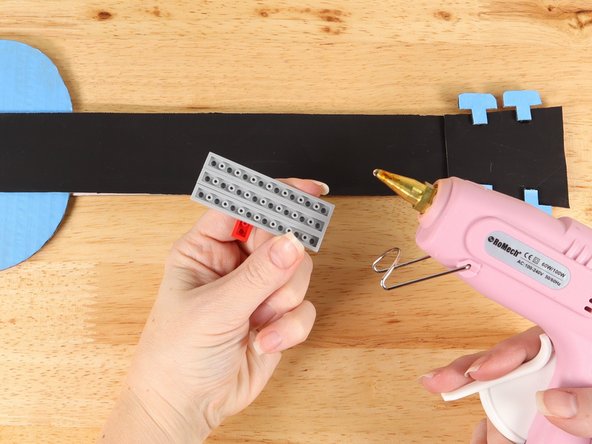
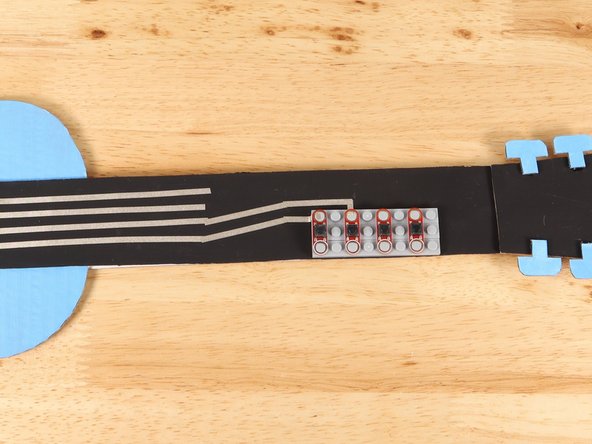
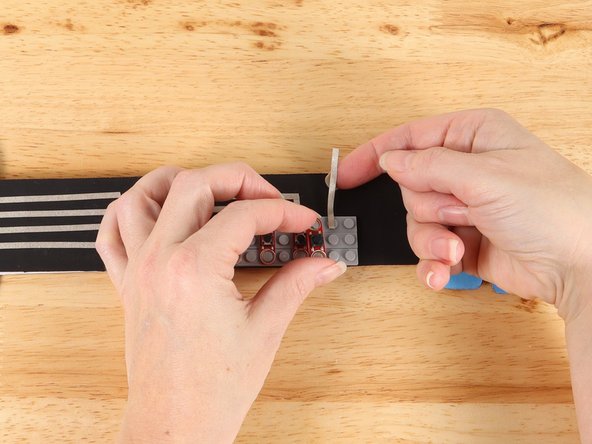
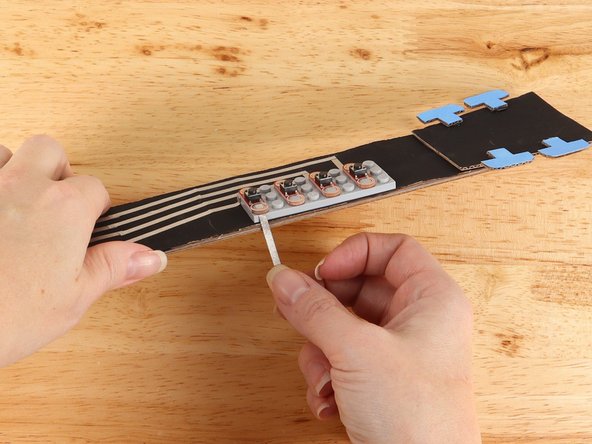
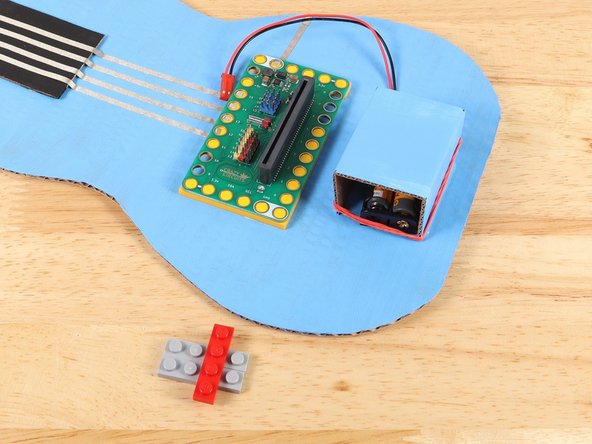
The buttons need LEGO studs to connect to the guitar. Here we used (3) 1x8 plates and held them together with another LEGO plate to keep them aligned correctly.
-
You can use any size of LEGO plates you would like as long as combined it is no more that 4 studs tall. Any taller and you will not have room for your tape paths on the remaining part of the neck. In the pictures our LEGO is 3x8.
-
-
-
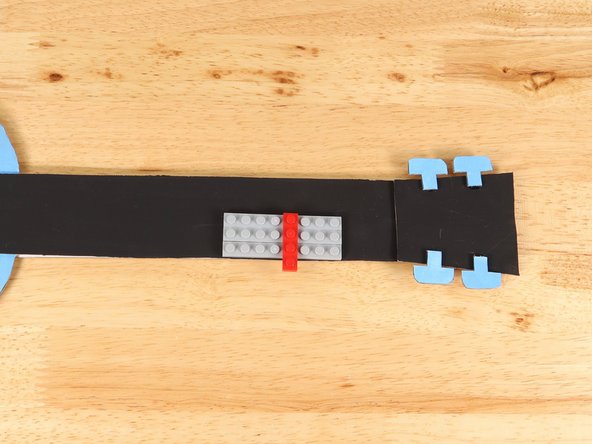
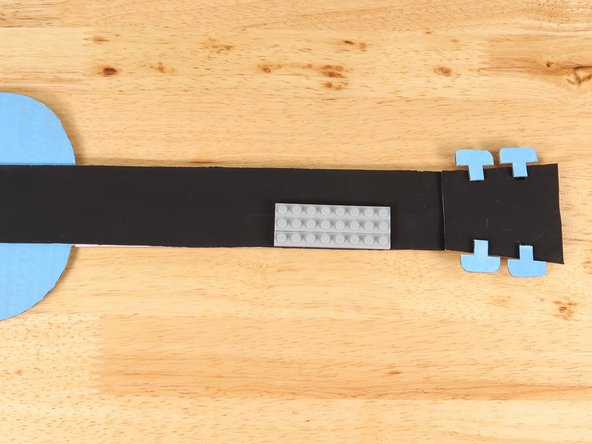
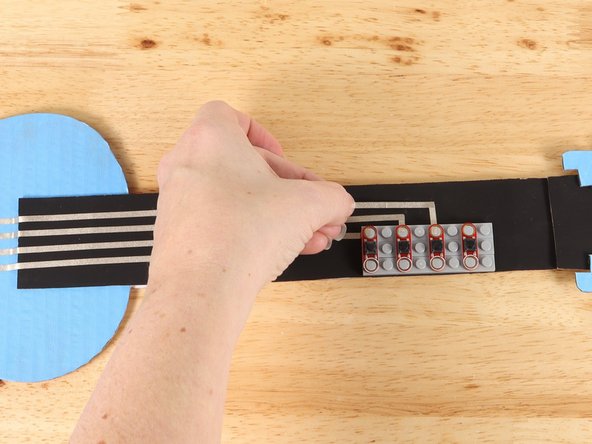
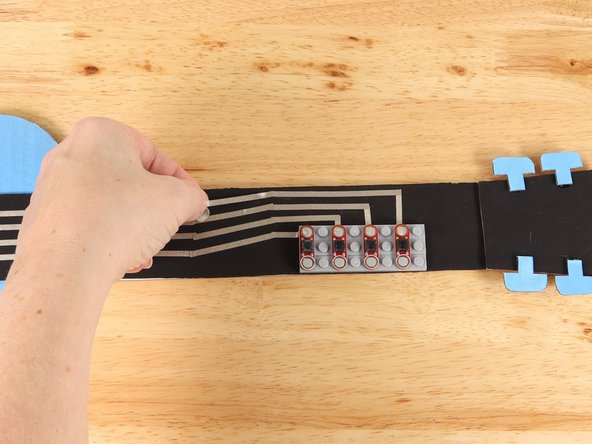
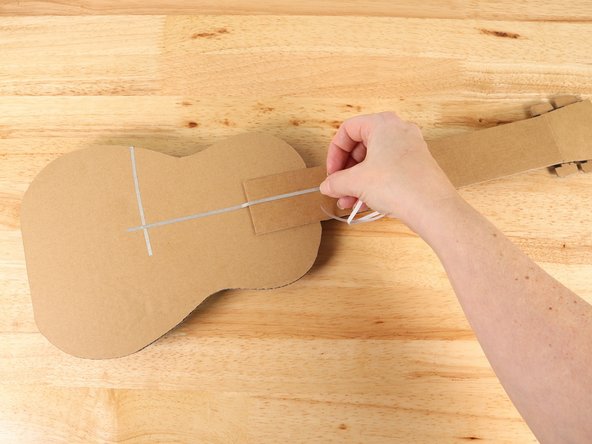
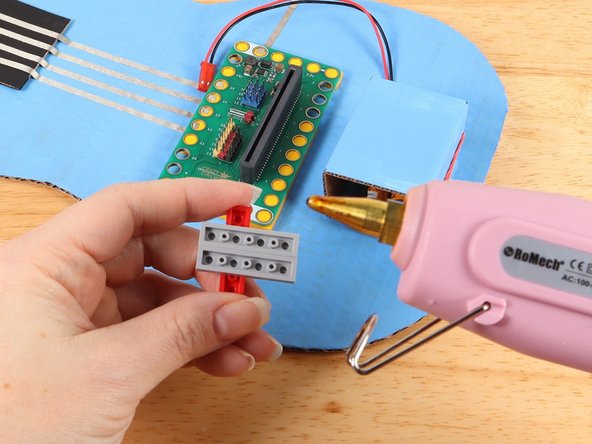
Using hot glue or another strong glue, attach the LEGO plates to the neck of the guitar.
-
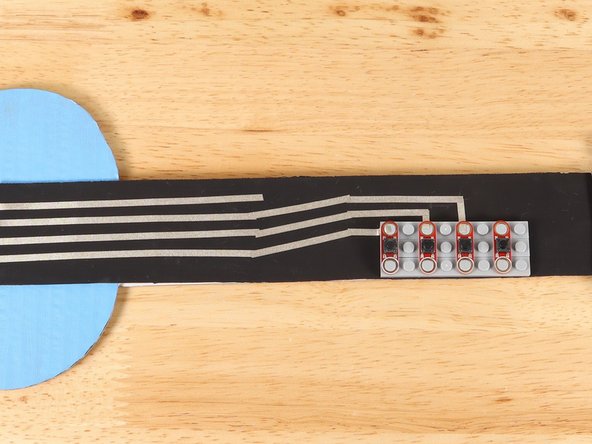
The LEGO plates should be lined up with the bottom edge of the guitar neck, as pictured.
-
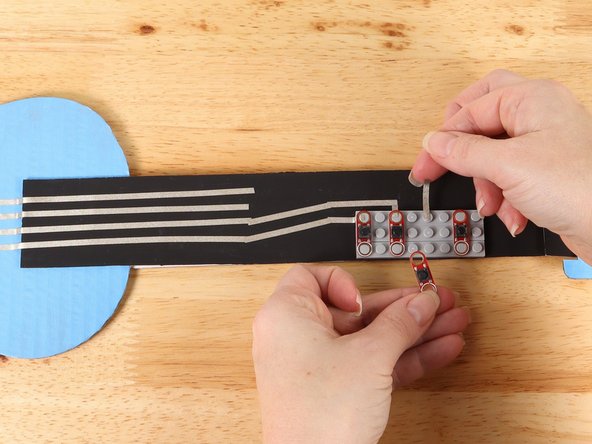
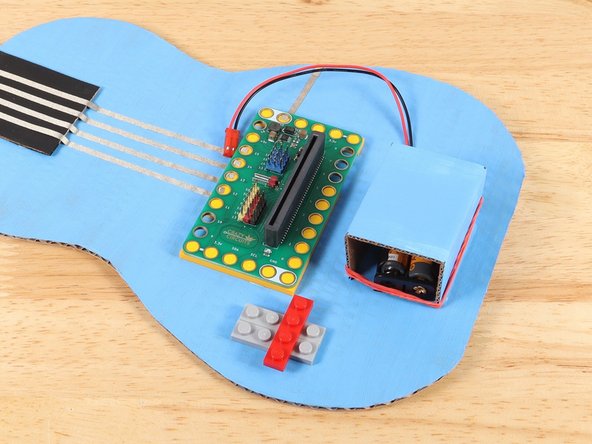
Remove the extra LEGO plate holding the other plates together.
-
-
-
There will be four tape paths going up the neck. These paths cannot touch each other. Make sure to plan your space for each path accordingly.
-
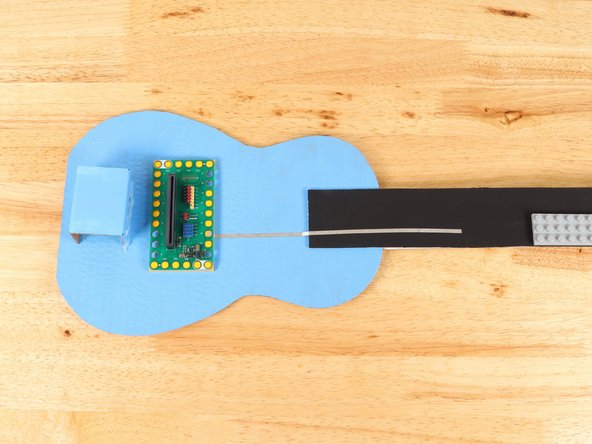
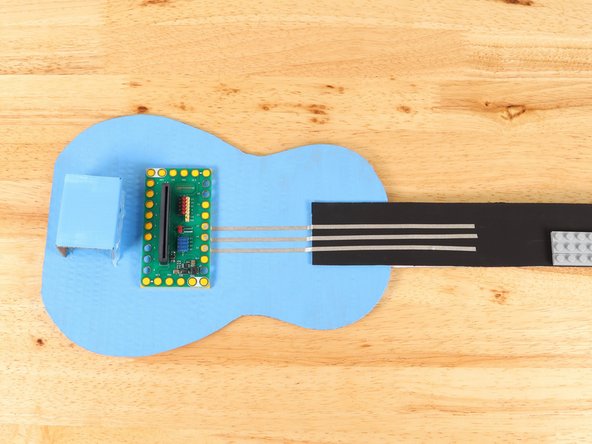
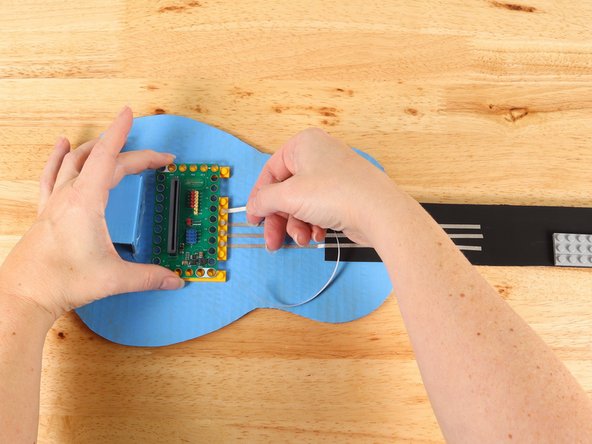
Using 1/8" Maker Tape, adhere the end of the Maker Tape to the center of the stud underneath Pin 15 of the Bit Board.
-
Press the Bit Board in place, securing the tape.
-
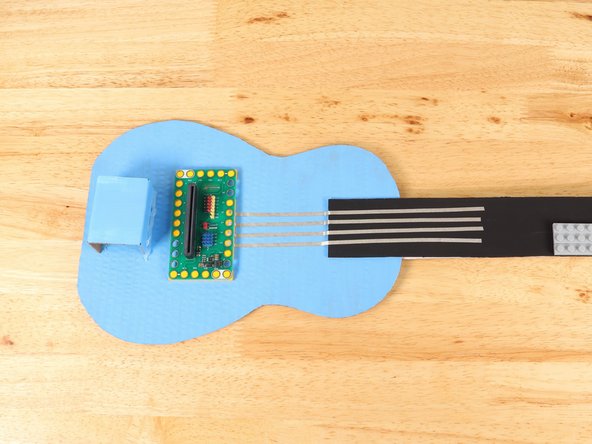
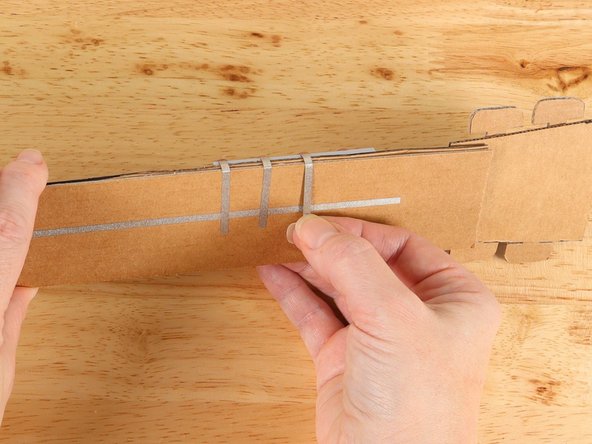
Continue the tape path onto the body and half way up the neck.
-
-
-
There will be four tape paths going up the neck. These paths cannot touch each other. Make sure to plan your space for each path accordingly.
-
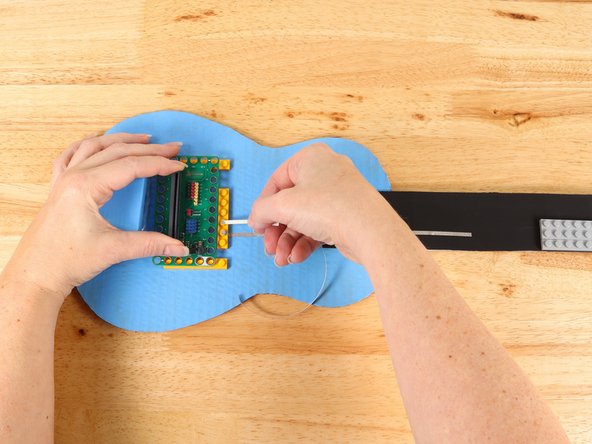
Using 1/8" Maker Tape, adhere the end of the Maker Tape to the center of the stud underneath Pin 14 of the Bit Board.
-
Press the Bit Board in place, securing the tape.
-
Continue the tape path onto the body and half way up the neck.
-
-
-
There will be four tape paths going up the neck. These paths cannot touch each other. Make sure to plan your space for each path accordingly.
-
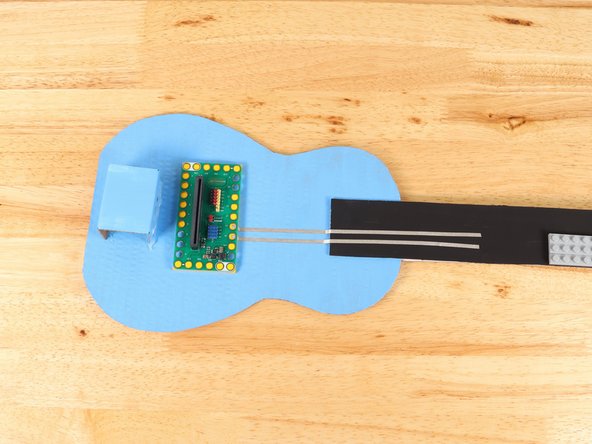
Using 1/8" Maker Tape, adhere the end of the Maker Tape to the center of the stud underneath Pin 13 of the Bit Board.
-
Press the Bit Board in place, securing the tape.
-
Continue the tape path onto the body and half way up the neck.
-
-
-
There will be four tape paths going up the neck. These paths cannot touch each other. Make sure to plan your space for each path accordingly.
-
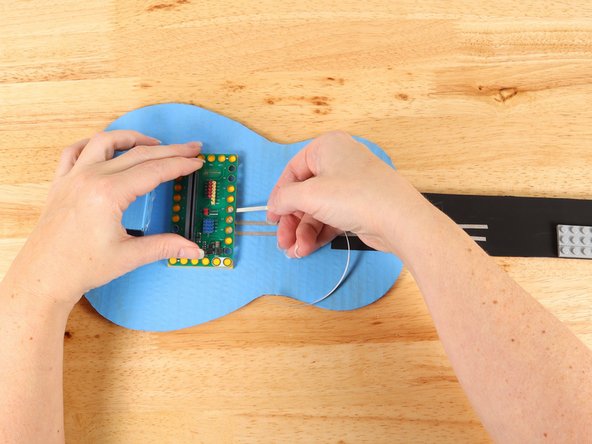
Using 1/8" Maker Tape, adhere the end of the Maker Tape to the center of the stud underneath Pin 12 of the Bit Board.
-
Press the Bit Board in place, securing the tape.
-
Continue the tape path onto the body and half way up the neck.
-
-
-
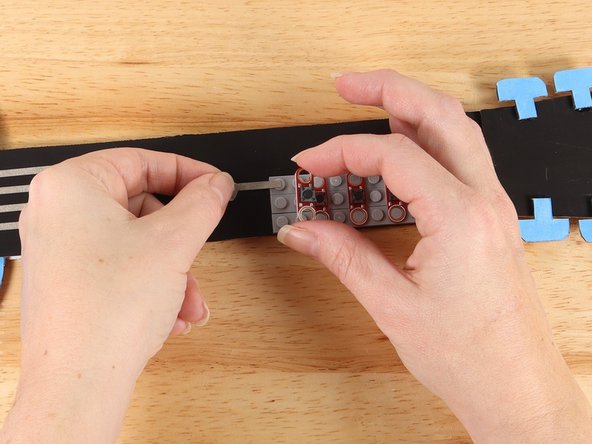
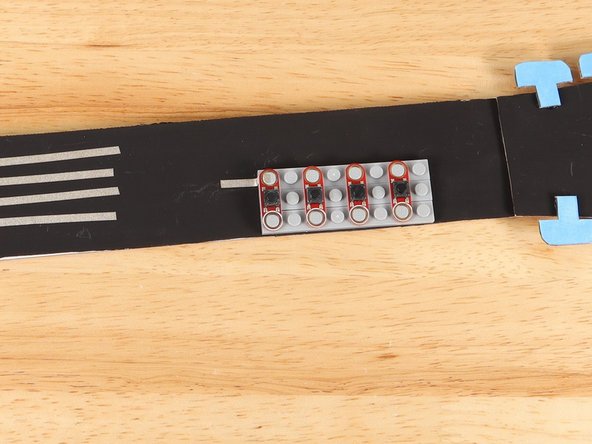
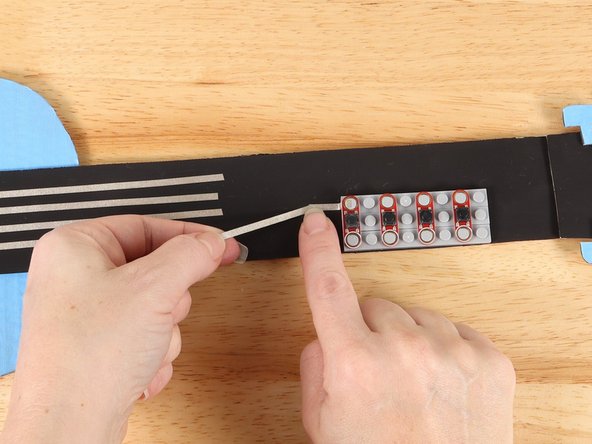
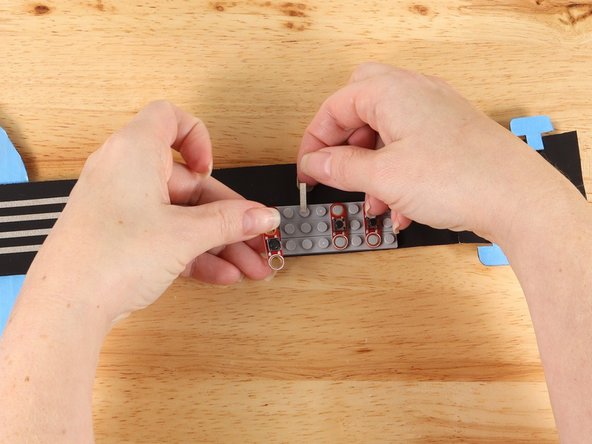
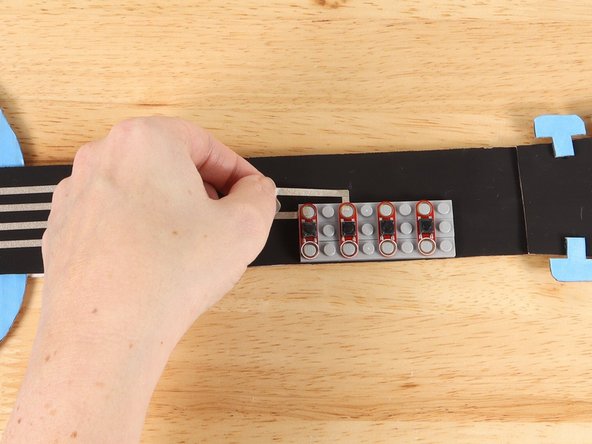
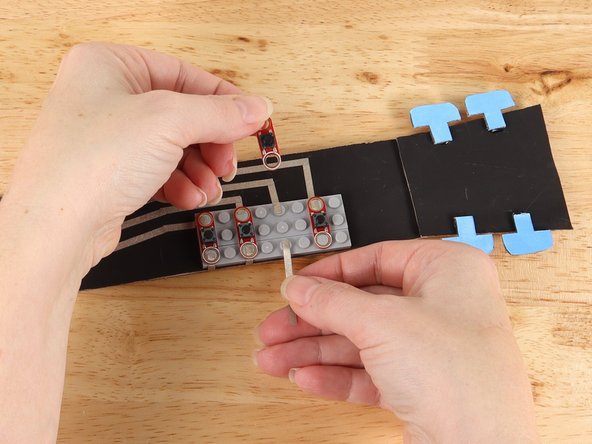
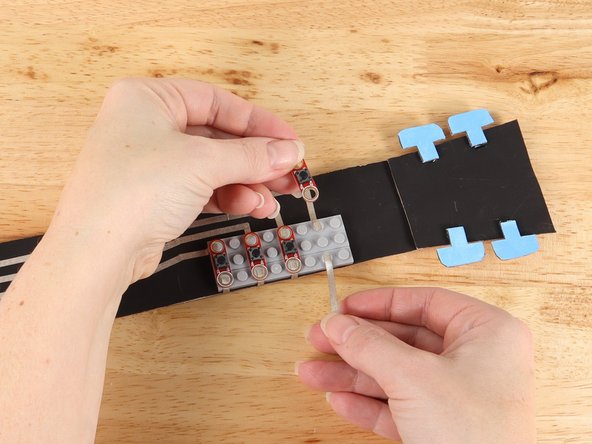
Lift up the first button and use a small piece of Maker Tape to start a path out to the left of the button.
-
Place the button on top of the tape path to secure it in place.
-
Add another piece of Maker Tape to connect the path diagonally from the button to the path from Pin 15.
-
Make sure the paths connecting Pin 15 to the first button do not come in contact with any of the other pathways.
-
-
-
Lift up the second button and use a small piece of Maker Tape to start a path straight out from the button as pictured.
-
Place the button on top of the tape path to secure it in place.
-
Add a piece of Maker Tape perpendicular to the first path that begins to lead down the neck.
-
Add another piece of Maker Tape to connect the path diagonally from the button to the path from Pin 14.
-
Make sure the paths connecting Pin 14 to the second button do not come in contact with any of the other pathways.
-
-
-
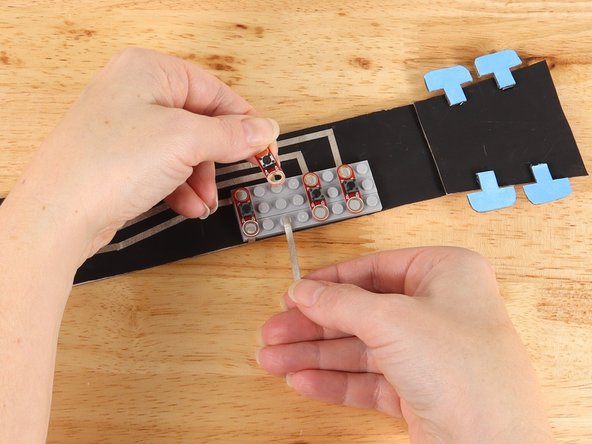
Lift up the third button and use a small piece of Maker Tape to start a path straight out from the button as pictured.
-
Place the button on top of the tape path to secure it in place.
-
Add a piece of Maker Tape perpendicular to the first path that begins to lead down the neck.
-
Add another piece of Maker Tape to connect the path diagonally from the button to the path from Pin 13.
-
Make sure the paths connecting Pin 13 to the third button do not come in contact with any of the other pathways.
-
-
-
Lift up the last button and use a small piece of Maker Tape to start a path straight out from the button as pictured.
-
Place the button on top of the tape path to secure it in place.
-
Add a piece of Maker Tape perpendicular to the first path that begins to lead down the neck.
-
Add another piece of Maker Tape to connect the path diagonally from the button to the path from Pin 12.
-
Make sure the paths connecting Pin 12 to the fourth button do not come in contact with any of the other pathways.
-
-
-
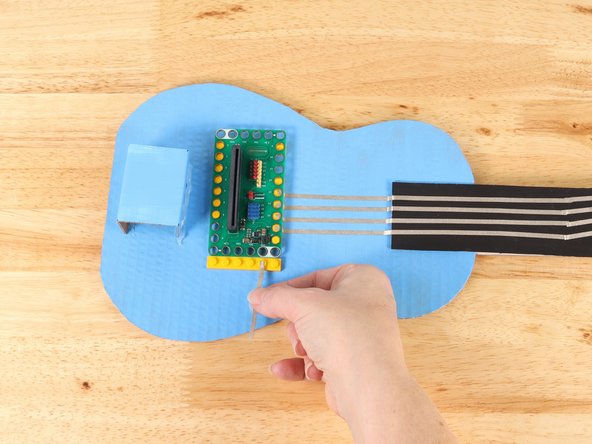
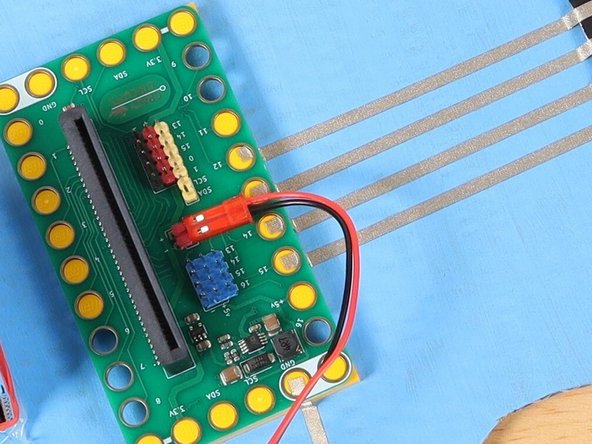
Remove the Bit Board and start a path of Maker Tape from one of the white (ground) holes.
-
Place the Bit Board on top of the tape path to secure it in place.
-
Wrap the tape path onto the back side of the guitar. If your path isn't long enough, add more tape overlapping the pieces to connect them.
-
-
-
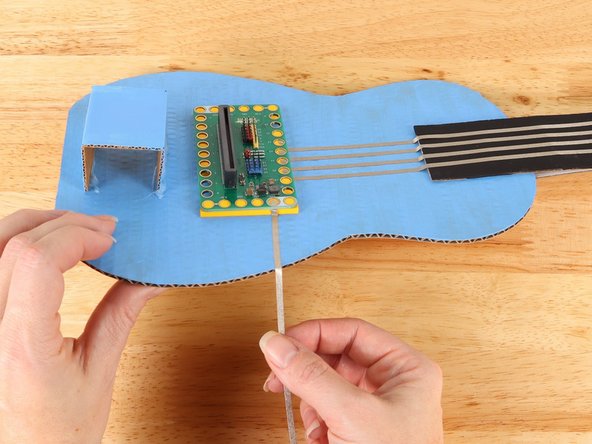
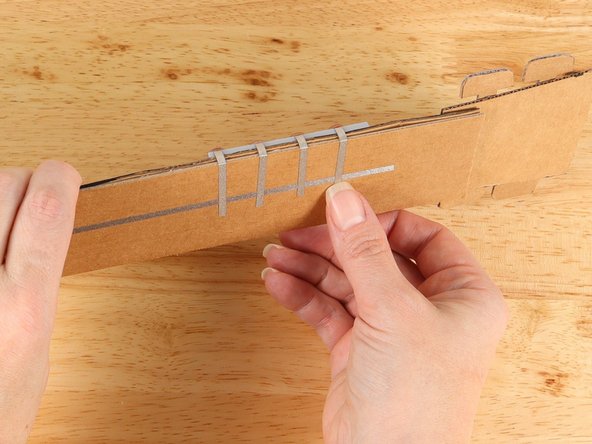
Add a long piece of Maker Tape that starts at the ground path and leads all the way up the neck.
-
-
-
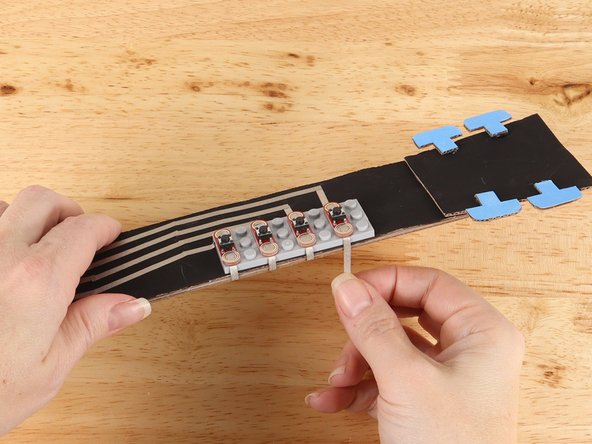
Remove the first button and add a piece of Maker Tape to the bottom stud as pictured.
-
Replace the button to help secure the tape path in place.
-
Wrap the tape around to the back of the neck and connect it to the ground pathway.
-
-
-
Remove the second button and add a piece of Maker Tape to the bottom stud as pictured.
-
Replace the button to help secure the tape path in place.
-
Wrap the tape around to the back of the neck and connect it to the ground pathway.
-
-
-
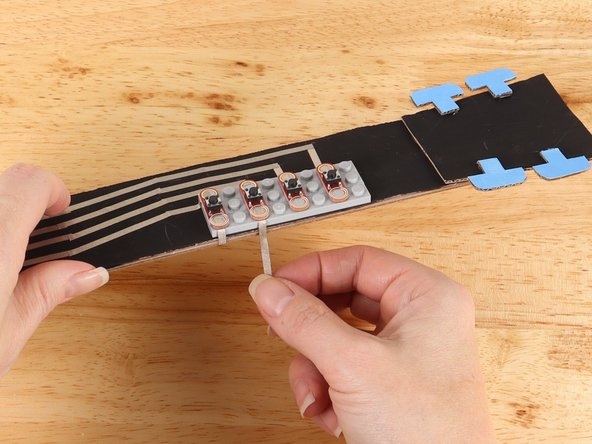
Remove the third button and add a piece of Maker Tape to the bottom stud as pictured.
-
Replace the button to help secure the tape path in place.
-
Wrap the tape around to the back of the neck and connect it to the ground pathway.
-
-
-
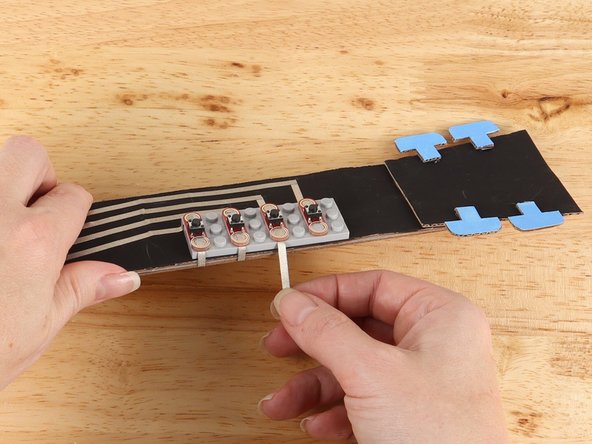
Remove the fourth button and add a piece of Maker Tape to the bottom stud as pictured.
-
Replace the button to help secure the tape path in place.
-
Wrap the tape around to the back of the neck and connect it to the ground pathway.
-
-
-
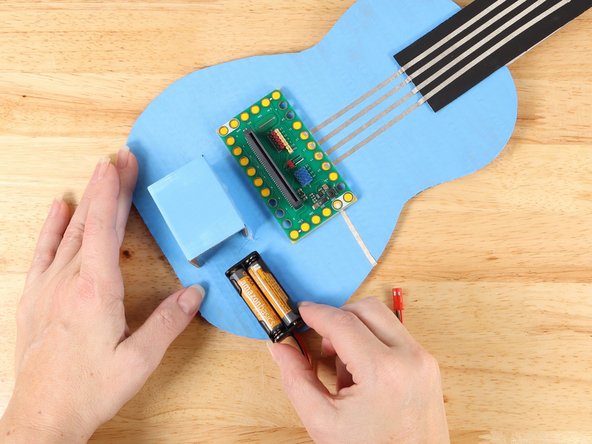
Slide the Battery Pack into the compartment and secure it in place with a rubber band.
-
-
-
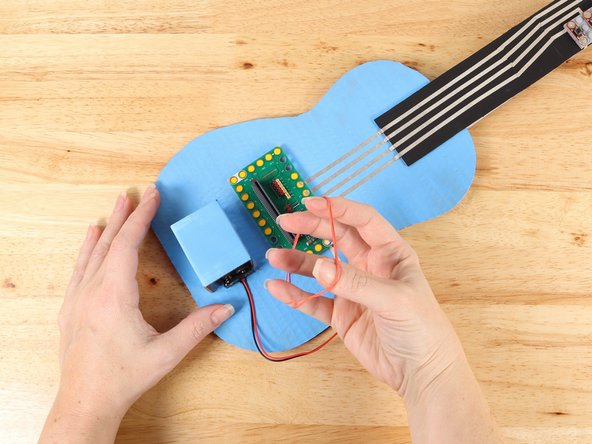
Plug the Battery Pack into the Bit Board.
-
-
-
If you've never used a micro:bit before you'll want to check out this guide: Bit Board V2 Setup and Use
-
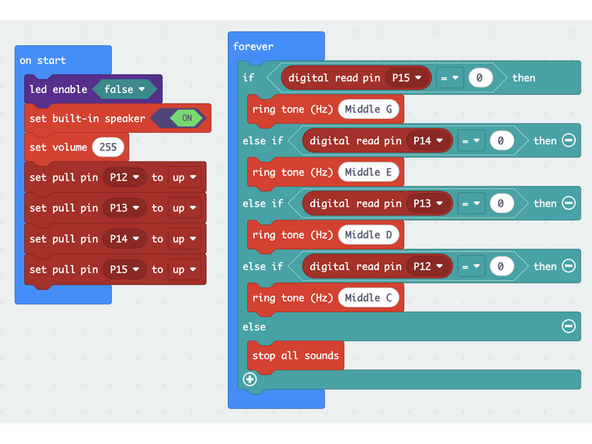
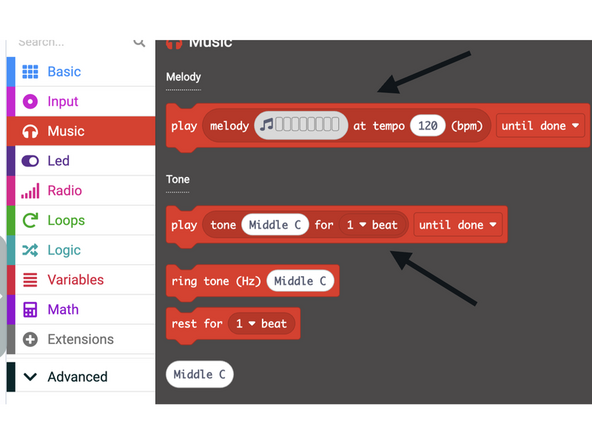
We're going to load the following code for our MicroBit Guitar Simple program: https://makecode.microbit.org/S84783-804...
-
-
-
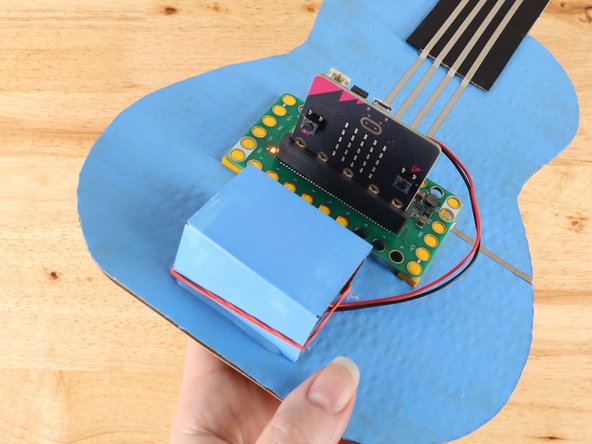
Once you've got your guitar built, and the code is loaded, you can test it out.
-
When connected correctly, each button will play a note. If one of the buttons doesn't work, check your tape paths and connections at the pins.
-
If the Bit Board or one of the buttons seems loose and doesn't stay connected well, you can add a little more tape over any original paths to make the connections more secure.
-
-
-
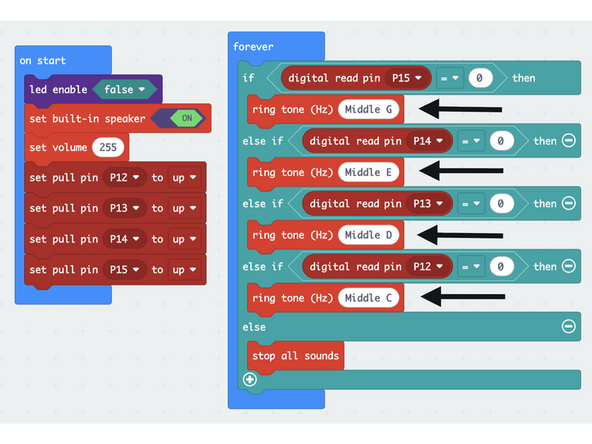
The notes in the preprogramed code were selected to be able to play Mary Had a Little Lamb.
-
You can change the notes to be whatever you would like. Each button could even play it's own tune! The possibilities are endless!
-
-
-
If you want to take it further and have the LED Matrix on the MicroBit light up when you press the buttons you can!
-
Here is the code to MicroBit Guitar LED Matrix: https://makecode.microbit.org/S13975-591...
-
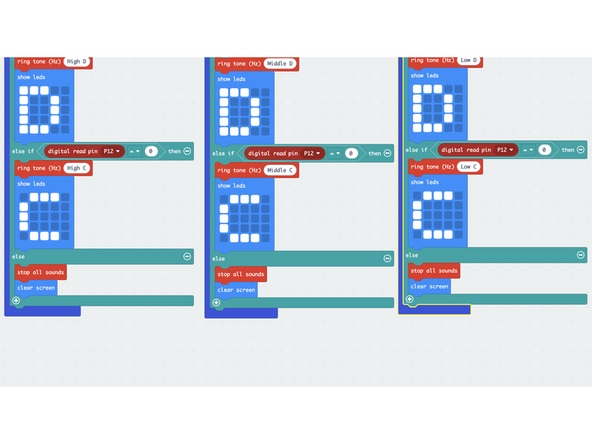
The LED Matrix is coded to show the letter of corresponding note that is being played. You could change the code to show images instead of letters.
-
-
-
If you want to expand your guitar even more, you can connect a Potentiometer! There are a lot of things you could do with the Potentiometer, but this guide will use the Potentiometer to change the pitch of the notes being played.
-
You will need LEGO plates that are 2x3 or 2x4 in area and a Potentiometer. The next few steps will walk you through this process.
-
-
-
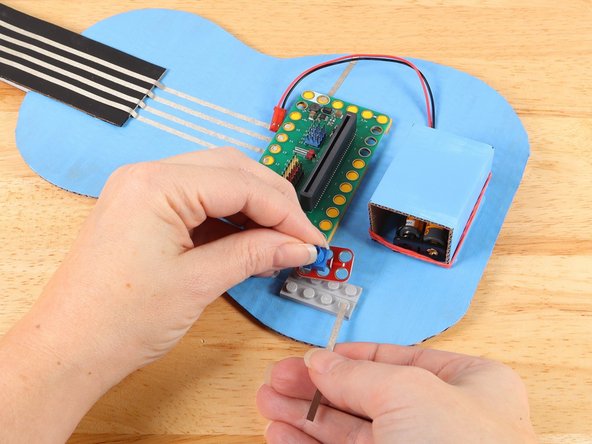
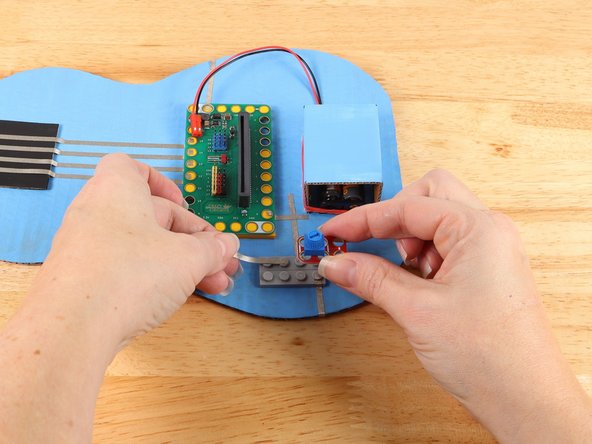
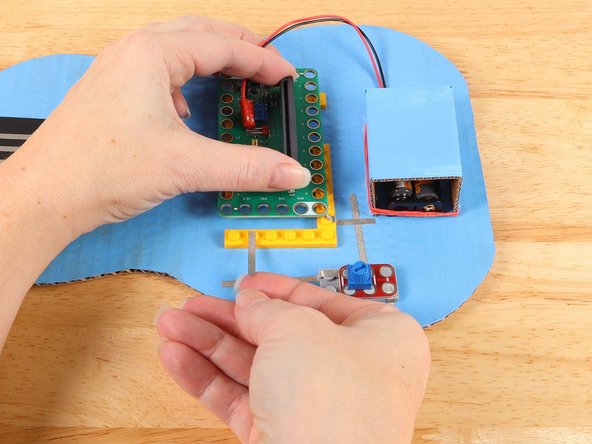
If your LEGO plates are like pictured and are separate parts, hold them together with another LEGO plate to ensure they are aligned properly.
-
Add hot glue or another strong glue to the bottom of the LEGO plates.
-
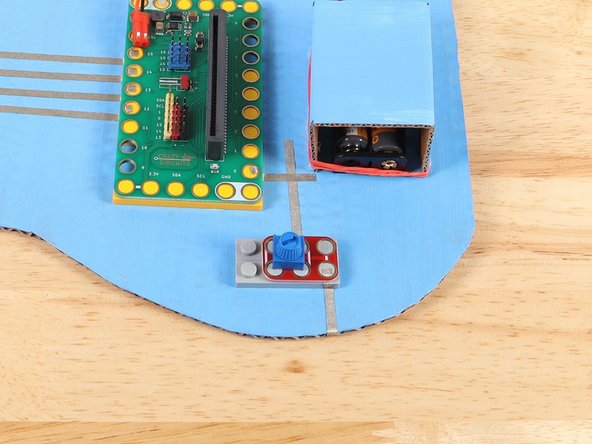
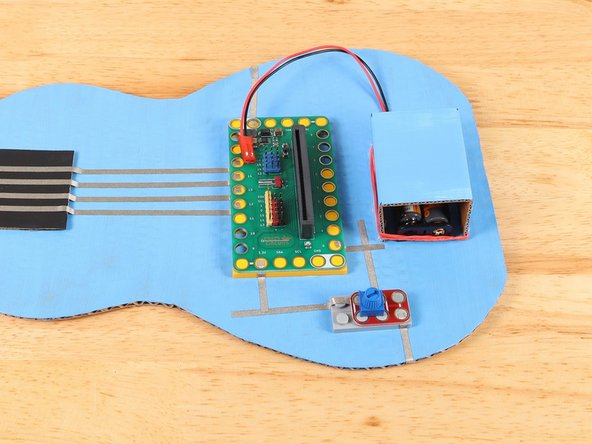
Add the LEGO plates to the guitar body. This should go on the opposite side of the Bit Board from the ground pathway. We will be connecting the Potentiometer to Pin 0 so we need to keep it close by.
-
Remove the LEGO plate (red in the picture) that is holding the plates together.
-
-
-
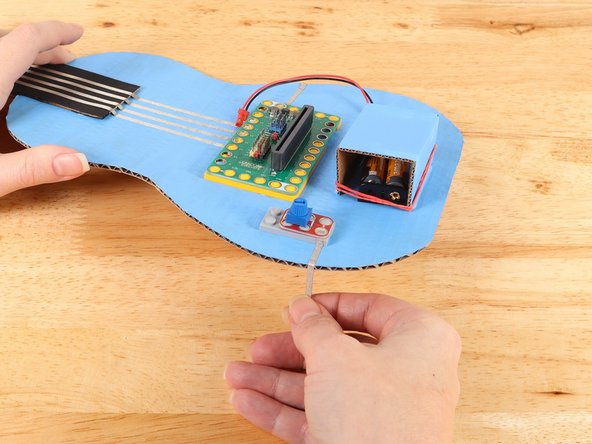
Use a piece of Maker Tape to start a path from the bottom hole of the potentiometer as pictured.
-
Replace the potentiometer to help secure the tape path in place.
-
Wrap the Maker Tape around to the back of the guitar and connect it to the ground path, using more Maker Tape if needed.
-
-
-
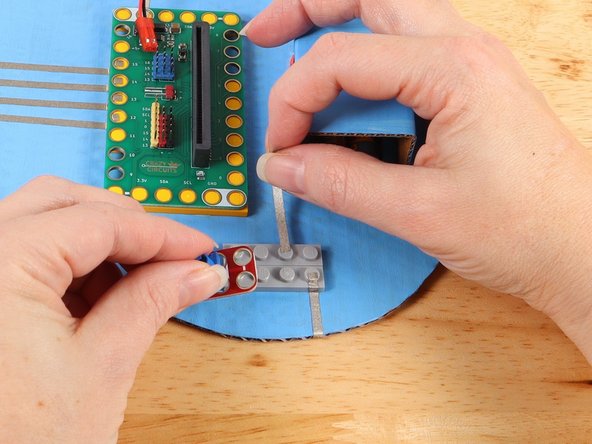
Use a piece of Maker Tape to start a path from the middle hole of the potentiometer closer to the Bit Board as pictured.
-
Replace the potentiometer to help secure the tape path in place.
-
Add a piece of Maker Tape under Pin 0 of the Bit Board that connects to the path from the Potentiometer. Press the Bit Board on top of the path to secure the tape in place.
-
-
-
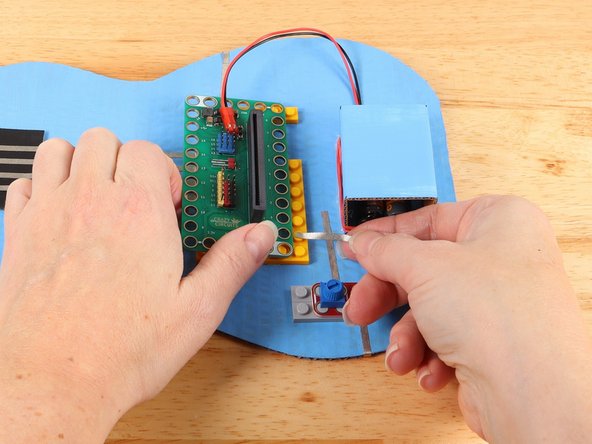
Use a piece of Maker Tape to start a path from the top hole of the potentiometer as pictured.
-
Replace the potentiometer to help secure the tape path in place.
-
Add a piece of Maker Tape under the 3.3v hole of the Bit Board that connects to the path from the Potentiometer. Press the Bit Board on top of the path to secure the tape in place.
-
-
-
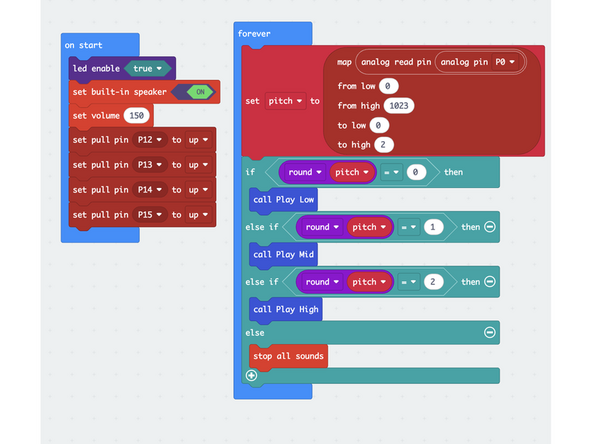
Here is the code for the MicroBit Guitar Potentiometer: https://makecode.microbit.org/S70921-019...
-
This code uses the map function to create a scale from 0 to 2 that "maps" to the 0 to 1023 values from the Potentiometer.
-
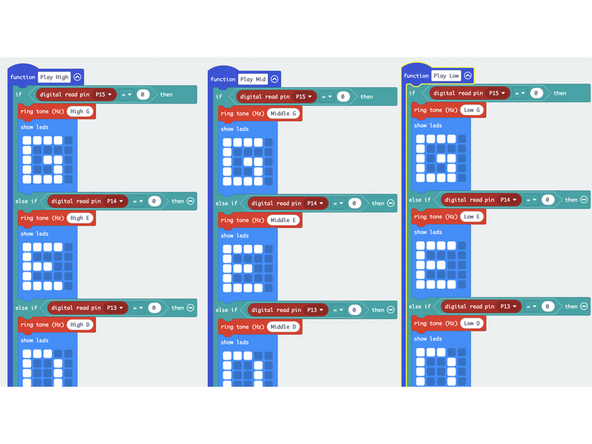
When the potentiometer is in position 0 it will call the function "Play Low". When in position 1 it will called function "Play Mid" and when in position 2 it will call function "Play High".
-
-
-
Now that your MicroBit Guitar is complete it's time to rock out!
-
-
-
For an even more complex build check out The Instant Star Guitar.
-
-
-
Follow along with our recorded live stream!
-
You can watch the full video of us walking through this project, along with explaining and exploring the code: https://youtube.com/live/-E9kW73GyNo?fea...
-


Attached Documents