
Introduction
Use a micro:bit, Ultrasonic Distance Sensor, and a NeoPixel strip to check how close an object is.
The NeoPixel Strip can act like a live bar graph to let you know when something is too close.
Video Overview
Featured Document
-
-
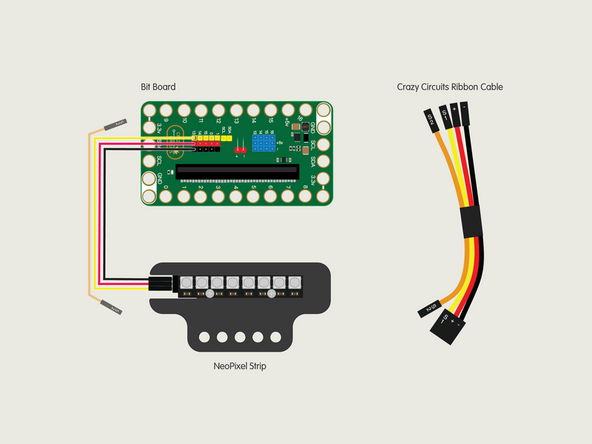
The magical thing about these “Individually Addressable” LEDs is that you don’t have to connect each LED to an individual pin on your micro:bit, you just need one signal wire along with power (Positive and Negative) to light things up.
-
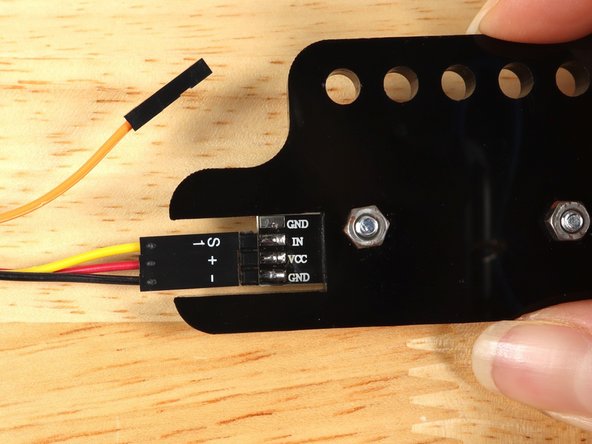
So let's get connected! If you turn the NeoPixel Strip over you'll see labels for the three pins. You should see IN, VCC, and GND.
-
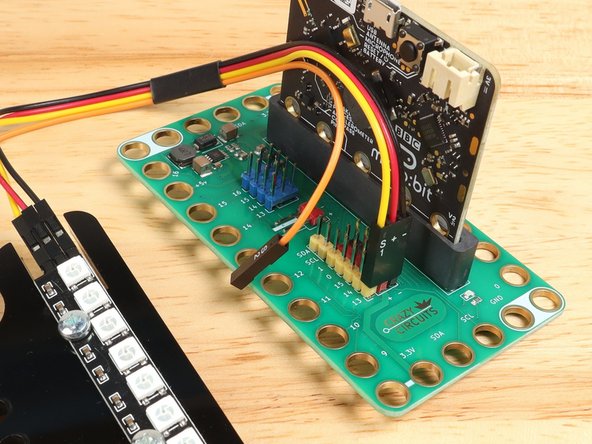
Use the Crazy Circuits Ribbon Cable to connect the NeoPixel Strip to the Bit Board.
-
The end with S1, +, and - can plug directly into the Pin 13 row (make sure S1 goes into 13) and the other end should plug into the NeoPixel Strip as shown.
-
We only need three wires for the NeoPixel Strip so you can leave S2 (the Orange wire) unconnected.
-
-
-
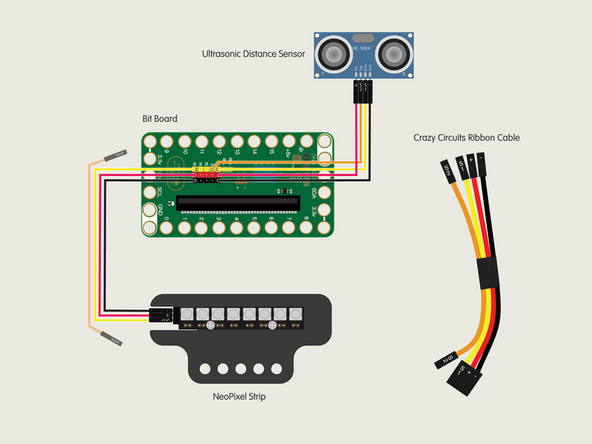
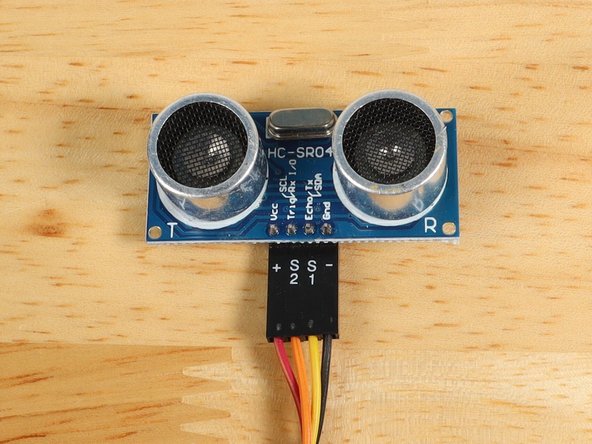
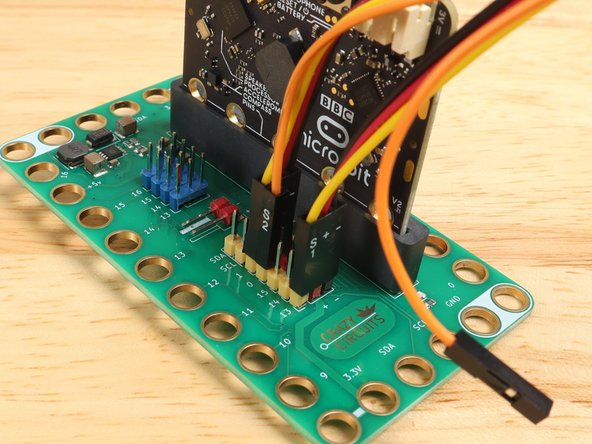
The Ultrasonic Distance Sensor has four pins, so we'll use all the connections on the Crazy Circuits Ribbon Cable to hook it up to the Bit Board.
-
The end with S1, +, and - can plug directly into the Pin 1 row (make sure S1 goes into 1) and then you can plug S2 (the Orange wire) into Pin 0, which is right next to Pin 1.
-
The other end plugs into the Ultrasonic Distance Sensor. The + goes to VCC, S2 goes to Trig, S1 goes to Echo, and - goes to GND.
-
-
-
In the next step we're going to provide a link to the code for this project, but first let's look at the NeoPixel Extension for MakeCode.
-
The Extension has the basic blocks you'll need to set up the NeoPixel Addressable RGB LEDs and to control them with a micro:bit, and the Bit Board makes it very easy to connect things!
-
-
-
If you've never used a micro:bit before you'll want to check out this guide: Bit Board V2 Setup and Use
-
We're going to load the following code for our NexoPixel Distance Sensor program: https://makecode.microbit.org/_KTgUPWF8r...
-
-
-
Leave the USB Cable plugged into the micro:bit and it should start to run the code as soon as it's loaded.
-
It's best to set the Ultrasonic Distance Sensor lying flat on the table and pointing directly up.
-
Move your hand over the sensor and you should start to see some of the LEDs light up! Move your hand closer and further and see if the number of lit LEDs changes.
-
Take a look at the code and see if it makes sense.
-
Feel free to play around with the code making changes to see how they affect the operation.
-
-
-
NeoPixels (or "Addressable RGB LEDs") are a fun way to practice your programming! We've got a few more examples to share.
-
-
-
-
-


Attached Documents
