
Introduction
Make a Pinwheel that's powered by a Motor, a CR2032 Battery, and some Maker Tape! (It also works like a regular pinwheel.)
To adhere the motor to the craft stick, and the pinwheel to the motor you can use hot glue, but we'll use double sided foam tape in this guide.
Video Overview
Featured Document
-
-
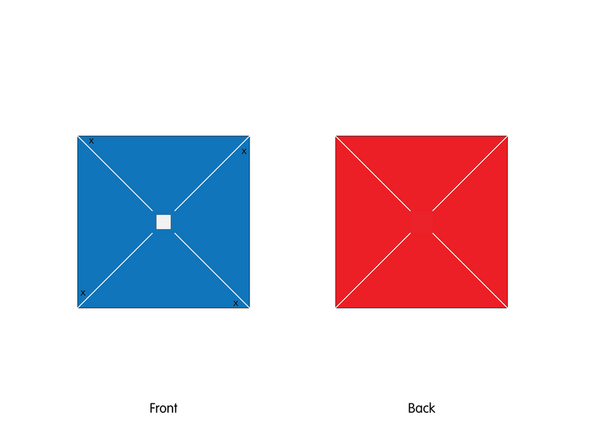
Print out the pinwheel template on regular (20 lb.) printer paper.
-
Use colored pencils, crayons, or markers to color your pinwheel if desired.
-
We recommend coloring the front and back different colors. You can also add stripes or patterns!
-
Leave the small colored square in the center uncolored, as we'll stick a small piece of double sided tape to it.
-
-
-
Cut slits along the dotted lines of the template.
-
Note the slits do not go all the way to the center of the pinwheel template.
-
-
-
Add a small square of double sided foam tape to the center of the pinwheel template, on the Front.
-
Note that'll need a Foam Double Sided Tape, not just standard Double Sided Tape.
-
-
-
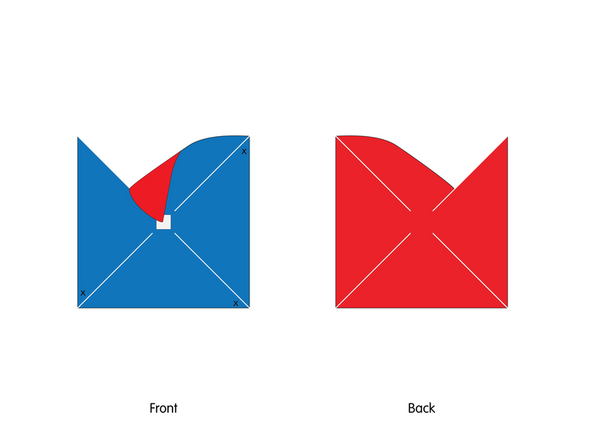
Fold down one of the spokes (marked with an x) and stick it to the double sided tape.
-
Do the same with the other three spokes.
-
Make sure you leave enough room to stick each of the spokes to the tape!
-
-
-
Once your pinwheel is assembled you can put it aside while you work on the handle and the circuit.
-
-
-
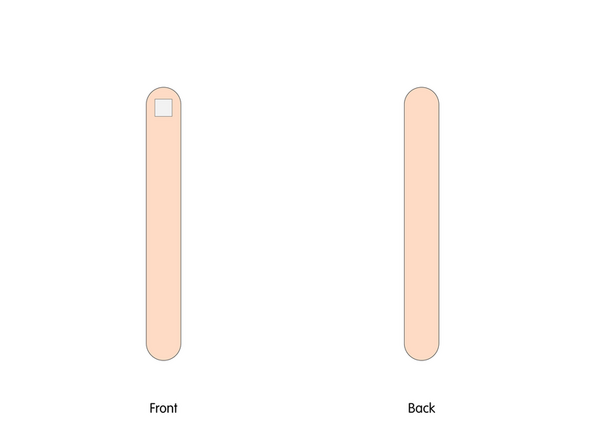
Add a small piece of double sided tape to the craft stick.
-
We'll be adding our motor to the tape in the next step.
-
Instead of double sided tape you can use hot glue but be careful when using a hot glue gun!
-
-
-
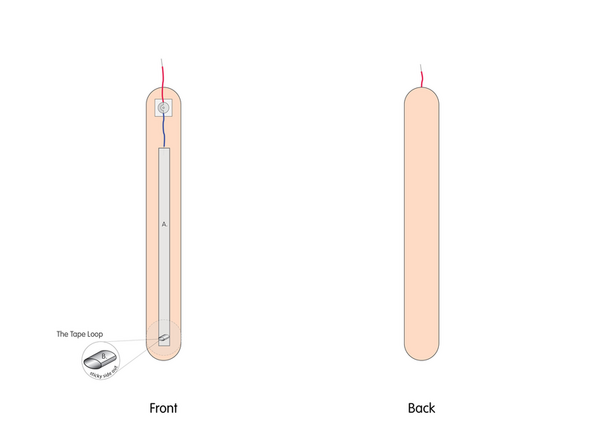
Stick the motor to the double sided tape (or hot glue) making sure the back of the motor (with the wires) is stuck down to the tape and the part that spins faces upwards so it can move freely.
-
Note that we've placed the motor so the red wire is at the top.
-
This will make our pinwheel turn anti-clockwise, which is the opposite direction of the results you'll get if you blow on the pinwheel with your mouth.
-
If you place the blue wire at the top you'll reverse the rotation of the motor.
-
-
-
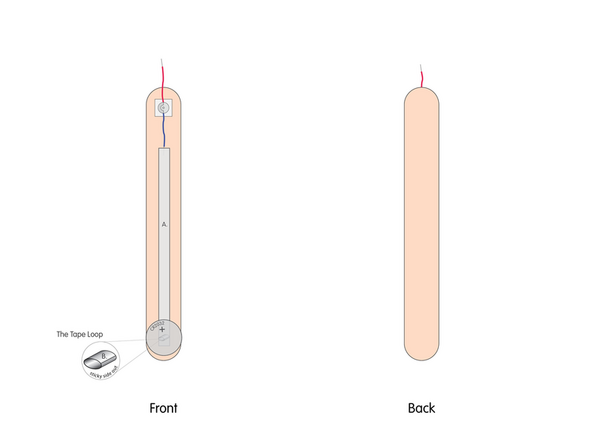
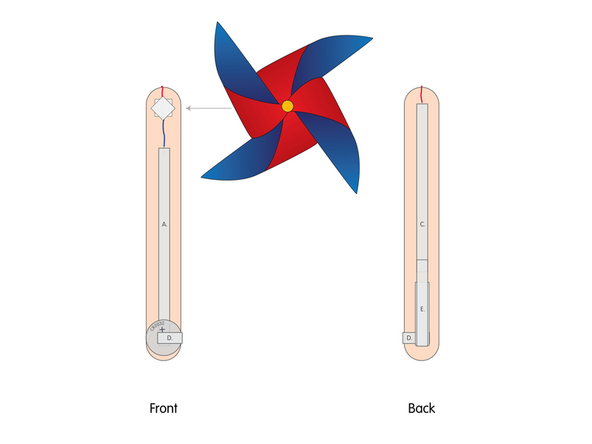
Add Tape Path A. pressing it down atop the blue wire, and then running down the length of the craft stick not quite to the bottom.
-
When adding Maker Tape atop a wire make sure you give a good press down to ensure a solid connection.
-
-
-
Make a loop of tape (sticky side out) using a short piece of Maker Tape, and stick it atop the end of Path A.
-
-
-
Once your Tape Loop is in place you can add the Battery to it.
-
Make sure the Positive side of the Battery is facing upwards, with the Negative side stuck down to the tape.
-
-
-
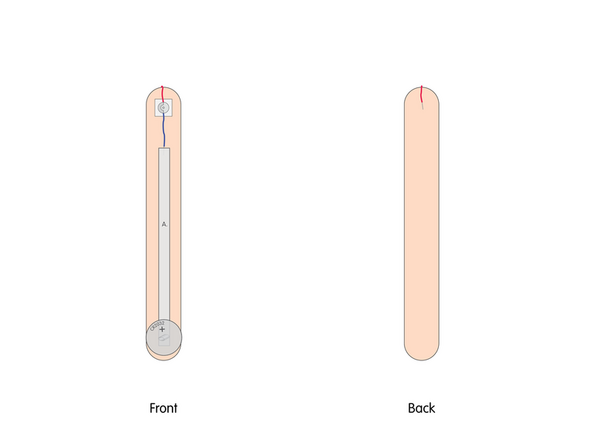
Take the red wire and wrap it around to the back of the craft stick.
-
We'll build the other half of the circuit on the back side.
-
-
-
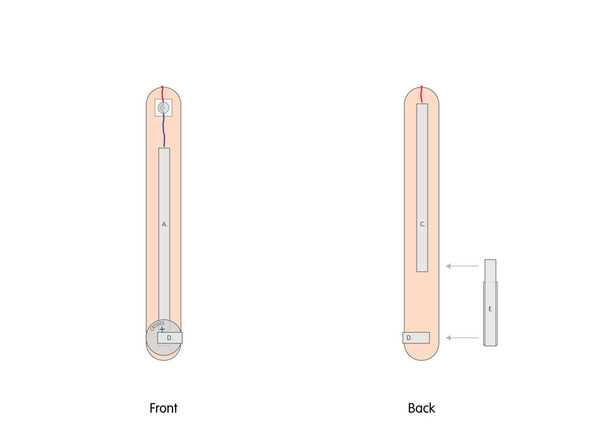
Add Tape Path C. pressing it down atop the red wire, and then run it about 2/3rds down the length of the craft stick.
-
-
-
Add Tape Path D. wrapping it around from the top of the Battery on the front, to the back of the craft stick.
-
-
-
If you haven't made a paper lever switch yet see the guide: Switch - Lever Switch
-
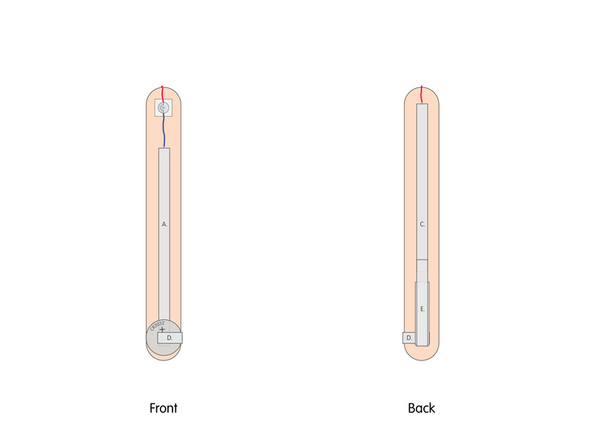
Add the paper switch to the end of Path C. so that the Maker Tape overlaps.
-
Make sure the other end of the paper switch comes in contact with Path D.
-
If the switch does not reach the Path D. tape you can adjust and add more Maker Tape as needed.
-
-
-
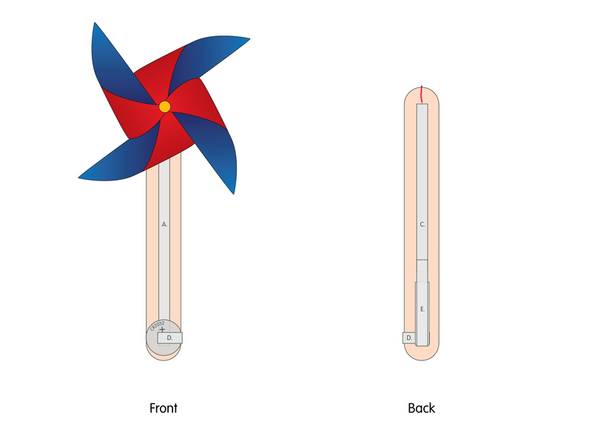
Add another square of double sided tape onto the shaft of the motor, and then stick the pinwheel to it.
-
If you're using hot glue instead of double sided tape make sure to be careful when applying it so you don't glue the shaft to the motor housing. It needs to spin freely!
-
-
-
Your pinwheel should look like this.
-
We're now ready to test it out!
-
-
-
Press the switch down and see if your pinwheel spins!
-
If it doesn't work, make sure your switch is making contact...
-
Make sure your motor can spin freely and doesn't have tape or glue impeding movement.
-
If you still have issues, go back through the steps and make sure you didn't miss anything.
-


Attached Documents
