Introduction
Add NeoPixels to your Sound Activated Rover to provide visual feedback of the sound levels.
Parts
Video Overview
-
-
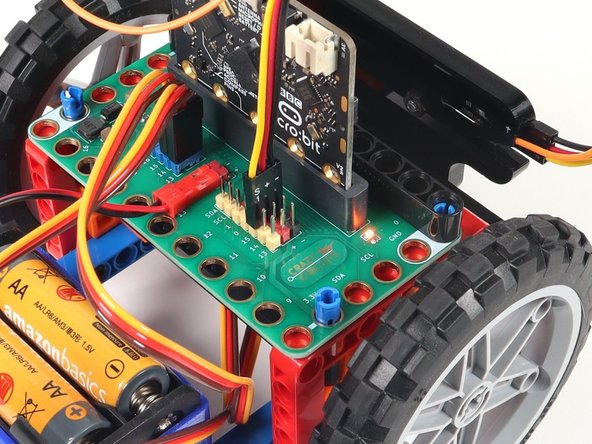
This guide assumes you've already built the Sound Activated Rover. If you haven't you'll need to do that first.
-
We're going to add the NeoPixel Addressable RGB LED Strip to the front of the Rover to get a visual display of the sound level the micro:bit will use to activate the Rover.
-
-
-
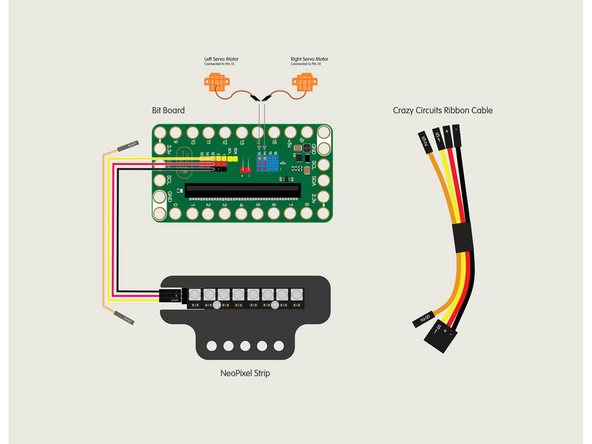
Since your Rover is already built and working, the Servos are already plugged into the Blue Pins (13 and 14) on the Bit Board, so we just need to add the NeoPixels.
-
So let's get connected! If you turn the NeoPixel Strip over you'll see labels for the three pins. You should see IN, VCC, and GND.
-
Use the Crazy Circuits Ribbon Cable to connect the NeoPixel Strip to the Bit Board.
-
The end with S1, +, and - can plug directly into the Pin 15 row (make sure S1 goes into 15) and the other end should plug into the NeoPixel Strip as shown.
-
We only need three wires for the NeoPixel Strip so you can leave S2 (the Orange wire) unconnected.
-
-
-
Use two pins to connect the NeoPixel Strip to the front of the Rover.
-
-
-
If you've never used a micro:bit before you'll want to check out this guide: Bit Board V2 Setup and Use
-
We're going to load the following code for our Rover Sound Detecting NeoPixels program: https://makecode.microbit.org/_F6990MMYg...
-
When you power on the Rover it will start moving while it runs a calibration routine to check for sound levels. (We'll cover the calibration in Step 5.)
-
Once the calibration is done the Rover will sit there waiting for the sound levels to go above the threshold that was set in the calibration routine...
-
-
-
Make sure to see the note at the bottom of this step.
-
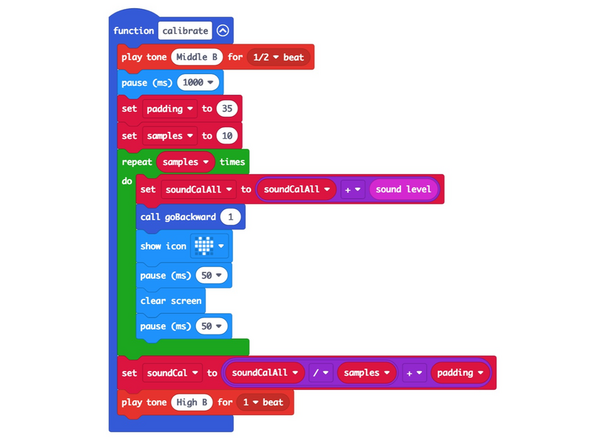
We need to calibrate the sound levels in the room before the micro:bit can tell if there is a sound.
-
The sound level can be anywhere between 0 and 255. (0 is very quiet and 255 is very loud.)
-
Our code takes 10 readings (with a slight pause between each reading) adds them all together and the divides by the number of samples (10 in this case) to get our final value.
-
Calibration routines often use this sampling technique where a number of values are captured and then the average of them is used.
-
Once we've calculated our ambient sound level we pad the number a bit to prevent false triggering. We used 35 for our pad value in this example but you can experiment with lower (or higher) values.
-
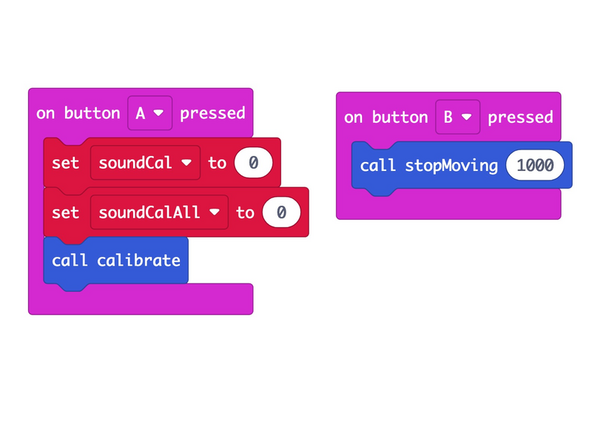
The calibration runs automatically when you power on the Rover but you can also run it by pressing the A Button on the micro:bit if you need to recalibrate.
-
Note: The Rover needs to move (or at least spin the wheels) when it calibrates! This is because the motors make noise, and we need to take that sound into account when doing the calibration.
-
-
-
Power on the Rover, and either set it down so it can roll, or hold it in your hand so the wheels can spin freely.
-
Do your best to be quiet and wait for the calibration to complete. Once the heart stops flashing on the micro:bit and you hear a second beep, the calibration should be done.
-
The Rover should be still when the room is quiet, so... Make some noise! Clap, yell, laugh... See if you can get the Rover moving.
-
You can make the Rover stop by being quiet. (Shhh!)
-