
Introduction
Creating a piano or synth is easy with the Crazy Circuits Invention Board. All you need to do is add in a Piezo Speaker Chip and connect the various Touch Points to something conductive. In this guide we'll be using lines of Conductive Tape as Touch Points, but you can easily use conductive dough (using alligator clips) or Bare Conductive Paint as seen in the video below. For more information on using Conductive Paint to make this project, check out this guide.
-
-
The layout for the parts is simple, since we're only using two.
-
The Invention Board will hang off the end of our Base Plate.
-
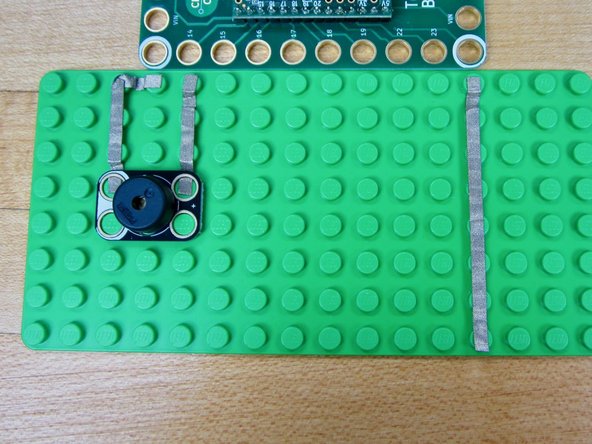
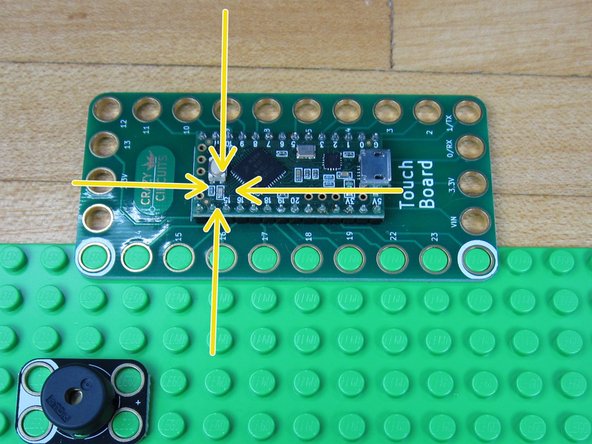
Our Piezo Speaker Chip needs to be connect to Pin 14 as well as Ground. (Holes surrounded by White are always Ground)
-
If you want to use a different pin for the Piezo Speaker all you need to do is change a single number in the code.
-
Keep your Invention Board reference card nearby. If you're looking to change up any of the pins you'll need to know which ones have Capacitive Touch abilities.
-
-
-
Run a line of tape from Pin 14 to your Piezo Speaker.
-
Run a line from Ground (hole with White around it) to the Ground side of your Piezo Speaker. (The side with White on it.)
-
We just did a simple right angle turn in order to keep our lines looking clean.
-
-
-
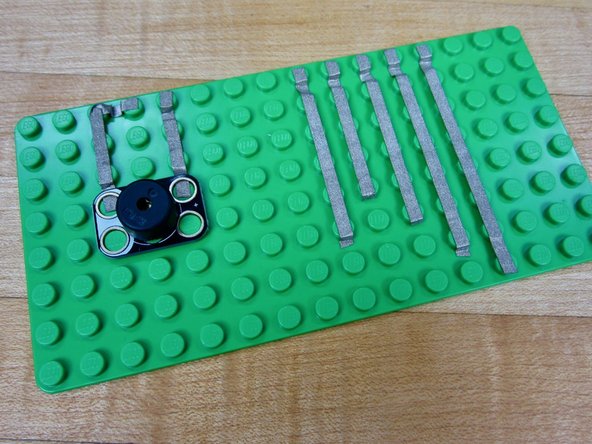
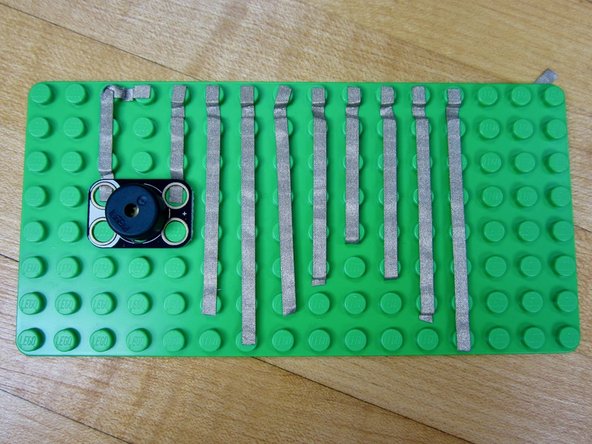
Anything conductive thats hooked up to one of the Invention Board's Touch Points will activate a note. To keep things easy we're just using some different sized lengths of tape.
-
The length of our tape is just for looks. Changing the pitch of each Touch Point is done in the code.
-
In the above video we used long lengths of tape that connected to patches of Conductive Paint. You can also do the same thing with standard Aluminum Tape from a hardware store.
-
At the end of this write up is a nice diagram showing how we hooked up all 11 Touch Points in our Conductive Paint Piano.
-
If you're using Conductive Dough, clip Alligator clips to the various Touch Point holes and then connect them to the dough.
-
-
-
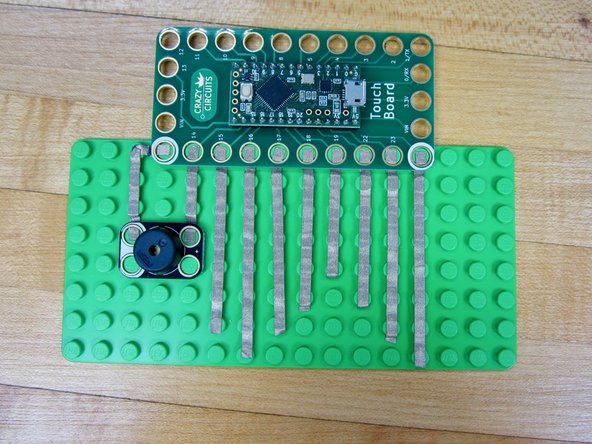
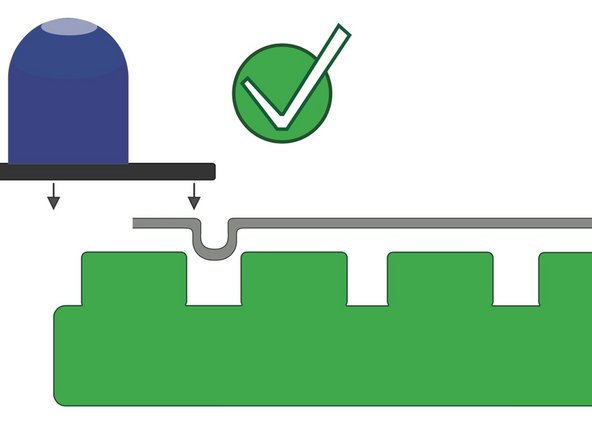
Clip your Invention Board over all the lines of tape.
-
If the board isn't going on, double check to make sure your tape isn't too long. If you're really having issues give yourself a refresher and read the Basic User Guide.
-
-
-
If you've not used your Invention Board before you should read the Invention Board User Guide. Practice uploading code before doing this project.
-
Open up your Arduino Software.
-
Download the Teensie Piano code file. (Found at that link.)
-
Copy and paste that code into your Arduino software window.
-
If you're not changing anything, just upload the code. Otherwise go to the next step to see how we change things up!
-
-
-
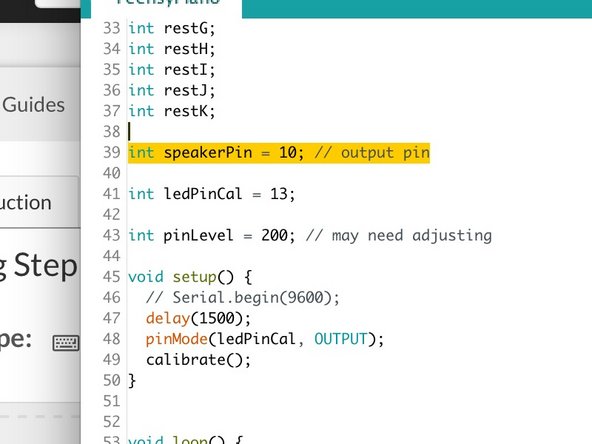
For our needs we're going to change the Piezo Speaker to Pin 14. Do this by going to Line 39 in the code and change "int speakerPin = 10;" to "int speakerPin = 14";
-
If thats all you're doing, upload the code!
-
-
-
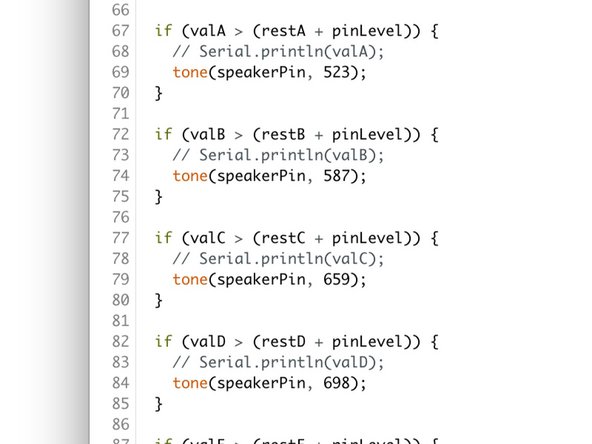
You can change the type of tone (note) that each Touch Point makes by changing number values in the code.
-
For example, the code that determines the sound that Pin 15 makes is controlled by the code between lines 67 - 69. (Line 15 says that Pin 15 gets called touchPinA in the rest of the code.)
-
Specifically: tone(speakerPin, 523);
-
What this code says is that when the Touch Point of pin 15 is activated, the Piezo Speaker will play a tone at a value of 523 Hertz, or what a musician would call a C note.
-
To change the value just change that number. You can find a full list of what musical note corresponds to what Hertz value on this website.
-
Once you're done, upload the code.
-
-
-
Once the code has been uploaded it will run automatically whenever the Invention Board is powered on. This can be from a computer or from a wall USB port.
-
When it first turns on it will take 3-5 seconds to calibrate. This means the board is sensing what is attached to the various Touch Points. During this time you should not touch anything.
-
The Invention Board shows when it's calibrating by turning on a small LED in the middle of the Invention Board. Once that LED turns off, you can start to use the piano.
-
-
-
Did you let your Invention Board calibrate for 4-5 seconds when you first plugged it in?
-
Did your code upload properly? (Refer to the Invention Board User Guide)
-
Is your Piezo Speaker hooked up to the correct pin? Make sure that whatever pin it's physically hooked up to is the same as the pin designated in the code. (Step 6)
-


This project is a great crowd pleaser and easy to expand into many formats. Paint, dough, aluminum tape, conductive fabric, cups of water, or even people can be used as Touch Points. Experiment with different materials and find what works best for you.
This project is a great crowd pleaser and easy to expand into many formats. Paint, dough, aluminum tape, conductive fabric, cups of water, or even people can be used as Touch Points. Experiment with different materials and find what works best for you.
