Introduction
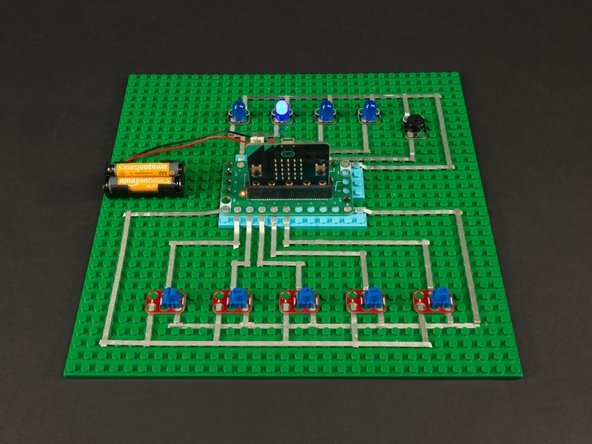
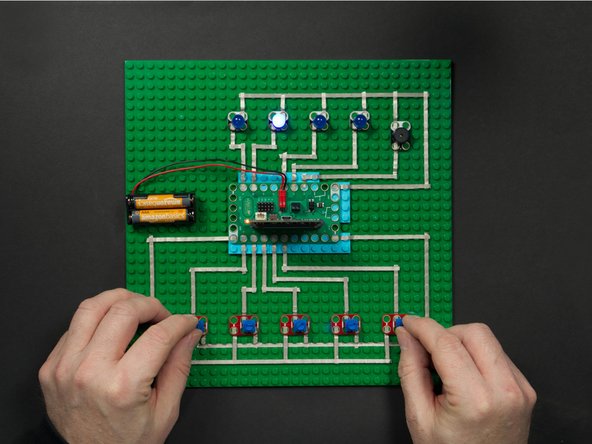
Build this simple synthesizer - a four step sequencer - with a Bit Board, micro:bit, and some Crazy Circuits parts.
Video Overview
Featured Document
-
-
So what is a Step Sequencer? We'll go over a few concepts in music and explain what one is, and then we'll build one!
-
While sequencing today is often done with software running on a computer, sequencers all started out as hardware devices. You can think of a music box or a roll of paper for a player piano as a type of sequencer which determines what note to play, and at what tempo.
-
The most common time signature in music is the 4/4 meter. The beats (or "pulses") are contained in each measure (or "bar"). You can create "beats" or rhythms by playing 4 different notes repeatedly.
-
Now, you could play the four notes manually, say by hitting drums, or pressing piano keys, but we can also build a machine to play our notes.
-
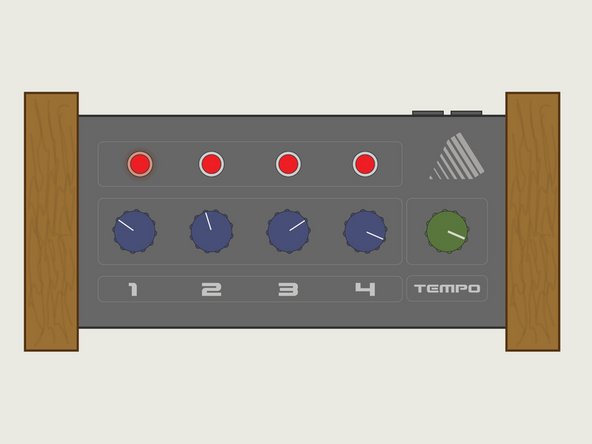
We'll build a sequencer (in this case a "step" sequencer) that can play four notes, in a loop, and allow you to set the pitch of four different tones, as well as set the tempo (or "speed") of the rhythm.
-
Our step sequencer will allow you to "program" patterns into it and observe the output via lights and sound.
-
-
-
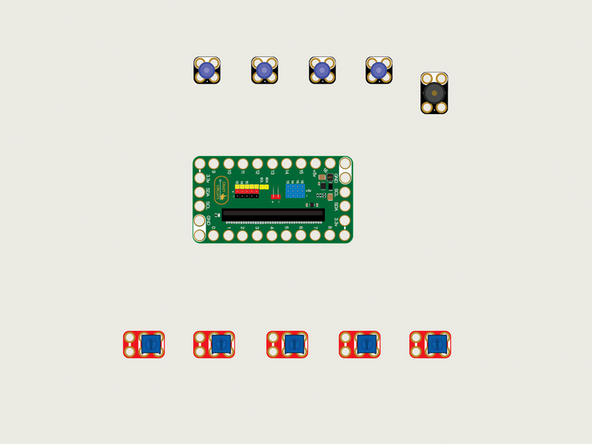
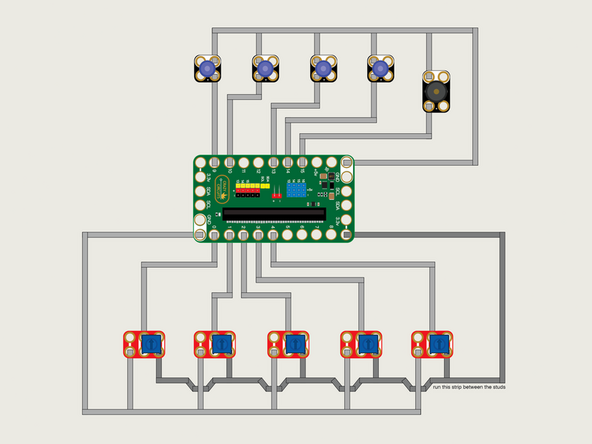
Gather your components and plan your layout. We’ll need room to connect the Bit Board and all of the Crazy Circuits components needed using 1/8” Maker Tape.
-
We’re going to use potentiometers to provide analog values to our sequencer. Unlike a switch or a button that can only have two values (“off” or “on”, which is really a 0 or a 1) an analog input like a potentiometer provides a range of values from 0 to 1023.
-
-
-
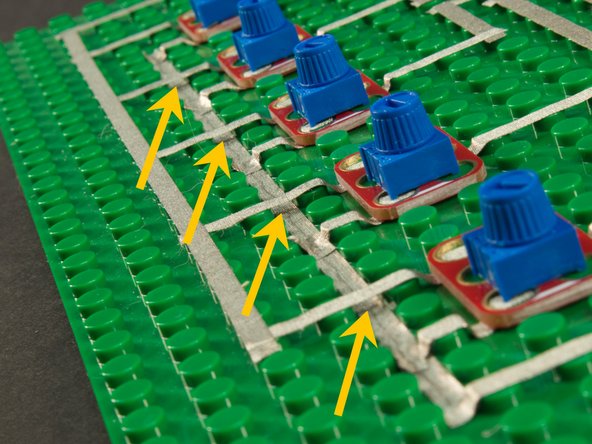
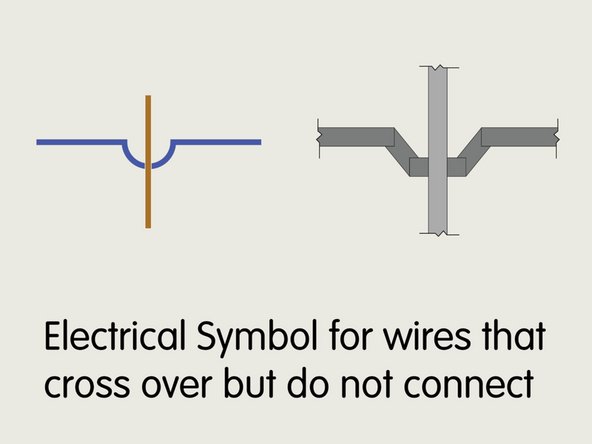
Where the tape might need to cross over another piece of tape, you’ll need to run it in the gutter between the studs so it doesn’t connect to the tape running on top of the studs.
-
In typical wiring diagrams there’s a special symbol that is used for showing where wires cross over but do not connect. In the diagram we’ve used our own “tape symbol” to show this, but you don’t really need to make this shape with the tape.
-
-
-
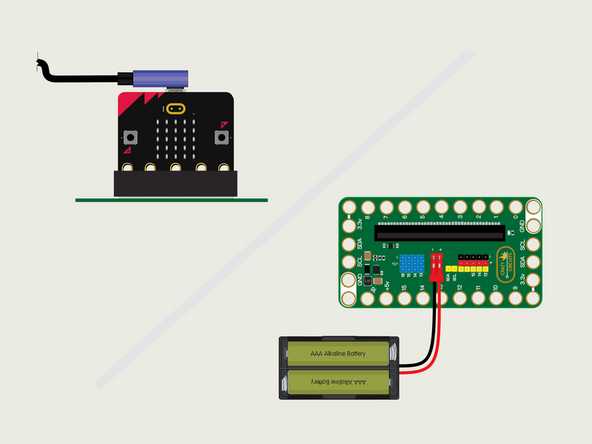
Connect a USB cable to the micro:bit and then plug it into your computer.
-
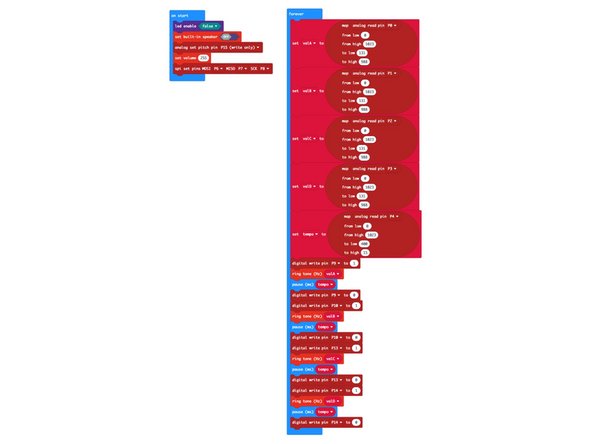
We'll be using makecode.microbit.org to program our board. It uses a simple drag and drop block interface.
-
We're going to load the following code for our Step Sequencer program: https://makecode.microbit.org/_8jdf1FW7z...
-
You can continue to power this circuit using the connected USB cable, or you can use a 2 AAA battery pack.
-
-
-
As you turn the first four potentiometer dials you will alter each of the four notes. The LEDs will light up as the note plays. Use the fifth potentiometer to adjust the tempo (or “speed”) that the rhythm plays at.
-
How fast can you make it go before it sounds terrible? Can you “program” your sequencer to play a high note, a low note, then another high note, and another low note?
-
What happens if you set all of the potentiometers all the way clockwise (or all the way counterclockwise) and then start to change just one note?
-
-
-
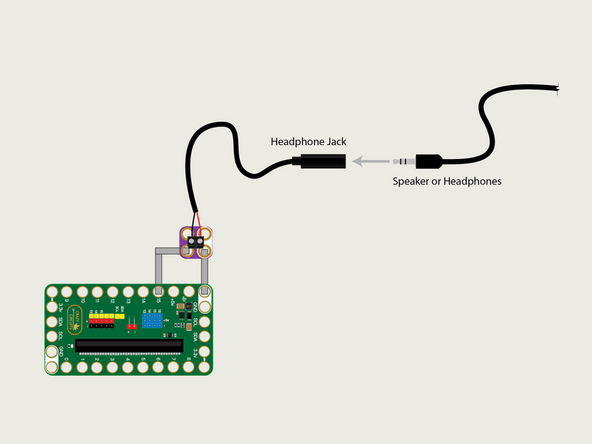
If you want more sound (either louder or better quality) you can add a Headphone Jack and a Screw Terminal in place of the Piezo Speaker. (See our Headphone Jack guide for more info.) You can then add headphones for your own private jam session or computer speakers so everyone can enjoy it!
-
Since the sequencer runs in "real time" (meaning you can adjust it and it immediately recognizes the changes) you can sort of "play" the sequencer like you would other instruments. Just keep turning the knobs as it is playing!
-
You could play with others who have their own sequencers and try to match up your beats, or have one person play a rhythm while another person plays the "lead". The possibilities are (nearly) endless!
-

Attached Documents
