
Introduction
The micro:bit V2 has capacitive touch and a built-in speaker, but the default speaker pin conflicts with a touch pin, so we can use an external speaker instead.
Video Overview
Featured Document
-
-
Gather your components. You will need a micro:bit V2, a Bit Board, a Piezo Speaker, and some 1/8" Maker Tape.
-
You do need a micro:bit V2 as it supports capacitive touch. Previous versions of the micro:bit will not work for this project without some modifications. (You might be interested in our guide to capacitive touch on the micro:bit V1 board.)
-
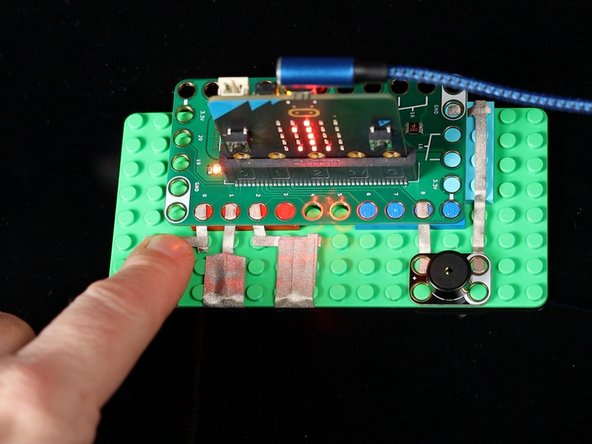
Assemble on a LEGO baseplate and use Maker Tape to connect the Piezo Speaker. Then add tape connecting to Pins 0, 1, and 2.
-
-
-
Connect a USB cable to the micro:bit and then plug it into your computer.
-
We'll be using makecode.microbit.org to program our board. It uses a simple drag and drop block interface.
-
We're going to load the following code for our Touch for Sound V2 program: https://makecode.microbit.org/_9of3TJJR6...
-
-
-
Touching the tape connected to Pin 0, 1, or 2 will play a tone on the Piezo Speaker and also show a number on the micro:bit's built-in LED matrix.
-
Touching the logo on the micro:bit will play a tone on the piezo speaker and also show a symbol on the micro:bit's built-in LED matrix.
-


Attached Documents
