Introduction
Create this fun micro bit balloon popper that is triggered by a tripwire!
Tools
Parts
- Crazy Circuits Bit Board
- micro:bit
- Brick Compatible 270 Degree Servo
- 2 AAA Battery Holder
- AA Batteries × 2
- Sewing Needle
- Clothespin
- Straw
- Fishing Line
- Index Cards
- Duct Tape
- LEGO Brick 1 x 16 (2465)
- LEGO Brick 2 x 4 (3001 / 15589) × 3
- LEGO Plate 1 x 6 (3666) × 4
- LEGO Technic Angle beams Set 991403
- LEGO Beam 13 (41239 / 72714)
- LEGO Pin without Friction Ridges (3673) × 2
Video Overview
Featured Document
-
-
Gather all materials listed in the pdf attached at the bottom of this guide.
-
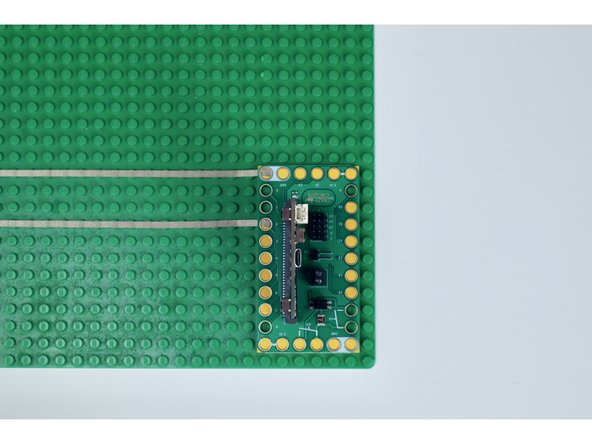
Use the four 1x6 plates in the positions shown to prepare the area that your Bit Board and micro bit will be mounted atop. This should be in the lower right hand side of the baseplate. Don't mount the Bit Board yet.
-
-
-
Use the photos provided as well as the illustrated assembly instructions to prepare the clothespin switch.
-
Position the completed switch toward the lower edge of your baseplate with the jaws facing down and hot glue it into place.
-
When the glue has set, connect the upper and lower contact points of the clothespin as pictured with small pieces of Maker Tape that can reach from the clothespin to the baseplate.
-
From those small contact points now ending on the baseplate, lay down the tape paths as shown so they extend UP and then to the right. They must be spaced so one can lead to the LEGO stud that will sit below the white ground pin when your Bit Board is mounted while the other can lead to the LEGO stud that will sit below pin 2.
-
-
-
With completed tape paths extending from the clothespin to the Bit Board mounting plates, press the Bit Board into place atop those paths.
-
Make sure that the Bit Board orientation allows your clothespin tape paths to connect to ground and pin 2.
-
-
-
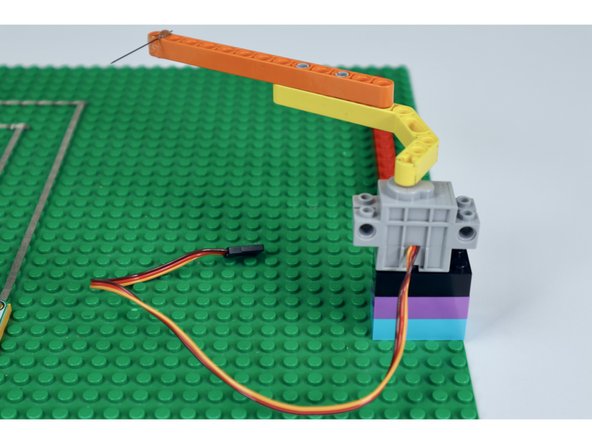
Using the assembly instructions on the attached pdf, build the servo and needle arm. Adding two or three 2x4 bricks below the servo before mounting on the baseplate will bring the needle to the height needed in order to contact the balloon when the arm/needle swing downward.
-
Press the prepared assembly into position where shown on the photo and project diagram.
-
Connect the wires from the servo to pin 1 with the color orientation pictured in the attached pdf.
-
-
-
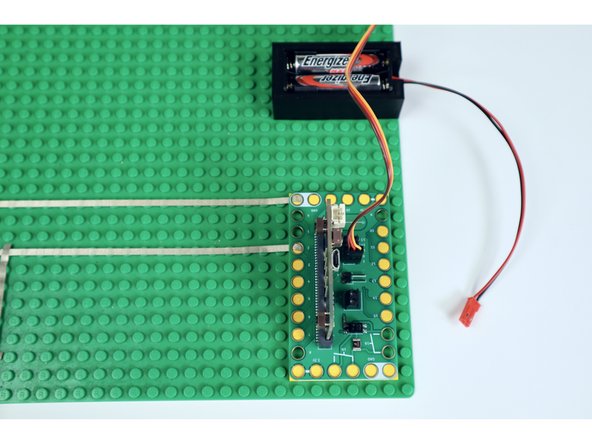
Add two AAA batteries to your battery holder and, with a big loop of duct tape or some hot glue, stick it into place on the baseplate below and to the right of the servo.
-
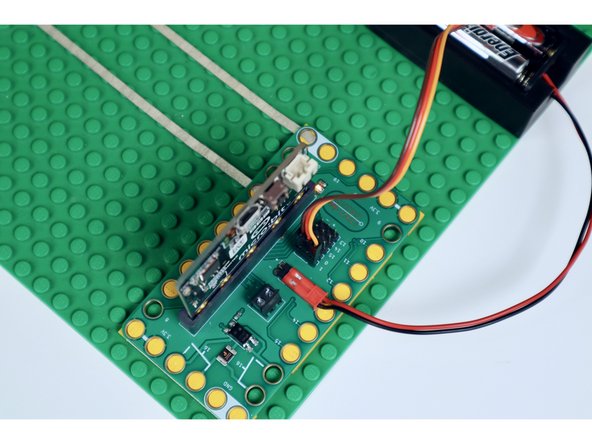
Connect the JST connecter from the battery pack wires to the two pronged power input on the Bit Board (don't worry about orientation as this part will only connect one way).
-
-
-
Insert an index card in the jaws of your clothespin switch, thus keeping the two conductive contact points of the switch from touching.
-
Insert your micro bit into the Bit Board with the orientation shown on the parts list portion of the attached pdf.
-
WARNING: Always keep your body away from the swing of the needle. Keep the index card in place at this point AND while setting up a balloon. Connect your micro bit to your computer via USB cable and upload the program found at the following link. https://makecode.microbit.org/_CEyUvWVEs...
-
Your contraption should now be testable. To test, simply pull the card. What should happen is that the servo and needle arm should swing downward toward the empty space where a balloon will be secured. To reset, don't manually rotate the servo arm back upward...put the card back into the clothespin jaws .
-
-
-
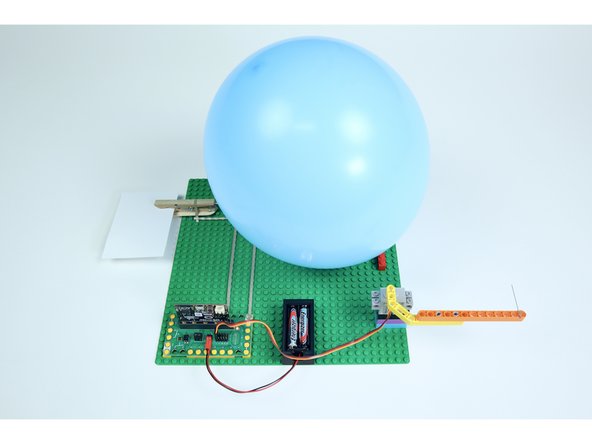
To prepare for operation, temporarily disconnect the battery pack from the Bit Board, inflate a balloon and secure it beneath the long LEGO bar where and how shown in the photo at left.
-
Reconnect the battery. Afterward, secure the device out of sight with tape on a table or wall.
-
Tape a piece of fishing line to the card and run the line to another point, securing THAT end as well. When someone walks through the line, it should pull away from the clothespin jaws and activate the servo, popping the unseen balloon and startling the intruder!
-
Pro Tip: To guide your fishing line down to where someone is less likely to see it, tape a straw low on the inside of a door frame and thread the free end of the fishing line through it before securing it to the opposite side of the door frame.
-
-
-
Watch this short video to see the trip wire setup!
-