
Introduction
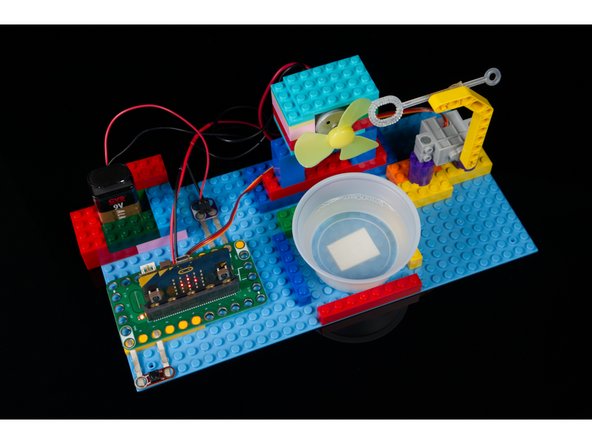
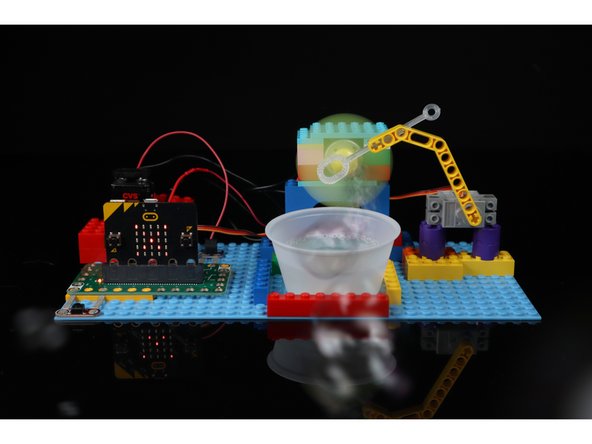
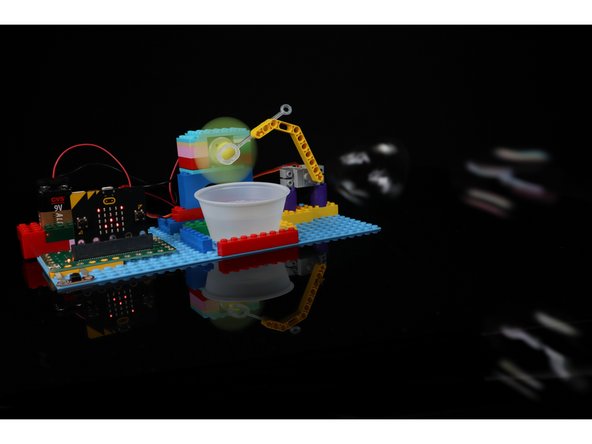
Create a LEGO-based Bubble Machine using a Bit Board along with a micro:bit or an Adafruit Clue board. Control a servo and motor with the press of a button and let the bubbles fly!
Note: This guide uses an older version of the Bit Board that featured an on-board relay. The more recent versions of the Bit Board do not have a built-in relay.
We recommend you check out the Distance Bubble Machine that uses a Distance Sensor to trigger it.
Tools
Parts
- Crazy Circuits Bit Board
- micro:bit
- Standard Pushbutton Chip
- Brick Compatible 270 Degree Servo
- Crazy Circuits Screw Terminal Chip
- Maker Tape
- DC Motor (12V / 12000 RPM)
- Plastic Fan Blade for DC Motor
- 9 Volt Battery
- 9 Volt Battery Connector
- Small Cup
- LEGO Technic Beam 3 x 3.8 x 7 Beam Bent 45 Double (32009 / 41486)
- LEGO Baseplate
- Misc LEGO Parts
- Bubble Wand & Bubble Soap
Video Overview
Featured Document
-
-
You'll need to mount the motor and servo onto a LEGO baseplate using a variety of LEGO pieces. (The parts you have will dictate the build.)
-
Attach the Bubble Wand to the servo using a LEGO Technic piece. (Hot Glue or a bit of tape works well for this.)
-
Make an area with LEGO bricks for the small cup to fit into. (We also used a piece of tape to help hold it in place.) The cup will hold the bubble solution that the wand will dip into.
-
-
-
Place your Bit Board onto the LEGO baseplate, adding the Maker Tape, pushbutton, and screw terminal before you secure it down.
-
Add the Servo by plugging it into Pin 0, and + and - on the pin headers.
-
After your components are added you can plug your micro:bit into the Bit Board.
-
-
-
Connect the negative wire of the battery to the negative wire of the motor.
-
Connect the positive wire of the battery to the screw terminal, then wire the negative wire of the motor to the other side of the screw terminal.
-
A relay is an "electronic switch" than can be controlled. In this case the Bit Board tells the relay to turn on which completes the circuit and allows the motor to run and then tells the relay to turn off stopping the motor from running.
-
If your motor spins the wrong direction you can reverse the power (swap negative for positive and vice versa) and the motor will spin the opposite direction.
-
-
-
If you've never used a micro:bit before you'll want to check out this guide: Bit Board V1 Setup and Use
-
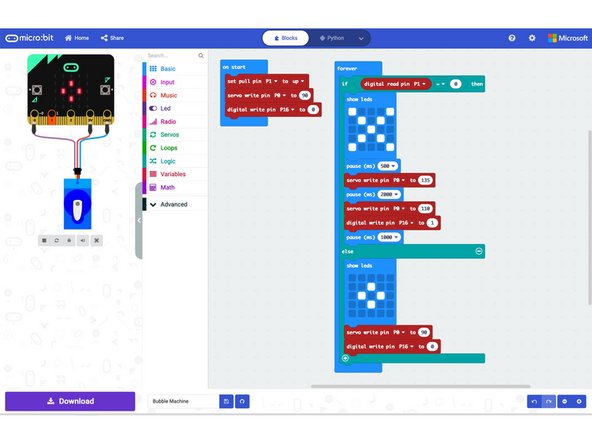
If you are using a micro:bit you can load the code into the MakeCode browser-based editor using this link: https://makecode.microbit.org/_05vhF0CH2...
-
If you are using an Adafruit Clue you can find the code in our GitHub repository using this link: https://github.com/BrownDogGadgets/Crazy...
-
Once you have the appropriate code load it to your board the way your normally would. (Usually this involves connecting your board to a computer and copying the code to the board.)
-
The code is pretty simple. For the micro:bit version we added a fun animation using the build-in LEDs, and for the Adafruit Clue version we added some informational messages on the built-in screen.
-
-
-
If you are using a micro:bit it is best to power the Bit Board with two AA or AAA batteries. This will provide enough power for the servo to function.
-
If you are using an Adafruit Clue it is best to power the Clue with a USB cable as the power source.
-
Remember, the DC motor is powered by a separate battery, not the power source that powers the board.
-
The one tricky part in the build might be determining the servo position. We recommend removing the servo arm and wand while testing to make sure 90 degrees is pointing straight up. If it is not, either adjust the servo positioning or adjust the servo angles in the code.
-
-
-
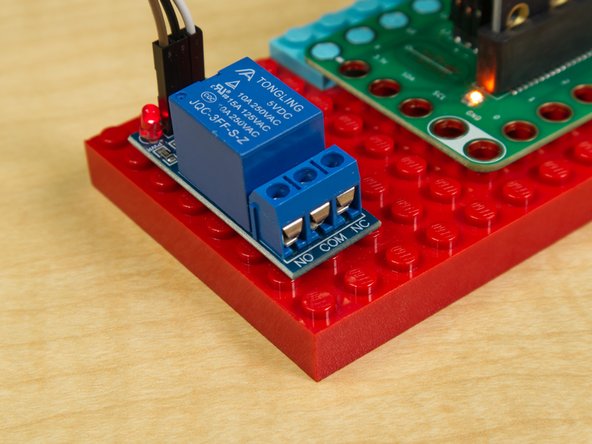
Note: Version 2.1 of the Bit Board does not have an on-board relay. You can use an external relay module in its place.
-
See the guide Relay Module for information on connecting an external relay module.
-
We've also got a guide for a Bubble Machine with a Distance Sensor that is worth checking out!
-


Cancel: I did not complete this guide.
One other person completed this guide.
Attached Documents
