
Introduction
Make a micro:bit powered piano that you play with a stylus.
Video Overview
Featured Document
-
-
The Stylophone is a small analog stylus-operated keyboard. It was invented in 1967 by Brian Jarvis and was first produced in 1968 by Dubreq.
-
The Stylophone has been used in many popular songs, including "Space Oddity" by David Bowie, “Pocket Calculator” by Kraftwerk, and “Icky Thump” by The White Stripes.
-
We’re going to make our own version of the Stylophone (which we’ll call the “Stylobit”) using our Bit Board, a micro:bit, and Maker Tape. We’ll also make our own stylus to play the Stylobit.
-
-
-
The Stylophone uses a “stylus” that is connected by a wire to the Stylophone. When you press the metal tip against one of the metal keys on the keyboard it completes the circuit and plays the appropriate note.
-
Our Stylobit works on the same principle. We’re going to use a stylus that is connected to the ground pin of the Bit Board, and when it makes contact with a key that is connected to one of the pins on the Bit Board it will close the circuit and play a note.
-
-
-
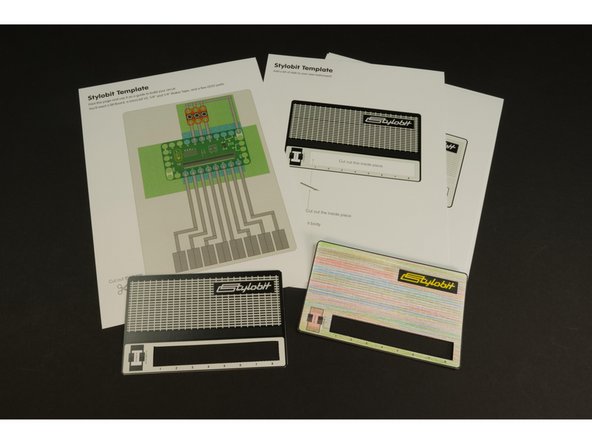
You’ll need to print two pages, one with the base to build our project on, and a second page which will give our Stylobit some style.
-
The second page is not required, but it makes the Stylobit more fun.
-
We’ve also provided a black and white version of the Stylobit in case you want to color or decorate it.
-
We recommend printing the page on heavier paper, like cardstock, for the best results.
-
-
-
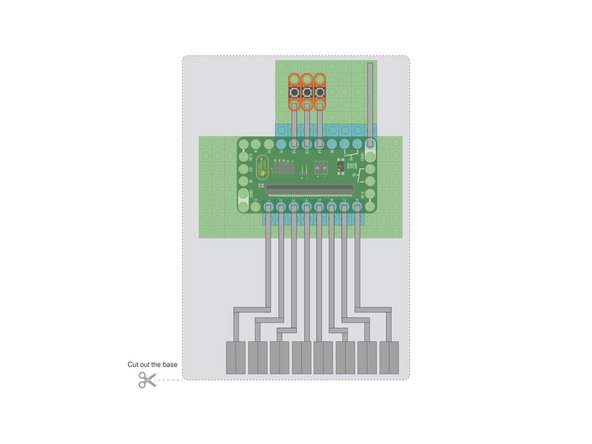
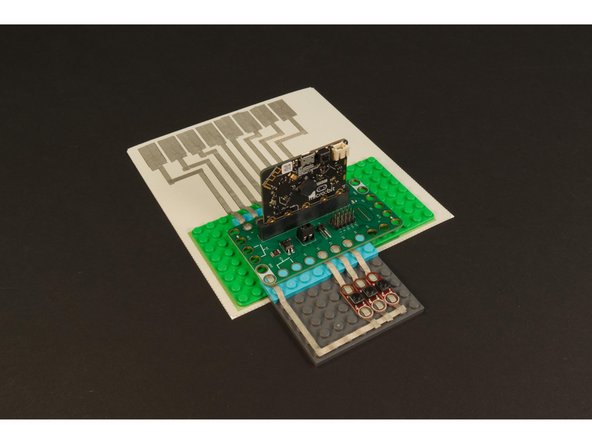
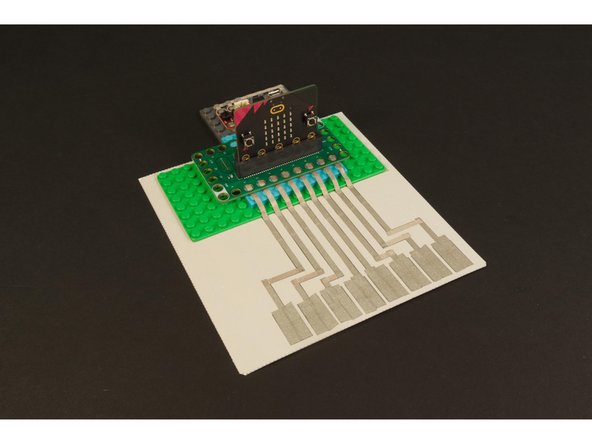
Use the template as a guide to build your circuit. (Build it right on top of the paper!)
-
An 8 x 16 LEGO baseplate is perfect for this project. You’ll also need a few LEGO plates or bricks.
-
Use 1/8” wide Maker Tape to connect to the Bit Board, and to run towards the “keyboard”.
-
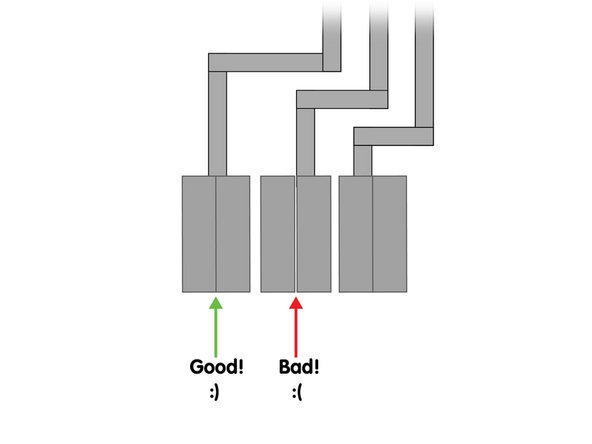
For the keyboard use 1/4” Maker Tape. Make sure you overlap the two pieces of Maker Tape.
-
Maker Tape is conductive on the top and bottom and all the way through, so it works just fine when you overlap it.
-
-
-
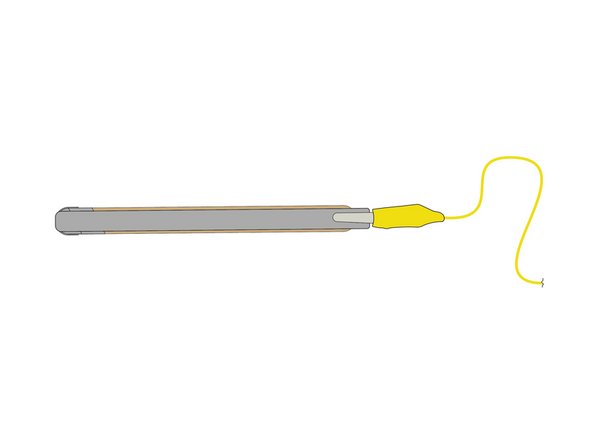
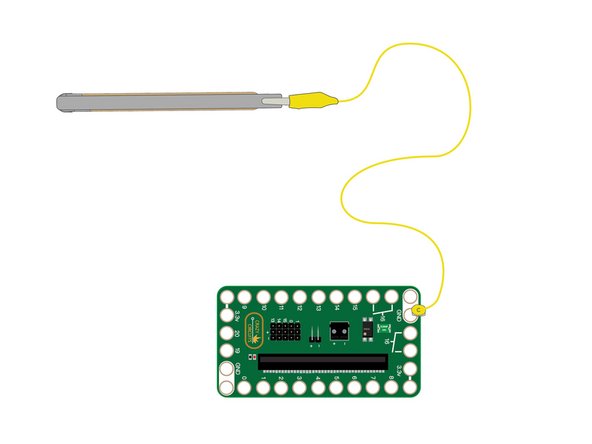
Every Stylo-Instrument needs a stylus, so let's make one using Maker Tape!
-
To make our stylus we're going to use a popsicle stick just like we did for the tweezers in our Operation Game.
-
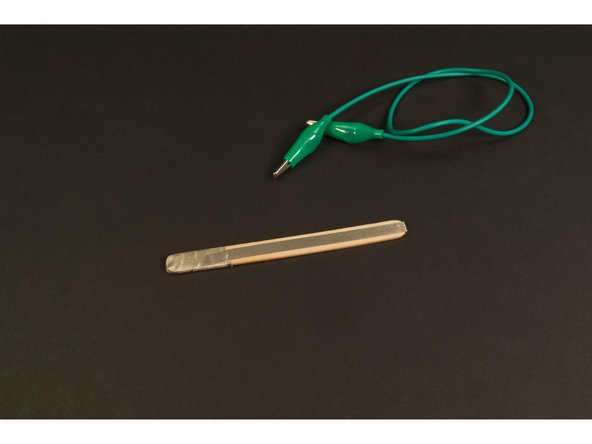
Just wrap 1/4" Maker Tape around a popsicle stick, making sure you've covered the tip of the stylus completely, and then run tape to the other end so you can connect an alligator clip.
-
If you don't have any popsicle sticks, you could use a chopstick, or a pencil or pen. You just need something you can apply Maker Tape to and that is comfortable to hold in your hand.
-
-
-
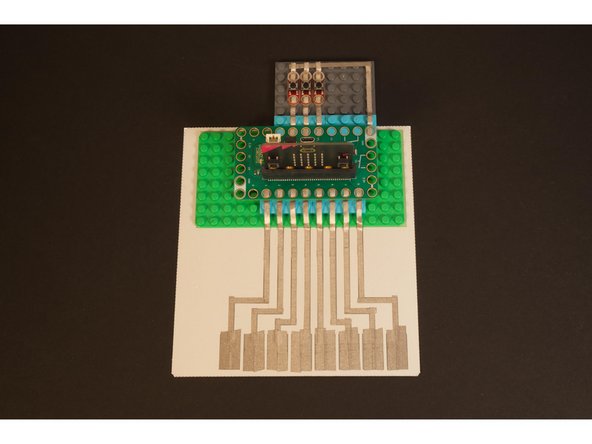
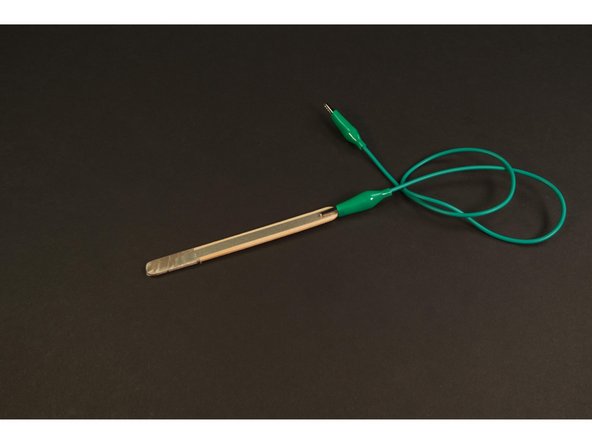
Once you've got your stylus built you can connect it to the GND pin on the Bit Board.
-
If you're right handed you may prefer to connect it to the right side rear ground pin, and if you're left handed you may want to use the left side front ground pin.
-
Remember, the stylus is what makes the connection between the "keys" (connected to the Bit Board with Maker Tape) and GND. Completing the circuit is what plays the sound!
-
-
-
Connect a USB cable to the micro:bit and then plug it into your computer.
-
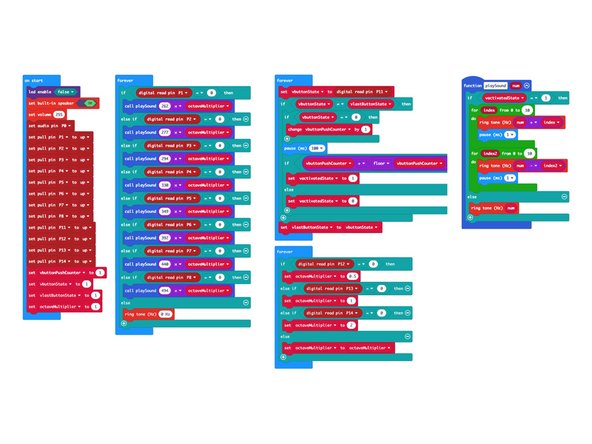
We'll be using makecode.microbit.org to program our board. It uses a simple drag and drop block interface.
-
We're going to load the following code for our Stylobit program: https://makecode.microbit.org/_03aKaof0J...
-
Note! This code uses the built-in speaker on the micro:bit V2. If you have an older model micro:bit it will not have a built-in speaker. See step 11 for adding an external speaker.
-
-
-
Okay! You are now ready to test your new Stylobit.
-
Touch the stylus to a key and you should hear a sound. Touch another key. Did you hear a different tone?
-
To turn on vibrato mode, press Button B on the front of the micro:bit
-
To change octaves (between low, middle, and high) press the buttons connected to pins 12, 13, and 14 on the Bit Board, respectively.
-
If anything isn't working check your connections! Press down on the tape to make sure it's making a good connection, and double-check how you connected everything in Step 4.
-
-
-
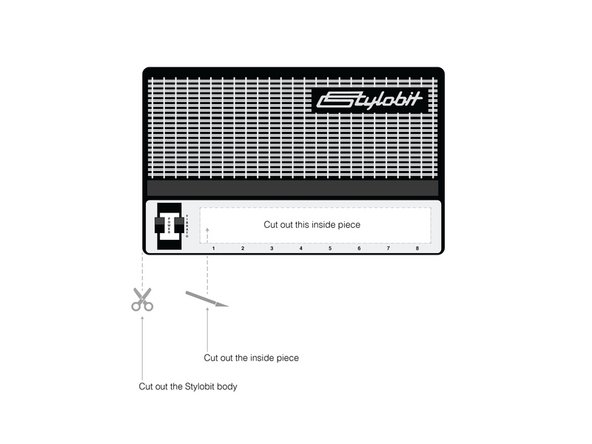
Did you make a cover? Now is the time to add it so your Stylobit can be Stylish!
-
We used two small loops of blue painter's tape, but any tape will do to hold it down. (You can even use Maker Tape!)
-
-
-
Get ready to make some noise! (Or music, if you are musically inclined.)
-
Just tap the keys with the stylus to play notes.
-
Pro-tip: Part of the fun of playing the Stylobit is doing slides across the keyboard. Practice tapping out notes and then adding in slides for neat transitions.
-
-
-
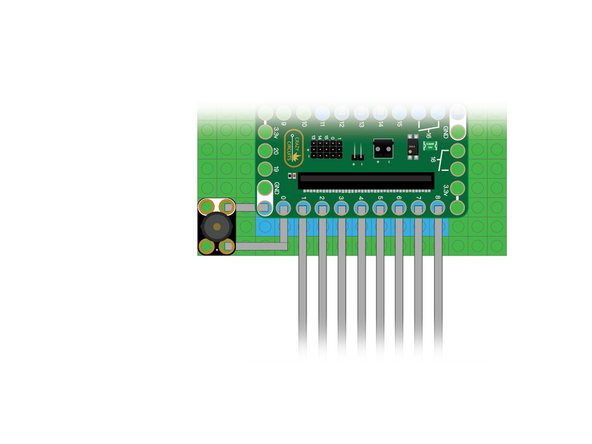
The micro:bit V2 has a built-in speaker, but if you've got a micro:bit 1.5 or older it will not have a built-in speaker, but we can our own speaker!
-
We can easily connect a Crazy Circuits Piezoelectric Speaker Chip to our circuit with Maker Tape. Just connect to GND and Pin 0 as shown.
-
You'll also need to make a change to the code. Adjust the code so you have the set built-in speaker block to OFF.
-
Check out our guide on using a Headphone Jack if you want a private jam session!
-
-
-
Once you've got your Stylobit working you can think about ways to modify or improve it.
-
You could edit the code to change the notes or the behavior of the buttons.
-
You can adjust the vibrato effect by altering how the two loops work. Maybe try 5 loops instead of 10, or a longer delay.
-
You could make it larger or add more keys/notes by using more pins on the Bit Board. The basic template is a good start, now try something new!
-


Cancel: I did not complete this guide.
One other person completed this guide.
Attached Documents
