Introduction
Make a piano using clothespins for the keys and our Bit Board and a micro:bit to play sounds.
Featured Document
-
-
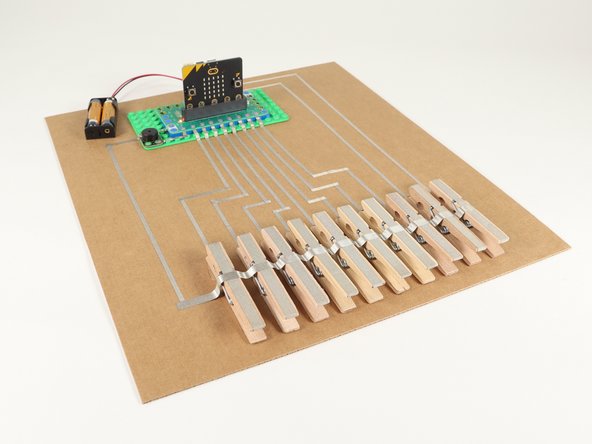
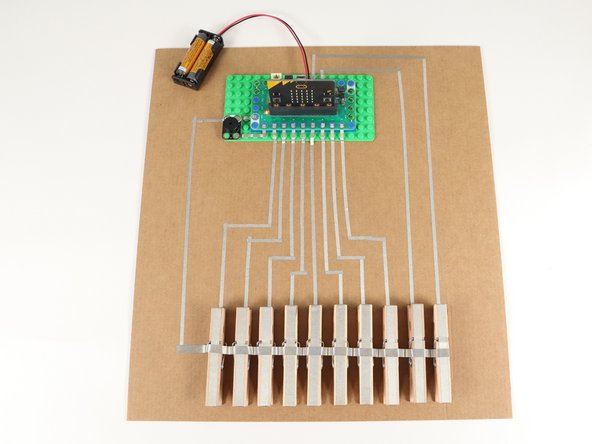
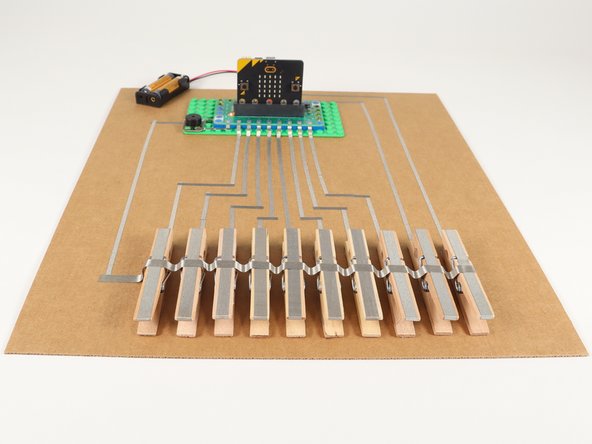
The diagram shows what our Clothespin Piano layout looks like. You'll want to make sure you have enough room to attach your clothespins, Maker Tape, and a small LEGO baseplate with the Bit Board.
-
We used a piece of cardboard for our build. (Save those boxes!)
-
Our clothespins were 10mm x 72mm in size, so if yours are different you may need to adjust things.
-
You can always opt to use more or less clothespin than we did, but you'll need to adjust the code to accommodate the changes.
-
Hey! Does this guide look familiar? We have another Clothespin Piano that uses our Robotics Board. Check it out if you're interested: Clothespin Piano with Robotics Board.
-
-
-
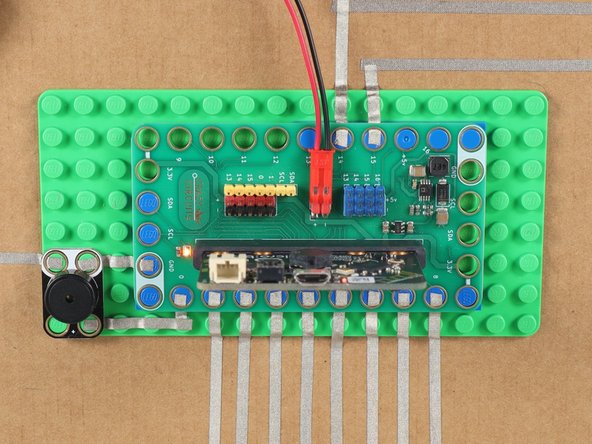
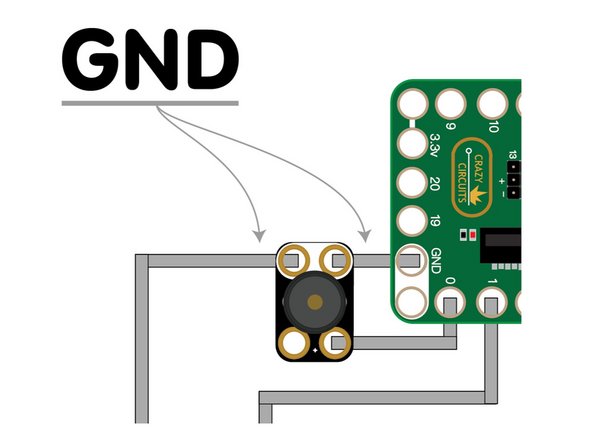
Build your circuit with the Bit Board and Piezo Speaker on top of a LEGO baseplate. You'll need a few small LEGO pieces to raise the board up on the edges.
-
Use 1/8" Maker Tape to run from the connections to the surface of your board.
-
Remember, Make Tape is conductive on the top and bottom (and all the way through!) so if you have to overlap it, that's okay... it will still work fine.
-
-
-
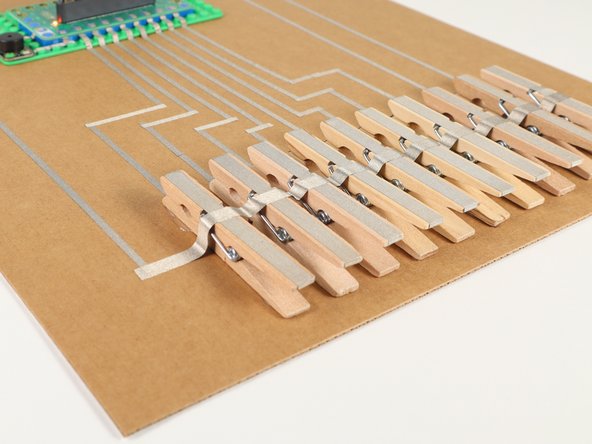
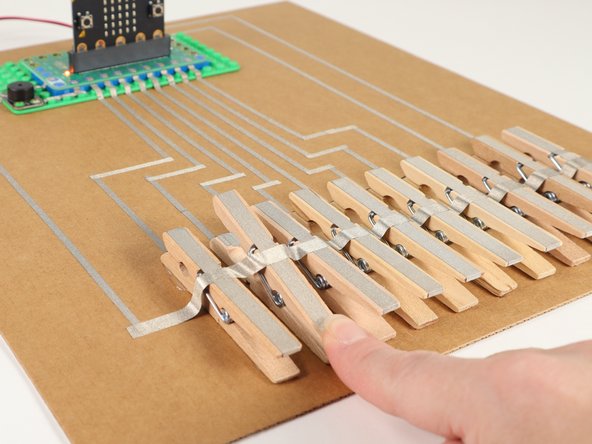
Attach the clothespins to the board in a row. Hot glue works well to hold them down.
-
Hot glue is hot! Be careful when using hot glue. You could use tape, but the clothespins tend to shift around when pressing down on them, so hot glue holds them in place much better.
-
-
-
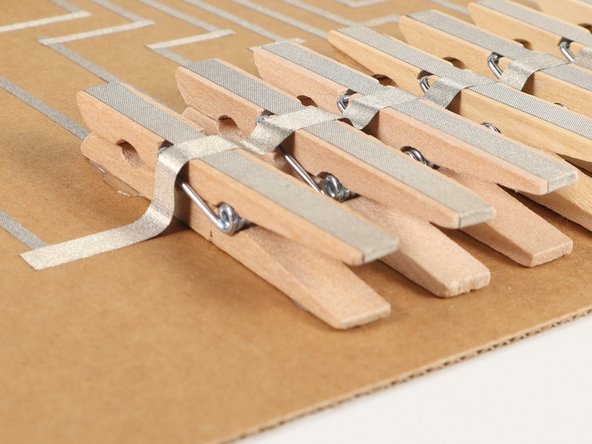
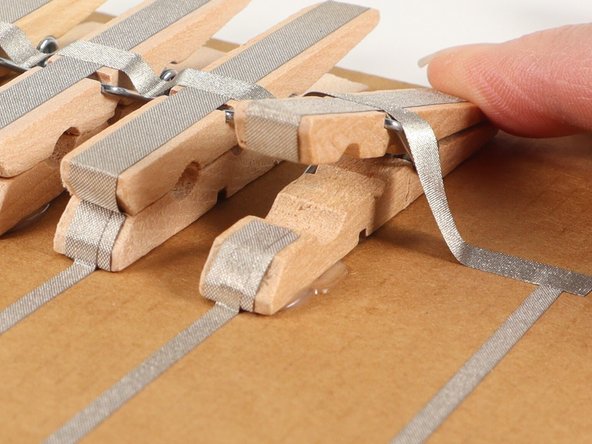
Add 1/4" Maker Tape to the top and bottom pieces of each clothespin. The top pieces will all connect to ground, and the bottom pieces will each connect to a pin on the Bit Board.
-
We recommend 1/4" Maker Tape for the clothespins so there is more surface area to make contact. You could use 1/8" if needed, but you would want to use multiple pieces for a wider area of contact.
-
Connect the 1/4" pieces with the 1/8" pieces to complete all of your connections.
-
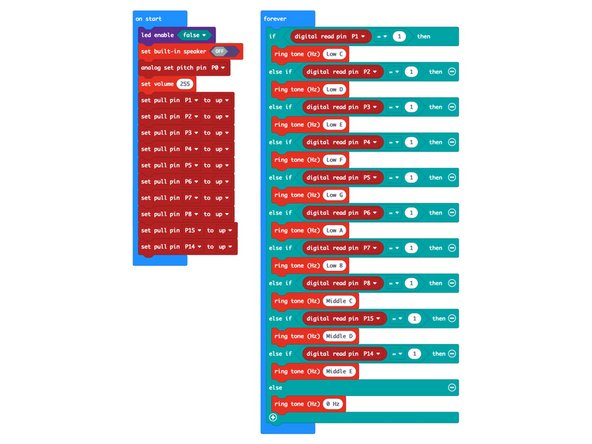
Our clothespins will act as "Normally Closed" switches, which means we're going to reverse the logic in our code so that when a switch is "on" no note is played, and when a switch is "off" a note will be played.
-
-
-
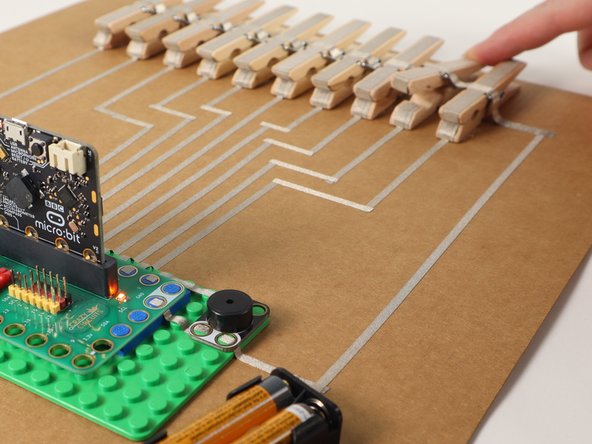
Run one long piece of Maker Tape across the top of the clothespins to the ground connection on the left side.
-
Leave some slack in the tape between each clothespin and after the last one to allow for the tape to move when the clothespin opens and closes.
-
-
-
Connect a USB cable to the micro:bit and then plug it into your computer.
-
We'll be using makecode.microbit.org to program our board. It uses a simple drag and drop block interface.
-
We're going to load the following code for our Clothespin Piano program: https://makecode.microbit.org/_49EVAM2L4...
-
If you immediately hear sound you should check that all of your tape connections are pressed down securely.
-
Since our switches are "Normally Closed" hearing sound without pressing on any of them means something isn't making good contact.
-
-
-
Plug in a USB cable for power and play a tune!
-
Is a clothespin closer to a "real" piano key than a pushbutton is? Can you press more than one key at a time? What sound do you get if you do?
-
Do you like Pianos? Check out our Simple Touch Piano. our Conductive Paint Piano, and our Working Piano Necktie for more piano fun!
-
-
-
Our code is compatible with the micro:bit V1.x but if you are using a micro:bit V2 and prefer to use its built-in piezo speaker you can make the following changes to the code:
-
Change the set built-in speaker block to on
-
Delete the analog set pitch pin block from the code.
-
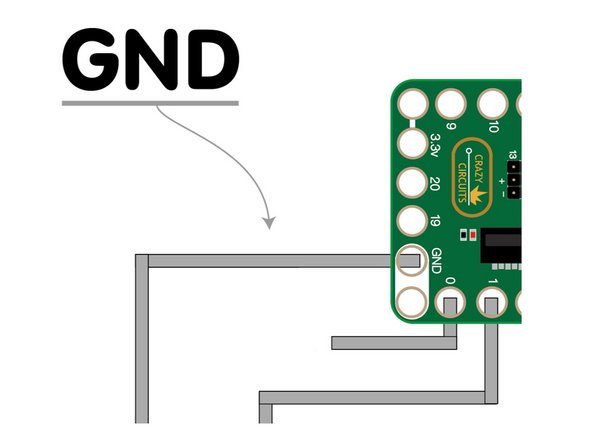
If you remove the Piezo Speaker you'll also need to bridge the gap created by its removal, since it has ground running through it.
-
Remove the Piezo Speaker and then place a piece of Maker Tape across the gap left by it so ground can connect.
-


Attached Documents
